
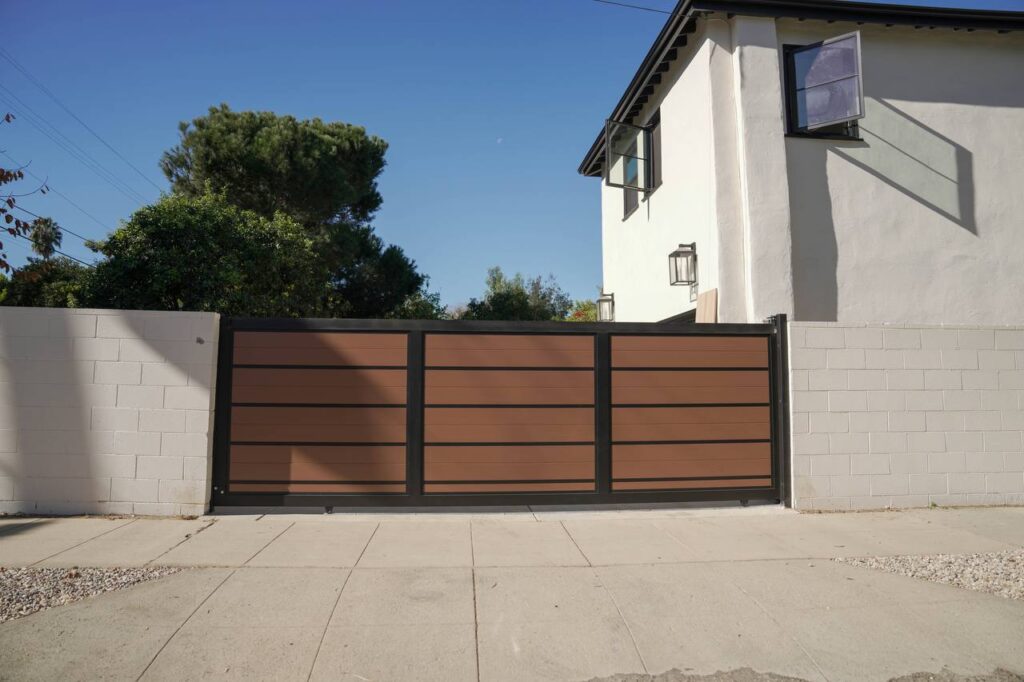
A successful aluminum gate installation starts long before the gate is hung. The installer has to understand the opening, driveway slope, post and wall structure, gate movement, bottom clearance, wind exposure, automation, electrical routing, safety devices and the way the finished gate connects to the surrounding fence or masonry.
That is why two gates that look almost identical in a photo can require completely different installation plans. A pedestrian swing gate between block walls is not installed like a full-privacy double-swing driveway gate. A tracked sliding gate needs a different foundation than a cantilever gate. An automated gate adds operator geometry, entrapment protection, access control and commissioning.
This Los Angeles installation guide explains the complete process from field measurement through final testing, with specific attention to modern aluminum gates, driveway conditions, posts, frames, automation, local zoning and long-term service.
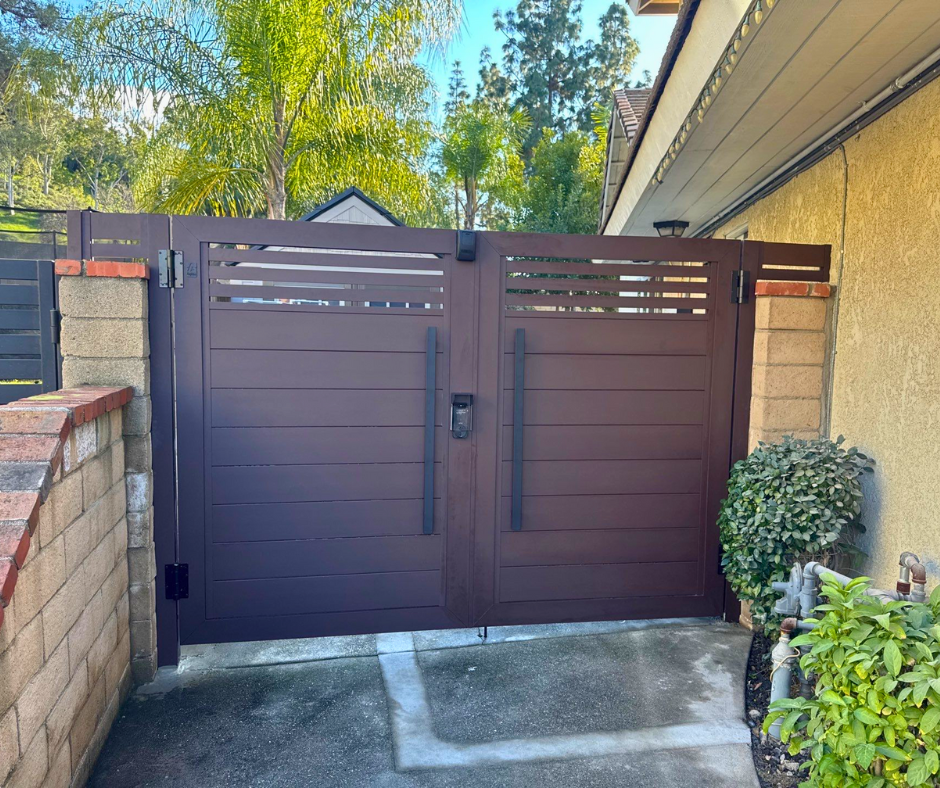
What Professional Aluminum Gate Installation Actually Includes
Professional aluminum gate installation is more than attaching hinges or setting a motor. It is a coordinated process that begins with the site and ends only after the gate moves smoothly, closes correctly and works safely with the surrounding property.
Field Measurement
The installer verifies the finished opening, walls, columns, driveway grade, available swing arc or sliding runback, bottom clearance and access-control locations. Measurements taken before paving or masonry is finished should be treated as preliminary.
Structural Support
Gate posts, concrete footings, steel reinforcement, wall connections, tracks or cantilever supports are established before the leaf is loaded. A gate that is perfectly fabricated can still sag or bind if the support moves.
Gate Frame and Hardware
The frame is checked for squareness before hinges, rollers, guides, stops, locks and operators are finalized. Hardware should attach to structural frame members rather than decorative infill.
Electrical and Automation
Automatic gates require power, conduit, operator placement, access controls and monitored safety devices. These elements are most reliable when planned before concrete and paving are complete.
Final Commissioning
The completed system is cycled repeatedly. Travel limits, stops, sensor zones, manual release, locks and clearances are checked under real operating conditions.
The gate leaf is only one part of the job. A complete installation combines site geometry, structure, movement, safety, access control and finish into one working system.
Site Inspection and Gate Measurements
A proper installation begins with a site inspection because the actual property controls the gate design.
Measure the Finished Structural Opening
Record the distance between final posts, columns or walls at several elevations. Masonry can taper and older walls are not always plumb.
Check the Driveway Grade
Measure how the paving rises or falls through the swing arc and across the opening. A few inches of elevation change can determine whether a swing gate clears the driveway.
Measure Side Runback
For sliding gates, measure the clear space beside the opening. Landscaping, utility meters, pedestrian gates and walls can reduce usable runback.
Identify Structural Substrates
Determine whether visible columns are reinforced masonry, concrete, steel, decorative veneer or stucco over framing. Hardware should connect to structure, not just the finish.
Locate Utilities
Before excavation, identify public utility markings and private irrigation, pool plumbing, landscape lighting and gate conduits that may cross post or operator foundations.
Plan Vehicle and Pedestrian Paths
Consider where vehicles stop while the gate opens and where people enter the property. A separate pedestrian gate can reduce traffic through a powered vehicle opening.
Document Existing Conditions
Photos of walls, concrete, grade and access make fabrication and scheduling easier and provide a reference if demolition reveals hidden conditions.
Choose Swing, Sliding or Cantilever Before Installation Begins
The movement type determines the installation geometry, so it should be resolved before posts or concrete are placed.
| Gate Movement | Installation Need | Best Condition | Common Conflict |
|---|---|---|---|
| Single swing | Strong hinge side, clear arc, closing stop | Moderate openings with driveway depth | Rising grade or parked vehicles |
| Double swing | Two hinge supports, center alignment and stops | Wide residential driveways | Unequal grades or moving posts |
| Tracked slide | Track foundation, wheels, guide posts and side runback | Short driveway depth and flat side travel | Debris, drainage or inadequate runback |
| Cantilever | Heavy support posts, roller assemblies and extended frame | Openings where a ground track is undesirable | Insufficient side space |
Why Swing Gates Fail on Rising Driveways
If the pavement rises behind the closed gate, the bottom rail can strike the ground before the leaf reaches a useful opening angle. Raising the gate can create an oversized gap, so sliding may be the better design.
Why Sliding Gates Need More Side Space Than Expected
The entire leaf must clear the vehicle opening. Posts, guides and catchers also occupy space. Cantilever gates need even more runback because of the counterbalance section.
Movement Affects Automation
Swing and sliding operators apply force differently. The operator location, electrical routing and safety zones should be based on the actual movement rather than added after installation.
How a Pedestrian Aluminum Gate Is Installed
Pedestrian gates are smaller than driveway gates, but they still require accurate frame, hinge and latch alignment.
Verify the Opening
The installer checks clear width, finished paving and wall or post condition. If the gate is between masonry walls, the hinge and latch anchors need verified structure.
Set the Hinge Side
A freestanding hinge post is installed plumb and allowed to stabilize before the gate is hung. Wall-mounted hinges are positioned into structural backing or approved masonry.
Hang and Level the Leaf
The frame is supported while hinges are adjusted so the top line is level and the gate clears the paving throughout its swing.
Install the Latch or Lock
The receiving side is set from the actual closed position, not from theoretical dimensions. The latch should engage without lifting or forcing the gate.
Check Closing Action
Self-closing gates should close reliably from the required open positions. A closer should not be used to overcome a dragging gate.
Protect Privacy
For full-privacy gates, bottom and side clearances should remain controlled without creating binding.
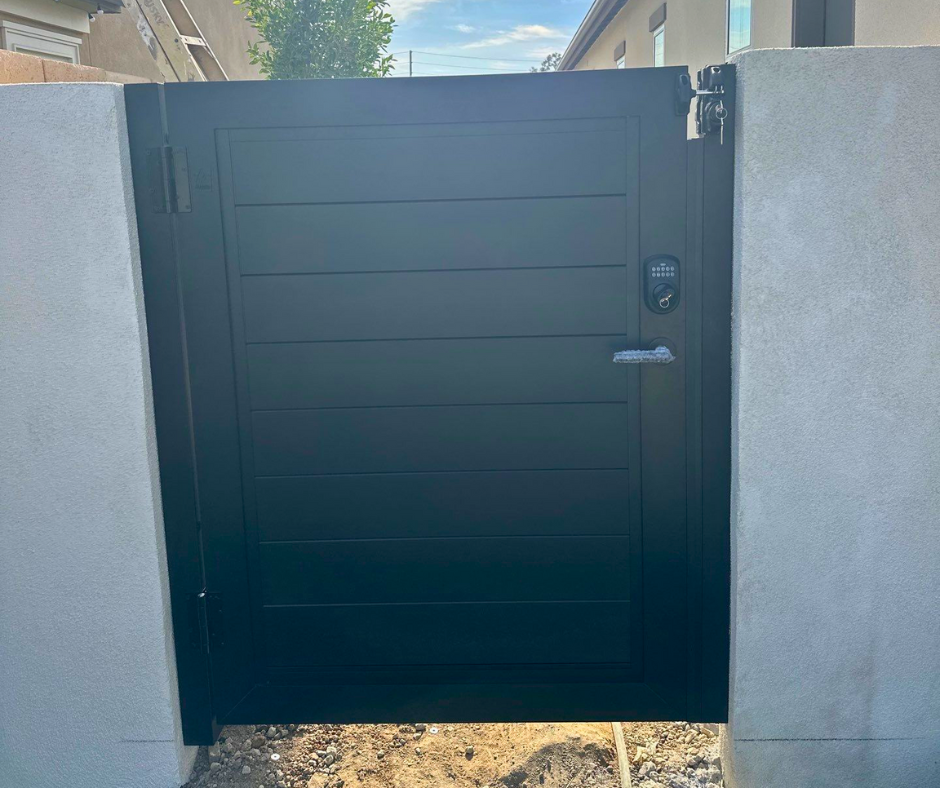
Double-Swing Aluminum Driveway Gate Installation
A double-swing installation divides the driveway between two leaves, but it also doubles the number of hinge-side conditions that must remain aligned.
Establish Both Hinge Posts
The two hinge supports are installed to the finished opening and verified for plumb, elevation and structural capacity.
Hang Each Leaf Independently
Each leaf is adjusted for level and consistent bottom clearance before the center seam is finalized.
Set the Center Gap
The leaves need enough clearance to move without contact while maintaining a clean visual seam. Full-privacy designs may use stops or overlaps to reduce the sightline.
Install Physical Stops
Manual or automated swing leaves should close against appropriate stops so wind and operator force do not load the latch or operator gearbox as the only end condition.
Coordinate Operators
Automated double gates require the two leaves to open and close in a controlled sequence when their geometry or center hardware demands it.
Test Wind and Flex
Large privacy leaves should not visibly twist at the hinge brackets or operator connections during normal motion.
Sliding Aluminum Gate Installation
A sliding gate installation is built around a straight travel path. Track, wheels, upper guides, receiving hardware and operator alignment all depend on that line.
Prepare the Track Foundation
The track needs continuous, stable support and should not follow irregular pavers or cracked concrete. Drainage and debris paths are considered before the track is fixed.
Install the Gate Wheels
Wheels attach to structural frame locations and are aligned so the leaf rolls without binding.
Set Upper Guides
Guide rollers keep the gate vertical while allowing free horizontal travel. They should contact a designated frame surface instead of decorative slats.
Confirm Full Runback
The gate is rolled completely open to verify it clears the driveway without colliding with walls, fences, landscaping or pedestrian paths.
Set Receiving Hardware
A catcher or receiving post stabilizes the closed end and can reduce movement in wind.
Align the Operator
Rack, chain or other drive components are installed straight and at consistent engagement so the operator does not push the gate sideways.
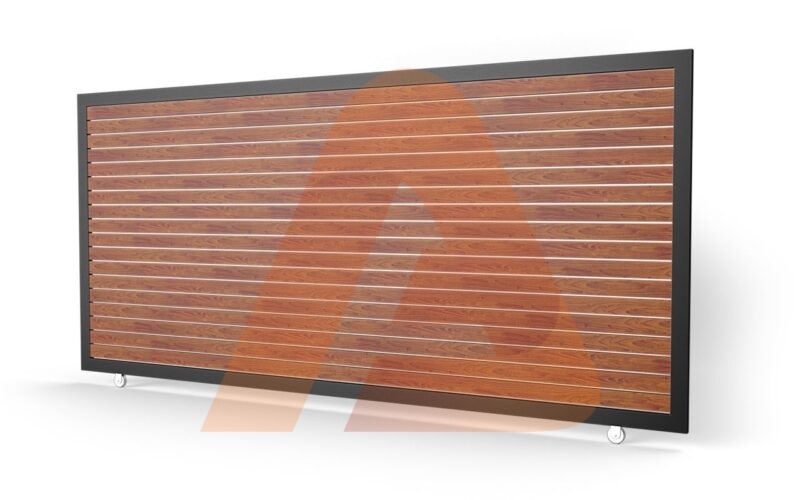
Cantilever Gate Installation
Cantilever gates float across the clear vehicle opening without a ground track. The installation therefore concentrates large loads at the support side.
Build the Support Foundation
Roller posts and foundations are sized around the complete leaf and counterbalance geometry. This support is substantially more important than an ordinary fence post.
Set Roller Assemblies
The two support points are aligned so the gate frame travels straight without twisting.
Install the Extended Frame
The counterbalance section remains behind the opening and provides the leverage needed for the leaf to project across the driveway.
Adjust Elevation
The gate should remain at a consistent height above the driveway through its entire travel.
Set Closed-End Support
A catcher or receiving guide can stabilize the far end when closed, especially on wide or high-privacy gates.
Commission Automation
The drive system is aligned only after the manual gate rolls smoothly. A motor should never be used to disguise poor cantilever geometry.
Inspect the Aluminum Gate Frame Before Hanging It
The installation crew should verify the frame before applying the loads of hinges, wheels or an operator.
Check Squareness
Measure diagonals and inspect corners. A gate that begins out of square will create uneven gaps and hardware alignment problems.
Check Straightness
Long sliding gates should be sighted along the top and bottom rails before installation.
Identify Structural Attachment Zones
Hinges, operator brackets, guide rollers and locks should connect to reinforced or structural portions of the frame.
Protect Decorative Infill
Slats, T&G, louvers and cladding create the visual face. They should not be crushed or used as the primary hardware connection.
Check Finish Damage
Inspect powder coating before the gate is hung so freight damage can be distinguished from installation damage.
Confirm Drainage
Hollow frame members and caps should be assembled according to the system so trapped water does not create avoidable problems.
A motor-ready gate is not defined by the presence of a motor. The frame must provide a structural location for the operator to apply force without deforming decorative infill.
Gate Posts and Foundations
Gate posts are the foundation of alignment. When posts move, even a well-built gate can sag, drag or stop latching.
Hinge Post Loads
A swing gate creates vertical weight and horizontal leverage at the hinge side. Wide leaves and full-privacy surfaces increase the demand.
Sliding Guide Posts
Sliding gates use guide posts to keep the leaf vertical. These supports also experience wind and contact loads from rollers.
Cantilever Posts
Cantilever systems create concentrated reactions at the roller supports and typically need more substantial foundations.
Soil and Footing Conditions
Footing dimensions depend on gate size, post, soil, wind and site design. One universal hole depth should not be copied from a small pedestrian gate to a large driveway entrance.
Concrete Curing
Heavy leaves should not be loaded onto freshly placed posts before the foundation has reached the required condition.
Base Plates
Surface-mounted gate posts require structural concrete and correctly selected anchors. Decorative pavers or thin topping are not enough by themselves.
Installing Aluminum Gates at Masonry Columns
Masonry creates a premium gate opening, but the visible finish does not reveal whether the column can actually support the hardware.
Identify the Core Structure
Determine whether the column contains reinforced block, concrete, steel, wood framing or only decorative veneer.
Do Not Anchor Only to Veneer
Stone, tile and stucco can crack or separate when used as the primary hinge attachment.
Coordinate Embedded Steel
New construction can include structural steel plates or posts inside masonry so hinges and operator brackets have strong attachment points.
Protect Waterproofing
Drilling and anchors should not create uncontrolled water paths into walls or caps.
Verify Column Plumb
An ornamental column can lean while still looking acceptable. Gate hardware should be aligned from the required movement plane, not blindly matched to the finish face.
Plan Electrical Penetrations
Keypads, intercoms, electric locks and operators often require conduit through or beside masonry. These pathways are much cleaner when installed before final finish.
Driveway Slope, Bottom Clearance and Swing Arc
Driveway grade is one of the most common reasons a gate that fits on paper fails in the field.
Rising Grade
An inward-swing gate needs enough bottom clearance to pass over the highest point in its arc. If the slope is too steep, a sliding gate may be more practical.
Falling Grade
A gate swinging over falling ground can create a large bottom gap when open or closed.
Cross Slope
When one side of a driveway is higher than the other, double-swing leaves may need carefully coordinated bottom lines.
Crowned Driveways
The center of a driveway can be higher than the edges. The lowest gate rail should be checked across the entire swing or slide path.
Drainage
Gate foundations, operator pads and tracks should not block water flow or create new ponding.
Finished Surface Matters
Measurements should account for future pavers, concrete toppings or resurfacing. A gate fabricated from rough subgrade elevations can become too low once the driveway is finished.
Sliding Gate Track, Runback and Receiving Conditions
Sliding installations need a complete travel path, not just enough room for the closed gate.
Track Straightness
A ground track should be installed on a straight, stable foundation. Waves or settlement increase rolling resistance and operator load.
Runback Length
The side area must accommodate the entire leaf when open. Cantilever gates need extra length for the counterbalance section.
Keep the Path Clear
Landscape curbs, utility boxes, pedestrian gates and parked vehicles should remain outside the travel envelope.
Receiving Side
The closed end can use a catcher or support that stabilizes the leaf without forcing it upward or sideways.
Debris Management
Leaves, gravel and coastal sand should not accumulate in a ground track. The installation should allow routine cleaning.
Drainage Across the Track
Track concrete should not create a dam across a sloped driveway. Water should have a controlled path through or around the installation.
Hinges, Rollers, Guides, Stops and Catchers
Hardware installation determines how smoothly the gate moves and how easily it can be serviced later.
Adjustable Hinges
Adjustable hinges can compensate for small alignment changes, but they should not be used to hide a moving post or a gate frame that is out of square.
Heavy-Duty Hinges
Large driveway leaves require hinges designed for the actual gate weight, width and cycle count. The hinge connection should distribute load into the frame and post.
Sliding Wheels
Track wheels should roll freely and remain aligned with the gate centerline. Wheel brackets are attached to the structural frame.
Guide Rollers
Upper guides keep sliding gates vertical without creating excessive drag. Contact surfaces should be durable and easy to adjust.
Catchers
A receiving catcher can stabilize the far end of a sliding gate when closed and reduce movement during wind.
Stops
Physical open and closed stops protect hinges, rollers and operators from overtravel. Electronic limits should work with, not replace, appropriate physical travel control.
Lubrication and Service Access
Moving parts should remain accessible for inspection, lubrication or replacement after landscaping and wall finishes are complete.
Installing Full-Privacy Aluminum Gates
Full-privacy gates require more installation attention because the leaf presents a larger continuous surface to wind and hides more of the hardware behind the infill.
Frame First
The structural frame is checked before T&G, cladding or other solid infill is fully loaded. A flexible frame becomes harder to diagnose once the leaf is complete.
Control Perimeter Gaps
Side, bottom and center gaps should remain consistent enough to preserve privacy while leaving room for movement and drainage.
Watch the Hinge Post
A full-privacy swing leaf can create significant torque during wind. Post movement may first appear as a changing center gap or latch alignment.
Sliding Guide Support
For sliding privacy gates, guide rollers should contact the frame, not the finished face. Solid panels can hide guide locations, so the structure needs to be planned before cladding.
Operator Force
A stronger operator should not be used to compensate for a gate that binds or a post that moves. The gate should travel freely by hand before automation is commissioned.
Wind Stops
Open and closed positions should have support appropriate for the site so the operator is not the only element resisting wind at the end of travel.
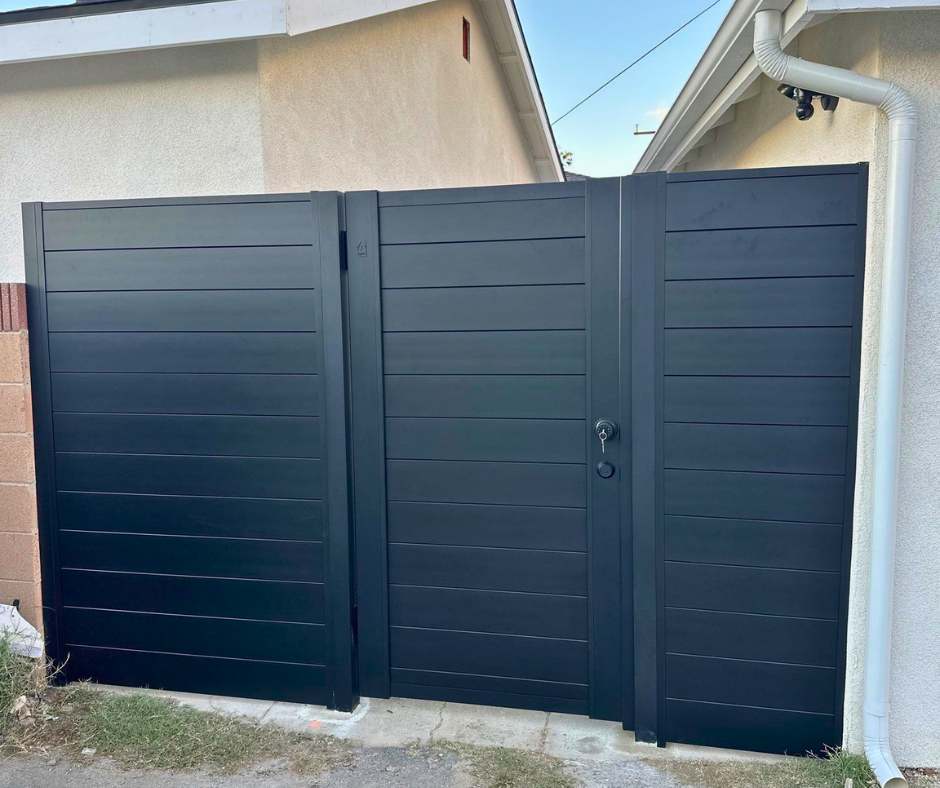
Wind Planning for Aluminum Gate Installation
Wind can change the behavior of a gate dramatically, especially on wide privacy leaves.
Open vs Solid Infill
Open slats allow more air to pass through. T&G and flush cladding act more like a broad solid panel.
Swing Gate Torque
Wind pressure acts across the leaf and transfers force into hinges, posts and operators. The farther the pressure acts from the hinge side, the larger the leverage.
Sliding Gate Pressure
Sliding gates transfer wind through guide rollers, wheels, tracks or cantilever supports. Tall leaves can push heavily against guide posts.
Coastal and Canyon Conditions
Malibu, hillside and canyon properties can be more exposed than sheltered valley lots. The same gate design may require different support in a high-wind location.
Open Position Matters
A swing gate can catch wind differently when open than when closed. Stops and operators should be protected in both positions.
Do Not Rely on the Motor as Structure
Operator arms and gearboxes are movement devices. The gate frame, hinges, posts and stops should carry structural reactions appropriate to the system.
Automatic Aluminum Gate Operator Installation
Automatic gate installation should begin with a manually smooth gate. The operator is then added to a system that already moves correctly.
Select the Operator for the Gate
Movement type, leaf size, weight, wind surface, duty cycle and mounting geometry influence operator selection.
Build a Stable Operator Base
Sliding operators need a rigid pad that stays aligned with the gate. Swing operators need structural brackets and post or column conditions suited to their force.
Attach to Structural Frame
Operator brackets should connect to frame members or dedicated reinforcement. Decorative slats should not carry the drive force.
Set Travel Limits
Open and closed limits are adjusted after physical travel and stops are established.
Test Manual Release
The owner should be able to disengage the operator during a power failure or service condition using the approved release procedure.
Battery Backup
Where the operator supports it, battery backup can maintain access during outages. Backup capacity and expected cycle count vary by system.
Commission Under Repeated Cycles
The gate is opened and closed repeatedly to verify there is no binding, overheating, sensor fault or change in alignment.
Power, Conduit and Low-Voltage Planning
Electrical planning is much cleaner before concrete, masonry and landscaping are finished.
Operator Power
The operator may require line voltage or another approved supply based on the manufacturer. Electrical work should follow applicable code and product instructions.
Conduit Crossings
Double swing gates can need wiring between sides. Sliding gates can need power at the operator side and low-voltage paths to photo eyes, keypads and intercoms.
Low-Voltage Separation
Control wiring, communications and power should be routed according to the equipment and electrical requirements rather than placed randomly in one conduit.
Future Access Control
Even if the owner starts with remotes only, spare conduit to a keypad pedestal or intercom location can make future upgrades easier.
Drainage
Conduit ends and operator bases should be detailed so water does not collect in electrical boxes or underground raceways.
Service Loops and Access
Wiring should have enough service length for maintenance without leaving exposed loops that can be damaged by vehicles or landscaping.
UL 325, ASTM F2200 and Automatic Gate Safety
Automated vehicular gates are powered moving systems. Current safety standards address both the operator and the physical construction of the gate.
UL 325 addresses gate operators and entrapment-protection requirements. ASTM F2200-24 is the active standard specification for automated vehicular gate construction and covers gate types including horizontal slide and horizontal swing gates. ASTM states that automated vehicular gate systems covered by F2200 should comply with the specification and UL 325.
Entrapment Zones
Installers evaluate areas where a moving gate can crush, pinch, draw in or trap a person between the gate and a fixed object.
Photoelectric Sensors
Monitored photo eyes can protect designated zones by detecting an obstruction without physical contact.
Sensing Edges
Monitored edges can provide contact protection at gate edges or fixed posts where an entrapment hazard exists.
Pedestrian Separation
Vehicular gates are intended for vehicle access. Where people need regular entry, separate pedestrian access helps keep them out of the powered vehicle gate path.
Guarding Slide Gates
Sliding gates can create draw-in and pinch areas along adjacent fences or walls. Openings and accessible rollers should be addressed by the applicable gate construction and operator requirements.
Qualified Installation
UL Solutions emphasizes proper product selection, installation according to manufacturer instructions and correct use of recommended safety devices. Local code officials or authorities should be consulted for project requirements.
Keypads, Intercoms, Remotes and Access Control
Access control should be installed around the users, not simply around the gate operator.
Remotes
Transmitters are convenient for residential vehicles but can be difficult to manage on larger properties with many users.
Keypads
Keypads allow temporary or permanent codes. The pedestal should be positioned so drivers can reach it without leaning into traffic or entering the gate travel zone.
Intercoms
Audio or video intercoms allow the property owner to verify visitors before opening the gate.
Vehicle Tags and Readers
Multifamily and commercial sites can use credential systems that identify approved vehicles without manual code entry.
Smartphone Access
Cloud or app-based systems can manage users remotely, but they still rely on a properly installed operator and safety system.
Exit Devices
Loop detectors, free-exit sensors or other devices can trigger vehicle departure when appropriate to the property.
Mounting Locations
Readers and keypads should remain outside the moving gate envelope and protected from vehicle impact where necessary.
Pedestrian and Pool Gate Installation Conditions
Pedestrian gates near pools or required barriers need more attention to closing and latching behavior than an ordinary side-yard gate.
Self-Closing Action
If required by the applicable pool-barrier rules, the gate should close automatically and reliably from the required positions.
Self-Latching Hardware
The latch location and release method should match the applicable safety requirements.
Opening Direction
Pool gates may be required to swing away from the pool area depending on the governing rules.
Bottom and Side Openings
The finished clearances should be reviewed as part of the entire barrier, not only for visual appearance.
Do Not Defeat the Closer
A gate that drags or has an out-of-plumb post should be repaired structurally. Increasing closer force is not a proper solution to bad alignment.
Separate From Vehicle Gates
Where practical, pool and pedestrian access should not rely on an automatic driveway gate that creates powered movement around people.
Los Angeles Gate Permits, Fence Height and Zoning
Gate installation in Los Angeles can involve zoning, building, electrical and planning questions depending on the project scope.
Fence and Gate Height
City of Los Angeles zoning commonly limits front-yard fence conditions more strictly than side and rear yards. Over-height front-yard fences and vehicular gates can require discretionary planning approval.
Real Los Angeles Cases Show Why Height Matters
Current Los Angeles City Planning cases include requests for over-height vehicular entry sliding gates and pedestrian gates within front-yard setbacks. That demonstrates why a tall street-facing gate should be checked before fabrication rather than assumed legal from neighboring examples.
Building Permit vs Zoning
A project can fall below a general building-permit threshold and still need to satisfy zoning. New masonry columns, retaining walls, structural alterations or electrical work can add separate permit requirements.
Automatic Gate Electrical Work
Operator power and related electrical work should be installed under the applicable electrical requirements and permit process where required.
Independent Cities
Beverly Hills, Santa Monica, Malibu, Pasadena, Glendale, Burbank and other cities in Los Angeles County use their own rules. Verify the actual jurisdiction.
HOA Review
Private design approval can be required in addition to municipal compliance. HOA approval does not replace city requirements.
Verify jurisdiction, height, setback and permit conditions before custom fabrication. Gate dimensions, posts and automation are much harder to change after the frame is complete.
Fire Access, Emergency Release and Driveway Gate Planning
Driveway gates can affect emergency access, so installation should account for local fire department requirements when they apply.
Emergency Entry
Some properties require approved key switches, lock boxes, radio systems or other emergency access methods. The local fire authority determines the acceptable method.
Clear Driveway Width
Posts, open leaves and operator equipment should not reduce a required fire-access opening below the approved width.
Power Failure
Automatic gates should have an approved manual release and, where appropriate, battery backup or another emergency-opening strategy.
Gate Failure Position
Commercial, multifamily and fire-access projects can have specific requirements for how the gate behaves during alarm, outage or emergency conditions.
Keep Equipment Accessible
Manual releases and emergency access devices should remain serviceable after landscaping, fencing and walls are complete.
Coordinate Early
Emergency-access requirements are easiest to integrate before the operator, columns and access-control equipment are finalized.
Replacing an Existing Wood, Steel or Aluminum Gate
Replacement installation starts with deciding what can safely remain.
Inspect Existing Posts
Old posts may look straight while having weak footings, hidden corrosion or poor wall attachment. A new gate should not inherit a failing support simply to reduce demolition.
Inspect Masonry
Cracked columns, loose caps and hollow decorative walls can need repair or reinforcement before new hinges are installed.
Check the Opening
Replacing a sagging gate is an opportunity to correct an opening that was never square or level.
Reuse Automation Carefully
An existing operator may be reusable if it is suitable for the new movement, leaf and current safety configuration. Compatibility should be verified rather than assumed.
Remove Old Anchors
Unused brackets and fasteners should be removed or finished so the new installation does not sit over damaged substrate.
Protect Existing Hardscape
Demolition near pavers, stone and stucco should be planned to minimize collateral damage and define who repairs unavoidable finish work.
Matching Gate and Fence Installation
Gate and fence should be laid out together because the gate opening becomes a control point for adjacent panel widths and slat lines.
Set Gate Posts First
Driveway and pedestrian openings are established before the remaining fence bays are divided.
Align Slat Courses
Horizontal fence and gate infill looks best when the visible lines continue across the opening.
Use the Right Post for Each Function
A fixed fence line post and a gate hinge post can look similar but carry different loads.
Match Finish Batches
Gate and fence produced together can reduce visible color variation, especially with custom colors or wood-look finishes.
Transition Privacy Intentionally
The gate can be full privacy while adjacent front fencing remains semi-private, as long as the change is designed rather than accidental.
Coordinate Wall Toppers
Masonry, fence panels and gates should share a planned top line and post rhythm where the architecture calls for continuity.
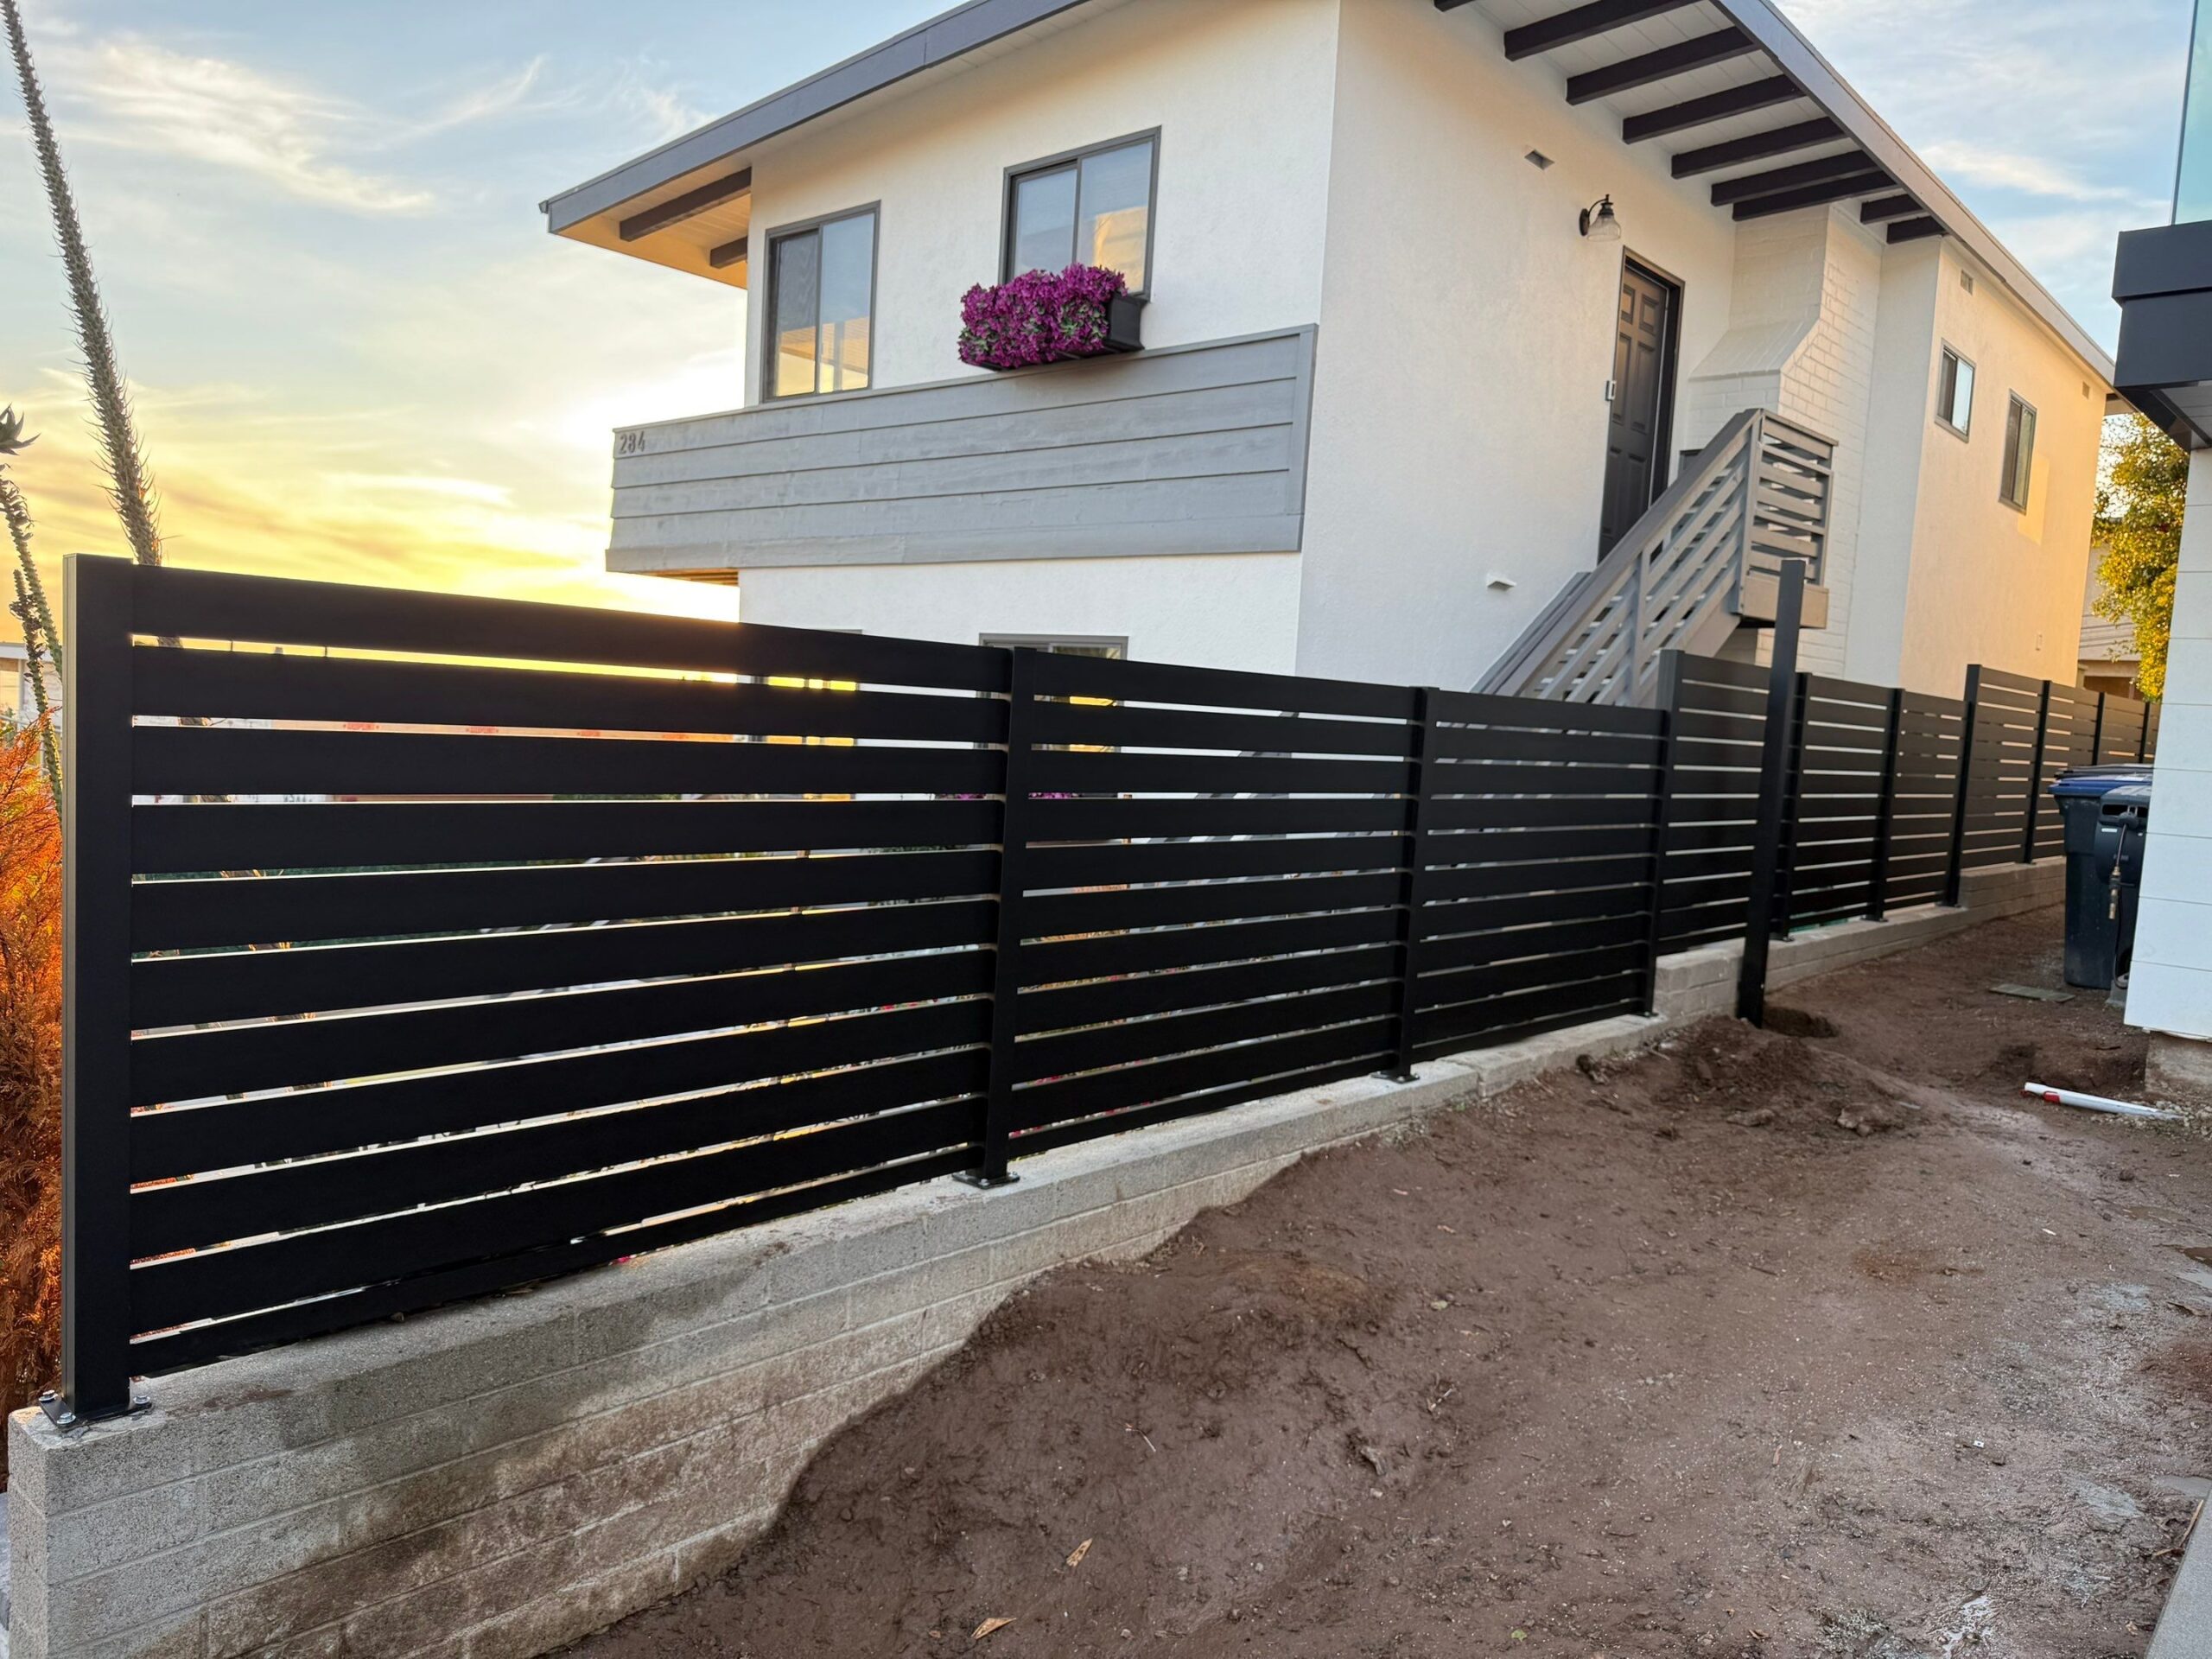
Protecting Powder-Coated Aluminum During Installation
Factory-finished aluminum should arrive at the completed project looking factory finished, not heavily touched up after careless handling.
Use Padded Staging
Frames and panels should rest on padded supports rather than directly on concrete, gravel or rough masonry.
Control Metal Chips
Drilling and cutting create sharp chips that can scratch powder coating if trapped between profiles.
Protect Wood-Look Finishes
Decorative grain surfaces can show scratches more readily than textured black, so protective film and clean work surfaces are especially important.
Remove Concrete Splash Early
Cement residue should not be allowed to cure on finished aluminum.
Use Touch-Up Correctly
Small exposed cuts or scratches can be protected with compatible touch-up products, but field repair is not identical to the original factory-cured coating.
Inspect Before Handover
The final walkthrough should distinguish minor finish marks from structural damage such as bent posts, twisted frames or damaged hardware.
Gate Adjustment and Commissioning After Installation
A gate should not be considered complete just because it opens once. Final commissioning verifies repeatable operation.
Manual Movement
Before relying on the operator, the gate is checked manually where the system allows. It should move freely without unusual resistance.
Open and Closed Stops
Stops are adjusted so the leaf reaches the intended position without overtravel.
Clearance Check
Bottom gaps, center seams, post clearances and guide contact are inspected through the complete travel.
Operator Limits
Open and close limits are set after the physical gate geometry is correct.
Safety Devices
Photo eyes, edges and other monitored entrapment-protection devices are tested according to the operator and installation requirements.
Access Controls
Remotes, keypads, intercoms, loops and manual-release procedures are verified.
Repeated Cycles
The gate is cycled multiple times to identify heat, vibration, changing alignment or intermittent sensor faults.
Owner Orientation
The property owner should understand normal operation, manual release, basic cleaning and when to request service.
Post-Installation Gate Maintenance
Aluminum keeps frame maintenance low, but every moving gate benefits from periodic inspection.
Clean the Aluminum
Fresh water and mild detergent remove dust, irrigation deposits and coastal salt without attacking the powder coating.
Inspect Hinges and Rollers
Listen for new noise, check for loose fasteners and look for changing gaps that can indicate wear or post movement.
Clean Sliding Tracks
Leaves, gravel and sand increase rolling resistance and should be removed before they damage wheels or overload the operator.
Check Guides and Catchers
Guide rollers should turn freely. Closed-end catchers should support the leaf without forcing it out of line.
Test Safety Devices
Automatic gate sensors should be tested as part of routine maintenance, following the operator manufacturer's instructions.
Inspect Access Controls
Keypads, intercoms, batteries and remote credentials can need periodic service independent of the gate frame.
Address Structural Movement Early
A gate that suddenly stops latching can indicate post, wall or foundation movement. Repeated hinge adjustment is not a substitute for correcting the cause.
How Long Does Aluminum Gate Installation Take?
Installation time varies because the visible gate is only one part of the work.
Simple Pedestrian Gates
A straightforward replacement between stable supports can move quickly once the correct gate is ready.
New Posts and Concrete
Excavation, reinforcement and concrete curing extend the schedule even when the gate itself installs in a single workday.
Masonry and Stucco
New columns, wall repairs and finish restoration add separate trades and cure times.
Sliding Foundations
Track slabs, operator pads or cantilever foundations can require substantial preparation before the leaf is installed.
Automation and Electrical
Conduit, power, safety devices, intercoms and access controls increase installation and commissioning time.
Permits and Planning
Over-height front-yard gates, structural work or other regulated conditions can add review time before field installation begins.
Custom Fabrication
The installation date should be coordinated with final measurements and production rather than scheduled from rough dimensions.
A fast installation is valuable only when the posts, concrete, electrical work and gate have been prepared correctly. The best schedule minimizes return visits and field modifications rather than rushing the final hanging day.
How to Compare Aluminum Gate Installers in Los Angeles
Homeowners should compare installers by the complete gate system, not only by the finished design photo.
Ask Who Fabricates the Gate
When design, fabrication and installation are coordinated, field dimensions and hardware interfaces are easier to resolve.
Ask How Posts Are Selected
The installer should explain why the hinge, sliding or cantilever support fits the leaf rather than offering one post detail for every opening.
Ask About Driveway Grade
A competent installer should evaluate slope before recommending swing or sliding movement.
Ask How the Operator Attaches
Motor brackets should connect to structural frame members and planned reinforcement.
Ask About UL 325 and ASTM F2200
For automated vehicular gates, the installer should understand operator entrapment protection and physical gate-construction safety requirements.
Ask About Permits and Jurisdiction
The proposal should identify whether zoning, electrical, planning, masonry or structural permits are part of the scope.
Ask About Real Installations
Look for projects that match your movement type and site condition, not only a collection of gate designs.
Ask About Service
Automatic gates need future adjustment and operator service. Understand who supports the system after installation.
Compare Scope
One quote may include posts, foundations, demolition, electrical, automation and wall repair while another covers only the gate leaf. Normalize the scope before comparing proposals.
How Gate Installation Changes Across Los Angeles
Los Angeles gate installation varies significantly by neighborhood because grade, coastal exposure, lot size, architecture and zoning conditions change.
Salt, wind and wildfire planning
Coastal cleaning, high-wind privacy gates and noncombustible exterior-material strategies can all influence the installation.
Slope, retaining walls and access
Driveway grade, narrow staging, retaining structures and changing elevations often control the gate movement.
Estate gates and front-yard design
Large masonry openings, custom automation and planning review can be more important than a standard residential install.
Wide residential driveways
Double-swing and sliding gates can integrate with long aluminum fence runs and pool-area privacy.
Compact coastal lots
Limited driveway depth can favor sliding movement, while marine exposure increases finish and hardware maintenance.
Masonry and mixed architecture
Existing columns, traditional walls and warm finishes often require careful integration rather than a one-style-fits-all gate.
Common Aluminum Gate Installation Mistakes
Fabricating before final measurement
Finished paving and masonry can change the opening enough to create bad clearances.
Ignoring driveway slope
A gate can fit the opening and still hit the ground during its swing.
Using a fence post as a gate post
Gate supports carry moving loads and can require stronger foundations.
Anchoring to veneer
Stone, stucco and decorative block faces are not automatically structural hinge supports.
Adding the motor after the gate is built
Operator attachment, conduit and safety devices should be planned into the installation.
Using the operator to overcome friction
A gate should move correctly before the motor is expected to drive it.
Leaving no sliding runback
The entire leaf, guides and receiving conditions need clear space.
Ignoring privacy-gate wind
Solid leaves create larger reactions at posts, hinges and operators.
Skipping physical stops
Electronic limits should not be the only protection against mechanical overtravel.
Placing sensors as an afterthought
Entrapment zones should be evaluated during layout, not after the gate is operating.
Damaging the powder coat during install
Careless staging can turn a factory finish into a field touch-up project.
Skipping final commissioning
Repeated cycles reveal alignment, limit and sensor problems that one opening test can miss.
Los Angeles Aluminum Gate Installation Checklist
- Confirm the property jurisdiction
- Verify gate height and front-yard zoning conditions
- Measure the finished structural opening
- Confirm driveway rise, fall and cross slope
- Choose swing, sliding or cantilever movement
- Measure the full swing arc or side runback
- Identify pedestrian access separately
- Choose open, semi-private or full-privacy infill
- Verify hinge, guide and receiving post locations
- Confirm post and foundation strategy
- Inspect existing masonry or columns
- Confirm structural backing behind veneer
- Locate public utilities before excavation
- Locate private pool, irrigation and lighting lines
- Plan drainage around tracks and operator pads
- Confirm final paving elevation
- Plan operator type and attachment
- Install conduit before final concrete where possible
- Plan keypads, intercoms and access controls
- Identify all powered-gate entrapment zones
- Plan photo eyes, sensing edges and vehicle loops
- Review UL 325 and ASTM F2200 requirements for automated vehicular gates
- Confirm emergency/manual release access
- Coordinate fire-department access where required
- Protect finished aluminum during staging
- Verify open and closed physical stops
- Test the gate manually before automation
- Commission repeated automatic cycles
- Test safety devices and access controls
- Receive maintenance and manual-release instructions
The best installation day is the result of decisions made earlier. When site geometry, structure, automation and safety are resolved before the gate arrives, the crew can focus on precision instead of redesigning the entrance in the field.
Aluminum Gate Installation and Safety Resources
These resources provide additional information about Globus Gates installation services, aluminum gate systems, automatic gate safety and project planning.
Frequently Asked Questions About Aluminum Gate Installation in Los Angeles
These questions cover the installation, structure, automation, permit and maintenance issues homeowners most often need to resolve before a gate project begins.
How is an aluminum driveway gate installed in Los Angeles?
Installation starts with final site measurements, driveway grade and movement selection. The crew then installs or verifies gate posts, foundations or sliding supports, hangs or sets the gate, installs hinges, rollers, guides and stops, adds automation and safety devices when required, and finishes with repeated testing and adjustment.
Should I install a swing gate or sliding gate on my driveway?
A swing gate works best when the driveway has enough clear depth and grade does not interfere with the swing arc. A sliding gate is often better when the driveway is short, rises behind the gate or has enough clear side runback. Site geometry should decide the movement before fabrication.
How do installers measure for an aluminum gate?
Installers measure the finished structural opening, wall or post locations, paving elevation, driveway slope, bottom clearance and available swing or sliding space. Sliding and cantilever gates also require full side-runback measurements, while automated gates need operator, conduit and safety-device locations.
Can an aluminum gate be installed on existing masonry columns?
Yes, when the columns contain suitable structural support. Stone veneer, stucco and decorative finishes should not be treated as the primary hinge or guide attachment. The installer should verify reinforced masonry, concrete, steel or other structural backing before loading the gate.
Why do aluminum driveway gates sag after installation?
Sagging can come from an under-supported frame, moving hinge post, weak foundation, poor hinge attachment or a gate that was not square before installation. Adjustable hinges can correct small alignment changes, but they should not be used to hide a failing post or structural frame problem.
Can a full-privacy aluminum gate be automated?
Yes. Full-privacy swing and sliding aluminum gates can be automated, but the solid surface creates more wind load. The frame, posts, hinges or rollers, stops and operator should all be selected for the finished leaf size, privacy and site exposure.
What safety standards apply to automatic driveway gate installation?
UL 325 addresses automatic gate operators and entrapment-protection requirements. ASTM F2200-24 addresses the construction of automated vehicular gates and states that covered automated gate systems should comply with F2200 and UL 325. The installer should also follow the operator instructions and local requirements.
Do automatic gates need photo eyes or safety sensors?
Automated gates require entrapment protection appropriate to the identified hazard zones and operator system. Monitored photoelectric sensors and sensing edges are common devices. The correct number, type and location depend on the operator, gate movement and site geometry.
Does an aluminum gate need a special gate post?
Large or moving gates often require support different from a standard fixed-fence post. Swing hinge posts, sliding guide posts and cantilever support posts carry concentrated loads that depend on the gate width, privacy, wind, hardware and foundation.
Can an aluminum swing gate work on a sloped driveway?
Sometimes. The installer must check how the pavement rises or falls through the complete swing arc. A steep rise can cause the bottom of the gate to strike the driveway. In that situation, a sliding gate may provide a cleaner installation than creating an oversized bottom gap.
Do I need a permit for an aluminum gate in Los Angeles?
Permit and planning requirements depend on the property and scope. Gate and fence height, front-yard setbacks, new masonry, structural work, electrical work and automation can trigger different reviews. Over-height vehicular gates in front-yard setbacks can require Los Angeles City Planning approval, so the jurisdiction should be checked before fabrication.
How long does aluminum gate installation take?
The field installation time depends on the gate type and site preparation. A simple pedestrian replacement can be much faster than a new automated driveway gate requiring posts, concrete, masonry, track foundations, electrical work or planning approvals. Production and curing time should be considered separately from the final hanging day.
Can an existing gate opener be reused with a new aluminum gate?
It may be possible when the operator is suitable for the new gate movement, size, duty cycle and current safety configuration. The installer should verify structural attachment, operator condition, entrapment protection and manufacturer compatibility rather than assuming the existing motor can be transferred.
How much bottom clearance should an aluminum gate have?
There is no single universal bottom gap. Clearance depends on driveway grade, gate movement, drainage, privacy, pets and applicable barrier requirements. The gate needs enough clearance to move reliably without creating an unnecessarily large opening.
What should I look for in an aluminum gate installer in Los Angeles?
Look for real installations similar to your gate type and ask how the installer handles site measurement, posts, foundations, driveway slope, masonry, operator attachment, UL 325 and ASTM F2200 safety, electrical work, permits and future service. Compare complete scope rather than only the gate design.
What maintenance is needed after an aluminum gate is installed?
The powder-coated aluminum should be cleaned periodically with fresh water and mild detergent. Hinges, wheels, guides, tracks, stops, locks, safety devices and automatic operators should be inspected and serviced. Coastal gates benefit from more frequent rinsing to remove salt deposits.
Final Thoughts: A Good Gate Installation Should Make a Complex System Look Simple
The finished aluminum gate should open smoothly, close in the right place and look like it was designed with the property from the beginning. Achieving that result requires much more than a well-fabricated leaf.
The site comes first. Driveway grade determines whether a swing gate can clear the paving. Side runback determines whether a sliding or cantilever gate has room to open. Masonry determines whether hinge or guide hardware has real structure behind it. Wind exposure affects full-privacy leaves. Front-yard location can affect height and planning approval.
The structural installation comes next. Hinge posts, guide posts, foundations, tracks, cantilever rollers and wall connections establish the geometry that the gate will use every day. If those elements move, the gate eventually moves with them.
Automation should be integrated only after the gate moves correctly. The operator needs a structural attachment point. Power and conduit need planned routes. UL 325 entrapment protection and ASTM F2200 gate-construction principles need to be considered around the actual movement and fixed objects. Keypads, intercoms and vehicle loops should stay outside hazardous travel zones while remaining practical for users.
Finally, the system has to be commissioned. Stops, limits, clearances, locks, manual release, sensors and repeated cycles should all be verified before the installation is handed over. That final testing is what turns individual components into a gate system.
For Los Angeles homeowners, the strongest project is the one where design, fabrication and installation are coordinated from the first measurement. When the frame, posts, gate movement, automation and surrounding fence are planned together, the finished entrance can remain clean and reliable without exposing the complexity behind it.