
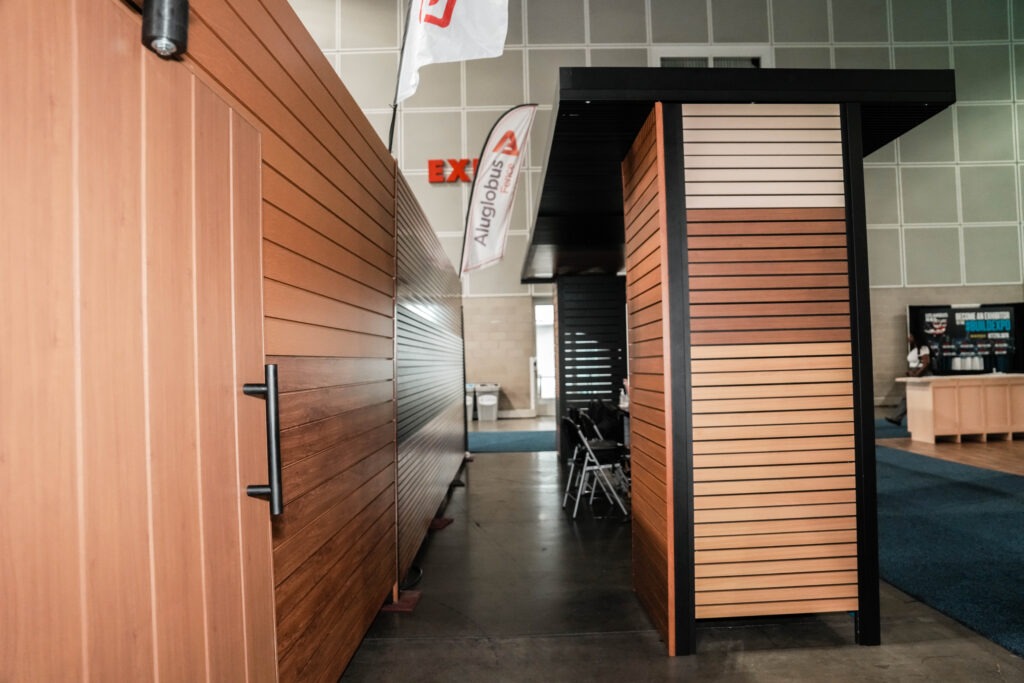
Wall cladding installation in Santa Monica is an exterior-envelope project before it is a design project. The installer has to understand what is behind the existing finish, how water moves through and around the wall, where the new system can be structurally attached, how windows and doors are flashed, how aluminum is allowed to expand, and how a coastal environment changes the choice of fasteners and maintenance.
That technical work is what makes architectural aluminum cladding look simple after installation. Long vertical or horizontal profiles magnify uneven substrates, poorly planned corners and inconsistent reveals, while penetrations for lights, vents, cameras and outlets can quickly make a facade look improvised if they are not coordinated before the first panel is installed.
This guide keeps the focus on the actual Santa Monica installation process, including T&G and click systems, rainscreen principles, stucco and masonry substrates, coastal exposure, permit review, historic and Coastal Zone considerations, facade detailing, inspection and long-term maintenance.
Why Santa Monica Is a Strong Market for Aluminum Wall Cladding
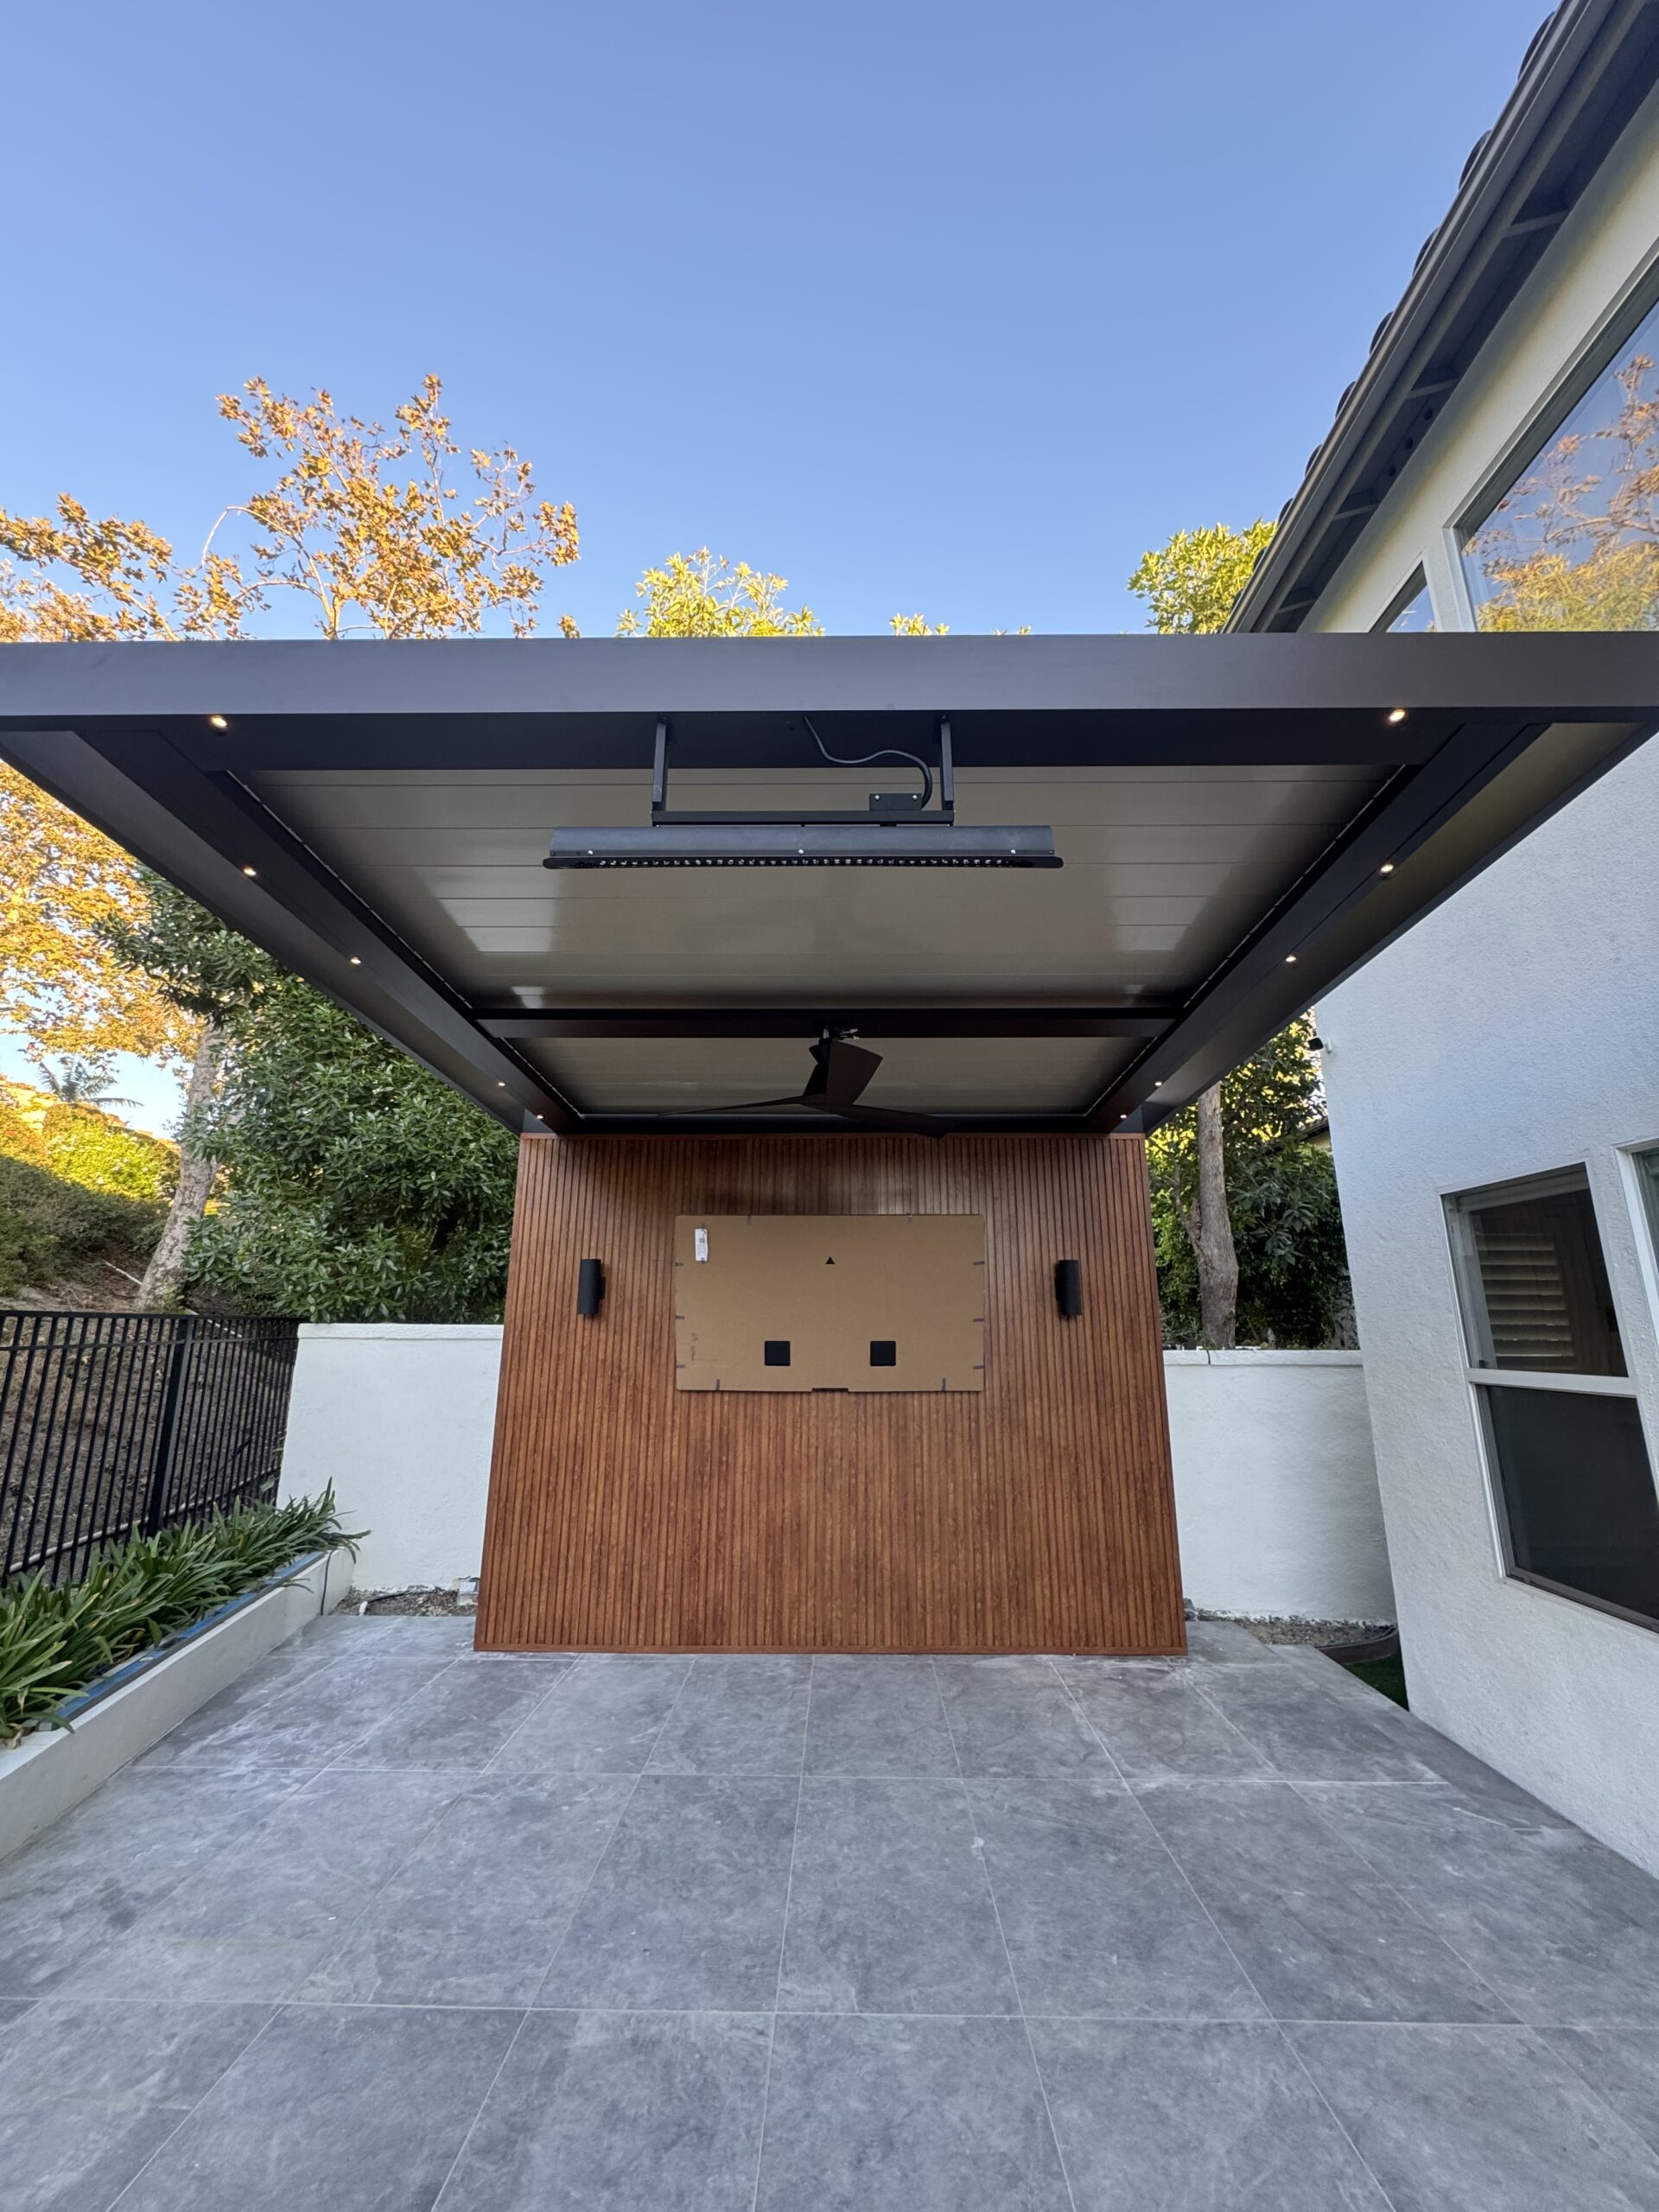
Santa Monica is one of the better Los Angeles-area markets for architectural aluminum cladding because the design demand and the environmental demand point in the same direction. Homeowners and designers want clean facades, warmer wood-look accents, sharper entry walls and low-maintenance exterior materials, while the coastal environment asks for finishes and assemblies that can tolerate salt, UV exposure, morning moisture and frequent temperature swings without the recurring refinishing cycle associated with exposed wood.
That does not mean aluminum cladding should be treated as a cosmetic cover-up. Santa Monica has older stucco homes, mid-century buildings, multifamily properties, retail facades and new contemporary construction, and each of those substrates can hide different conditions. A cracked wall, failed window flashing, deteriorated sheathing or weak attachment surface will not improve simply because a new exterior skin is installed over it. The project should begin by deciding whether the existing wall is healthy enough to receive a new system and what work needs to remain accessible for inspection before it is concealed.
From an SEO and buyer-intent standpoint, wall cladding installation Santa Monica is also a useful local topic because the person searching it is usually beyond inspiration. They are trying to understand whether cladding can go over stucco, whether a permit is required, how the panels are attached, how coastal corrosion is handled and what makes one installation more durable than another. Those questions are exactly where a detailed installation guide can be more useful than another general “benefits of aluminum cladding” article.
The visible aluminum is the final layer. The quality of the project is decided by the condition of the wall behind it, the drainage and flashing strategy, the support plane, the movement details and the way every edge and penetration is resolved.
What an Aluminum Wall Cladding Installation Actually Includes
An architectural cladding project is a layered wall assembly, not a single product attached directly to a facade. At the back is the existing building wall, which might be wood framing and sheathing, concrete, CMU block or stucco over another assembly. That wall needs to provide a structurally reliable attachment condition and a functioning water-management strategy. In front of it may be a water-resistive layer, flashings, furring, clips or rails, followed by the aluminum profiles, trims and terminations that create the finished architectural surface.
Each layer has a different responsibility. The substrate carries loads. Flashing and the backup wall manage water that passes the outer surface. Subframing creates a straight plane and can establish a drainage or ventilation cavity. The aluminum profiles provide weather exposure resistance and the desired appearance. Corners, window returns, base details and parapet transitions connect those layers so water does not simply move around the new cladding and enter at the edges.
The most professional installations are planned from these interfaces inward rather than from the center of the wall outward. A beautiful uninterrupted field of T&G panels is relatively easy once the difficult conditions are solved: where the first panel starts, how the last panel terminates, how the wall meets paving, how the system turns a corner, how a window sill drains and how lights or cameras are mounted without crushing the finished profile. Those details are what separate a designed facade from a collection of panels.
Site Survey and Wall Measurements
A cladding survey should document much more than wall width and height. The installer needs a dimensioned picture of the entire facade, including inside and outside corners, window and door openings, parapets, soffits, roof transitions, grade changes, electrical devices, vents, hose bibs, downspouts, cameras, address numbers and anything else that interrupts the panel field. Existing walls should also be checked for bowing and out-of-plumb conditions because long aluminum profiles make irregularities more visible than textured stucco does.
Measurements should be taken from finished conditions whenever possible. If new windows, doors, paving, stucco repair or roofing work is still pending, those changes can alter panel lengths and trim dimensions. A project that is fabricated from early rough measurements can end up with awkward narrow pieces around openings or with bottom and top clearances that no longer match the approved design. For custom-length profiles, final verification before production is especially important because cutting the wall geometry into the material is one of the advantages of a factory-prepared system.
The survey should also record access and staging. Santa Monica projects can have narrow side yards, close neighboring buildings, limited driveway space and active sidewalks. A technically simple wall can become logistically difficult if twenty-foot material cannot reach it without crossing landscaping or if scaffolding affects a public walkway. Good installation planning includes how the material will arrive, where it will be stored and how installers will safely reach every fastening point without damaging finished panels.
Santa Monica Building Permits and Facade Remodel Review
Santa Monica currently evaluates building-permit applications under the 2025 California Standards Code, effective January 1, 2026. The City explains that the required plan-review path depends on the scope of work, and it specifically lists certain minor facade remodels and repairs among projects that can sometimes qualify for Same-Day Review. More substantial alterations, work that does not meet the Same-Day criteria or projects with broader structural, electrical or other building-system changes move into formal plan review through the City’s electronic process.
For cladding, the practical lesson is that “we are only changing the exterior finish” should not be used as a substitute for checking the actual scope. New furring or structural attachments, changes around openings, electrical relocation, waterproofing modifications or larger remodeling work can affect what the City wants to see. The approved wall build-up may also influence fire, weather-protection and structural details, so permit comments should be resolved before long custom panels are cut and finished.
All construction authorized by a building permit is subject to inspection clearances before final approval. That matters for cladding because some of the most important work disappears behind the finished aluminum. Depending on the approved scope, the City or project team may need to see substrate repairs, flashing, water-resistive layers or attachment conditions before they are concealed. A project schedule should therefore allow for inspection points instead of assuming the crew can close the entire wall continuously from start to finish.
Minor facade remodels and repairs may qualify for Same-Day Review, while other work requires formal plan review. The correct path depends on the project scope, so the permit route should be confirmed before fabrication rather than inferred from the word “cladding.”
Coastal Zone Review in Santa Monica
Santa Monica’s coastal location adds a planning layer that does not apply the same way to every inland Los Angeles project. The City advises applicants that properties in the California Coastal Zone may also need California Coastal Commission approval, and applicants are responsible for determining whether that additional permit is required. A facade alteration can therefore be technically acceptable under building code while still needing separate coastal review because the project changes the exterior appearance or forms part of a larger development scope.
The local framework is also evolving. In June 2026, Santa Monica and the California Coastal Commission announced a memorandum of understanding to continue work toward the City’s first comprehensive Local Coastal Program. Until a certified program gives the City broader local coastal permitting authority, applicants should not assume that an ordinary City building approval automatically resolves Coastal Act requirements for every property.
For aluminum cladding, this is most relevant before a highly visible ocean-facing or street-facing facade is redesigned. Color, reflectivity, material character and the scale of the remodel can matter more in a coastal review than they do on a concealed courtyard wall. The most efficient approach is to confirm Coastal Zone status and any required planning approvals before committing to a final finish or panel layout, particularly when the cladding is part of a larger exterior renovation.
Historic Resources and Architectural Review
Santa Monica contains designated landmarks, Structures of Merit and properties identified through its Historic Resources Inventory. On those buildings, an exterior material change can be more than a normal maintenance decision because the existing facade, trim, proportions and material palette may contribute to the property’s historic character. City documents describe review roles for the Landmarks Commission and Architectural Review Board depending on the resource status and the type of alteration.
That does not mean aluminum cladding is automatically inappropriate on an older property. It means the location and design need to be chosen with more discipline. A new rear addition, a non-historic service wall, an interior courtyard or a clearly contemporary secondary volume may offer opportunities that are very different from covering an original street-facing facade. In some projects the strongest architectural move is contrast, using modern aluminum in a clearly new element while preserving the historic material that gives the original building its identity.
Before demolition or installation begins, the owner should verify whether the property appears on the City’s current historic-resource lists and whether design review applies. This is especially important when the project includes new windows, altered openings, significant color changes or removal of original exterior material. Resolving preservation questions early is far less expensive than redesigning a completed cladding package after fabrication.
Assess the Existing Wall Before Cladding Installation
Covering an exterior wall does not repair it. The substrate should be treated as a separate construction condition that has to be understood before the new facade is designed. On stucco, installers should look for hollow areas, significant cracking, staining, failed sealant and evidence of movement. On framed walls, sheathing and water-resistive layers should be checked where accessible. On concrete and CMU, the team needs to know where sound material and reinforcement are available for anchors and whether the wall is dry enough to receive the planned assembly.
Moisture evidence deserves particular attention. Efflorescence, peeling paint, soft sheathing, mold, rust staining around fasteners or recurring leaks near windows are not aesthetic defects that should simply disappear behind aluminum. The source needs to be identified so the new system does not trap a pre-existing problem. If the wall needs structural repair, waterproofing correction or termite treatment, that work should happen before furring and panels make access difficult.
The decision to install over an existing finish or remove it should be made from the actual wall condition. Overlay can reduce demolition and preserve a stable weather layer, but it increases wall thickness and can complicate window returns, roof edges and trim. Removal can expose the structure and simplify new flashing, but it creates a larger construction scope. Neither approach is universally better. The correct choice is the one that produces a sound, drainable and structurally reliable base for the cladding system.
Water Management, Drainage and Rainscreen Logic
Exterior aluminum should be designed with the assumption that wind-driven rain can reach joints and the space behind the visible panels. The purpose of a good cladding assembly is not to pretend the outer face is an impenetrable bathtub. It is to shed most water at the surface, direct incidental water onto a reliable backup layer and provide a controlled path for moisture to drain and the wall to dry.
This is the logic behind many rainscreen assemblies. Furring, clips or rails can create separation between the aluminum and the backup wall, allowing drainage and, where the approved design provides it, air movement behind the panels. The exact cavity depth and membrane system depend on the building type and approved wall assembly, but the principle is consistent: the cladding should not trap water against vulnerable sheathing or rely on face sealant alone to stay dry.
Openings are where water management becomes most visible technically. Window heads, jambs and sills need flashings that integrate with the backup wall and drain outward. The bottom of the cladding should allow drainage instead of being sealed tightly against paving or soil. At parapets and roof edges, water from above must be directed over or away from the panel system. A premium powder-coated facade is only as durable as the water details hidden behind the first few inches around its perimeter.
The cladding should shed water, the backup wall should manage water that gets behind it, and the assembly should give that moisture a way to leave. Continuous cosmetic sealant is not a substitute for those three functions.
Subframing, Furring and Creating a Flat Facade
Subframing is where a wavy existing wall becomes a straight architectural plane. Long aluminum profiles do not hide irregularity well, especially when shadow lines are narrow and consistent. Furring or rail systems let installers establish vertical and horizontal control lines independent of minor substrate variation, then shim or adjust the support points so the finished panel surface remains in plane across corners and openings.
The support material and fastening strategy depend on the approved assembly. Exterior projects can use different types of furring or metal rails depending on structure, fire requirements, corrosion exposure and system design. Whatever is selected, the support has to transfer cladding loads into sound building structure rather than into weak stucco or decorative finish. Random stacks of shims and inconsistent fastener depths can create flexible areas that telegraph through the finished wall or loosen under wind.
Subframing also changes the geometry around the wall. Moving the panel face outward affects window returns, door jambs, parapet caps, downspouts, electrical boxes and any adjacent stone or stucco. Those transitions should be dimensioned before the rails are installed. A few inches of added wall depth can make an existing sill too short or leave a light fixture recessed awkwardly behind the new facade, so the support plane has to be coordinated with every adjoining finish.
T&G Aluminum Wall Cladding Installation
Tongue-and-groove aluminum creates a continuous architectural surface by mechanically engaging each profile with the next. The installation is efficient once the starting line is correct, but it is unforgiving of a poor first course. If the first profile is not plumb or level for the intended orientation, that error continues across the entire run and becomes more obvious as the wall gets larger.
Installers typically work from a defined starting trim or edge condition, fasten the profile through the concealed attachment zone and then engage the next piece so the fastener is hidden. The profiles should seat fully without being forced over a crooked rail or damaged tongue. Long runs also need the manufacturer’s intended movement allowance because aluminum changes length as temperature changes. Over-tightening slotted connections or pinning every profile rigidly can lead to oil-canning, buckling or stress at terminations.
Layout should be planned before the first panel is cut. The crew needs to know where the final piece will land at the opposite corner, how the pattern will divide around windows and whether a visible wall will end with an unattractive narrow strip. On custom projects, adjusting the starting point or panel module by a small amount can make the completed facade look deliberately proportioned instead of field-cut to whatever space remained.
Click-System Wall Cladding Installation
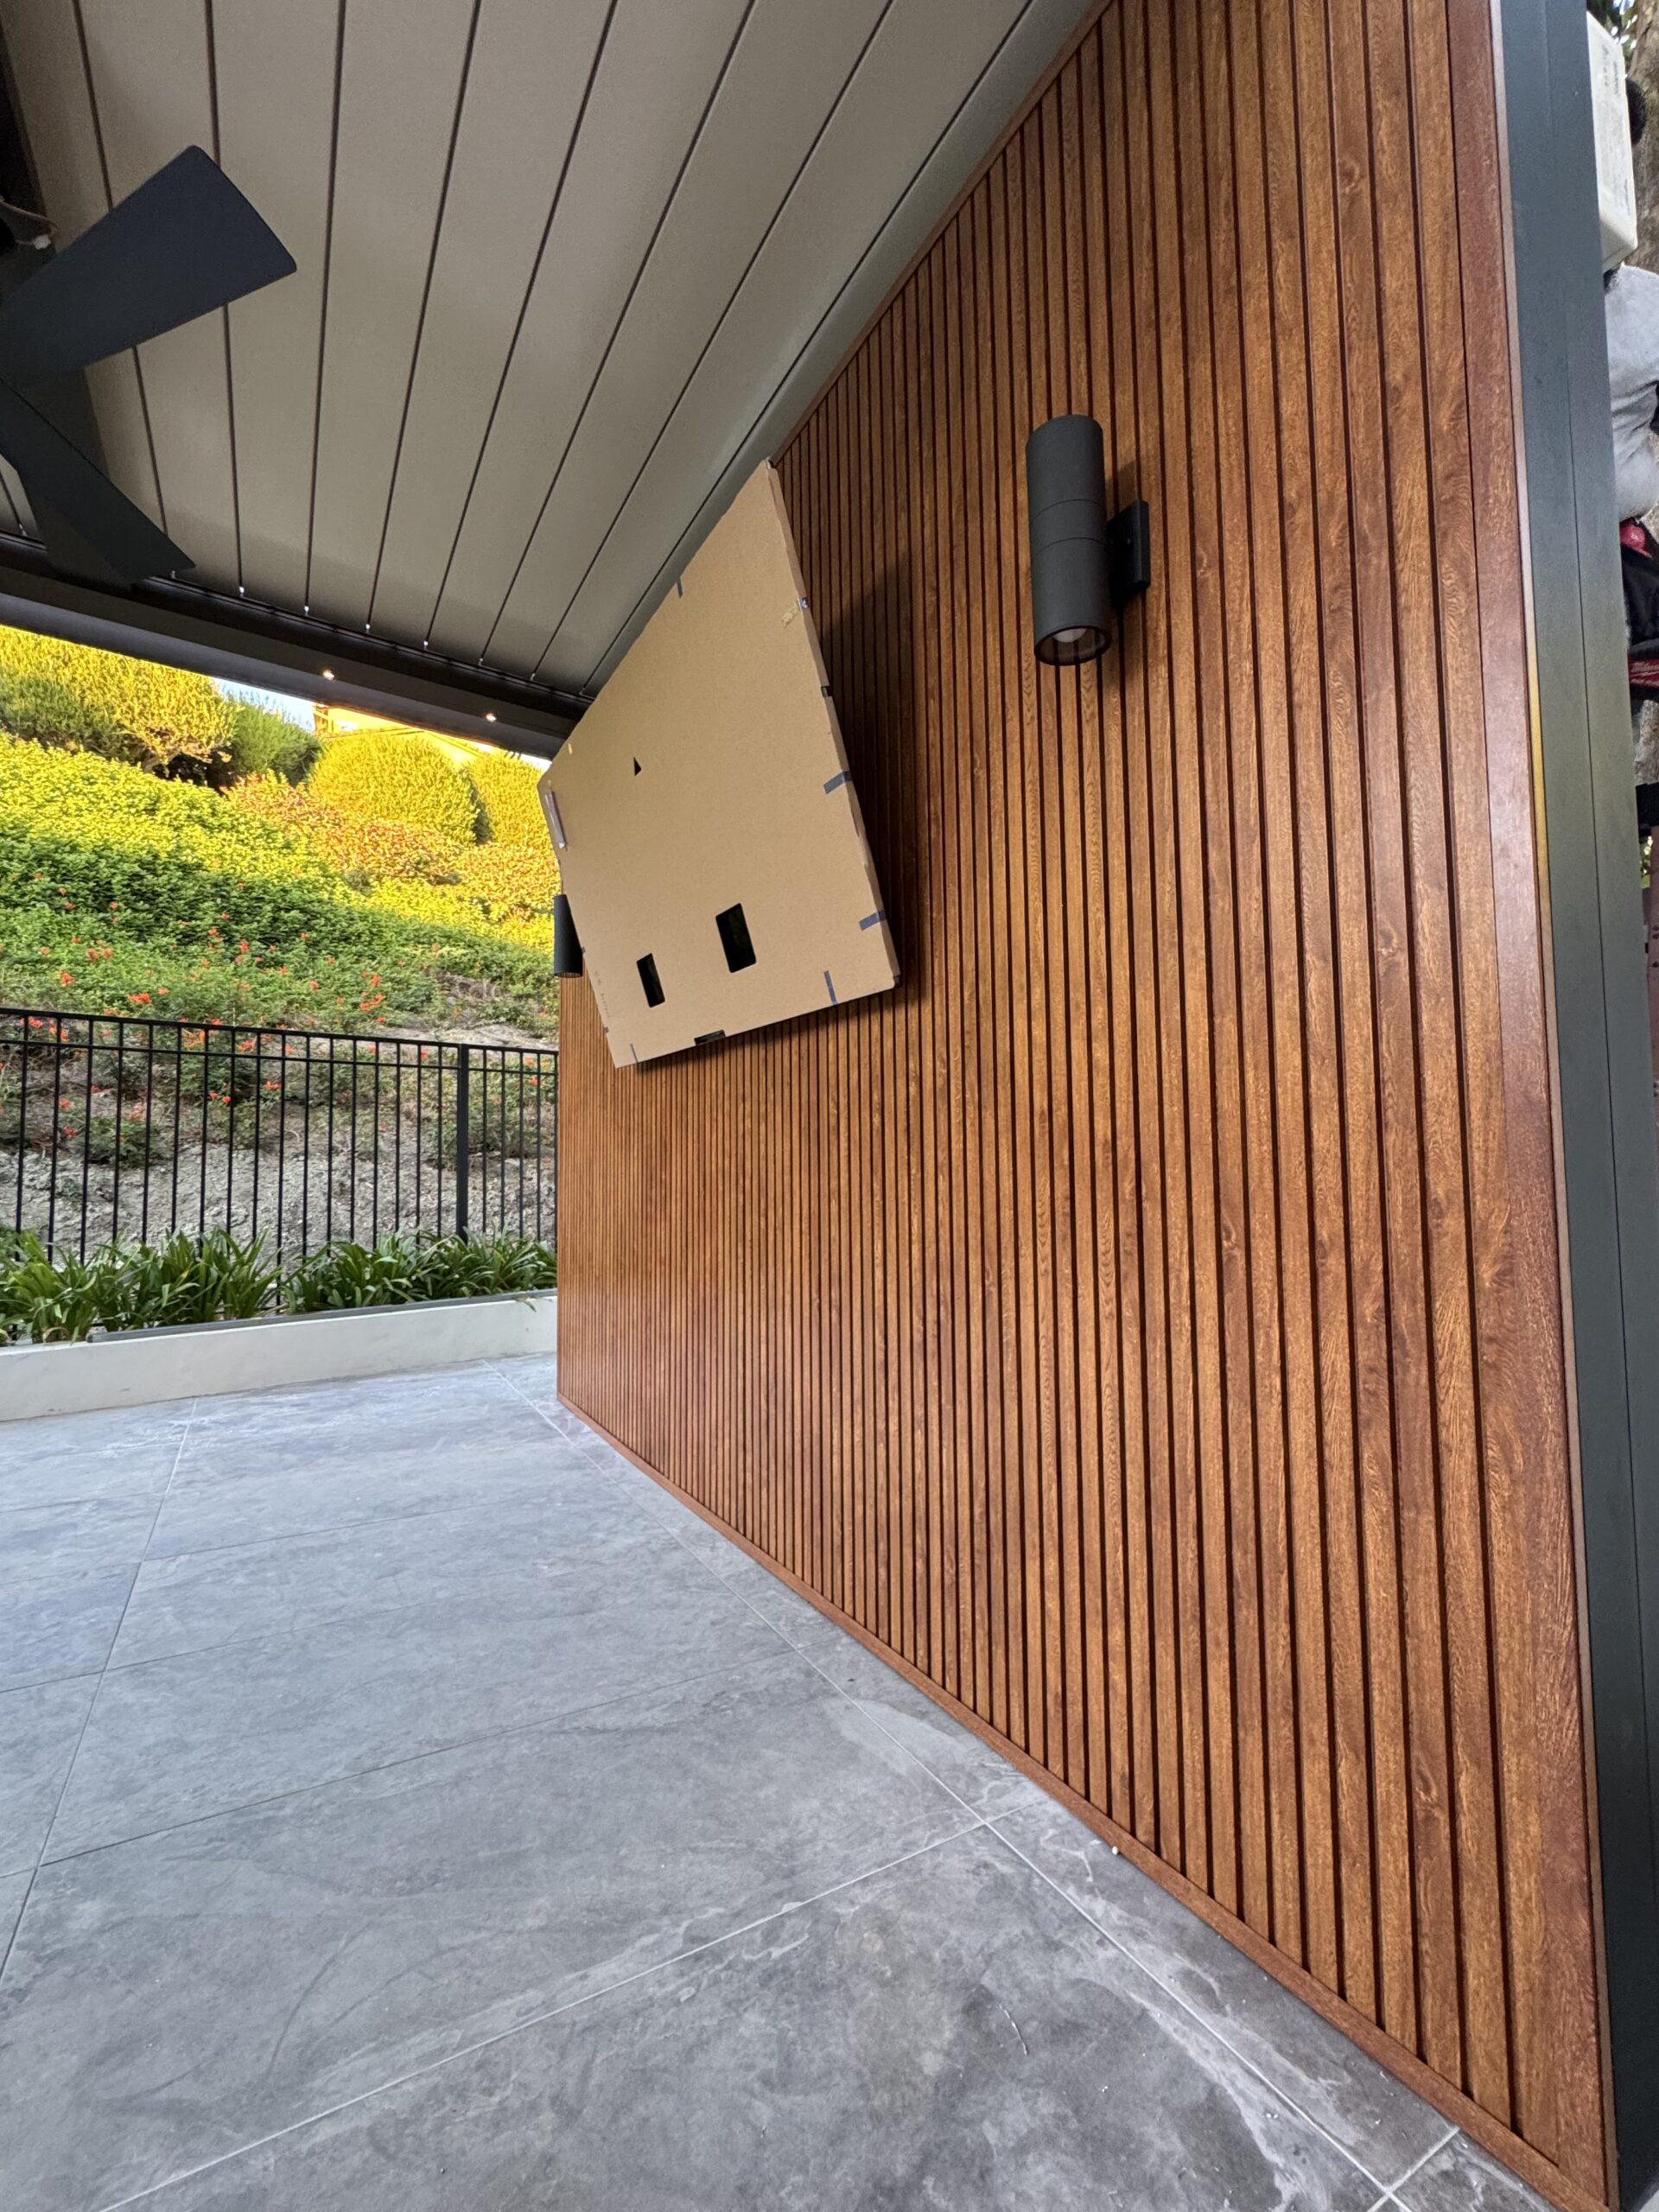
Click-system cladding is designed to reduce visible fastening and speed panel placement through clips, rails or snap-in engagement. That can be valuable on feature walls and projects where future access or panel replacement matters, but the faster panel connection does not reduce the need for accurate preparation. The support rails still have to be straight, evenly spaced and aligned because the finished panels follow the geometry of the system beneath them.
Each panel should be fully engaged rather than partially snapped into place to compensate for a crooked substrate. Incomplete engagement can produce uneven reveals or movement under wind, while a distorted rail can make one section of the wall look tighter than another. Service planning also matters. If a system is designed so individual profiles can later be removed, lights, conduits and trim should not be installed in a way that locks every panel together permanently.
Click systems are not automatically interchangeable with T&G in every exterior condition. Exposure, wall height, wind, fire requirements and manufacturer limitations should determine where the system is appropriate. The visual advantage is a clean face with reduced visible fasteners; the technical advantage is efficient installation. Both advantages disappear if installers begin adding ad hoc screws through the finished surface because the underlying rail layout was not planned correctly.
Vertical vs Horizontal Aluminum Cladding
Panel direction changes both the appearance of the building and the logic of the installation. Vertical cladding emphasizes height, works naturally on narrow entry towers and can make a low facade feel more contemporary. Horizontal cladding emphasizes width and can coordinate with long roof lines, horizontal windows or matching fence and gate slats. The correct orientation is not the one that is most fashionable; it is the one that strengthens the proportions of the specific elevation.
Orientation also changes how the subframing is arranged. The support system has to run in a direction that provides the required fastening points and drainage behavior for the selected panel. Corners, windows and roof edges may need different trim details depending on whether profiles arrive at them vertically or horizontally. On a complex facade, changing direction between volumes can work well, but the transition should occur at a real architectural break rather than in the middle of an otherwise continuous wall.
For Santa Monica homes with mixed materials, panel direction can help organize the composition. A vertical wood-look entry volume can contrast with smooth stucco while a darker horizontal cladding band aligns with a garage or gate. Using direction intentionally allows cladding to define separate building masses without adding unnecessary colors or decorative trim.
Corners, Starts, Ends and Panel Terminations
Most cladding photographs are taken from the center of the wall, but the quality of an installation is usually easiest to judge at the edges. Outside corners need to look straight from ground to roof while protecting cut panel ends. Inside corners need enough room for movement and drainage without creating a dark irregular gap. Starts and ends should land on planned trims rather than on field improvisations that change width from one floor to the next.
Corner strategy should be selected before the panel layout is finalized because the trim width becomes part of the facade proportions. A narrow dark corner can make two wall planes read as separate volumes, while a matching-color trim can make the cladding wrap continuously. On wood-look panels, miters and return trims require even more care because any exposed cut edge interrupts the grain effect and can make the assembly look like a surface covering instead of an architectural system.
Terminations at adjacent materials deserve the same discipline. Where cladding meets stucco, stone, glazing or a gate frame, the installer should know whether the detail calls for a reveal, overlap, sealant joint or dedicated extrusion. The goal is not to eliminate every visible joint. The goal is to make every joint intentional, weather-managed and repeatable across the project.
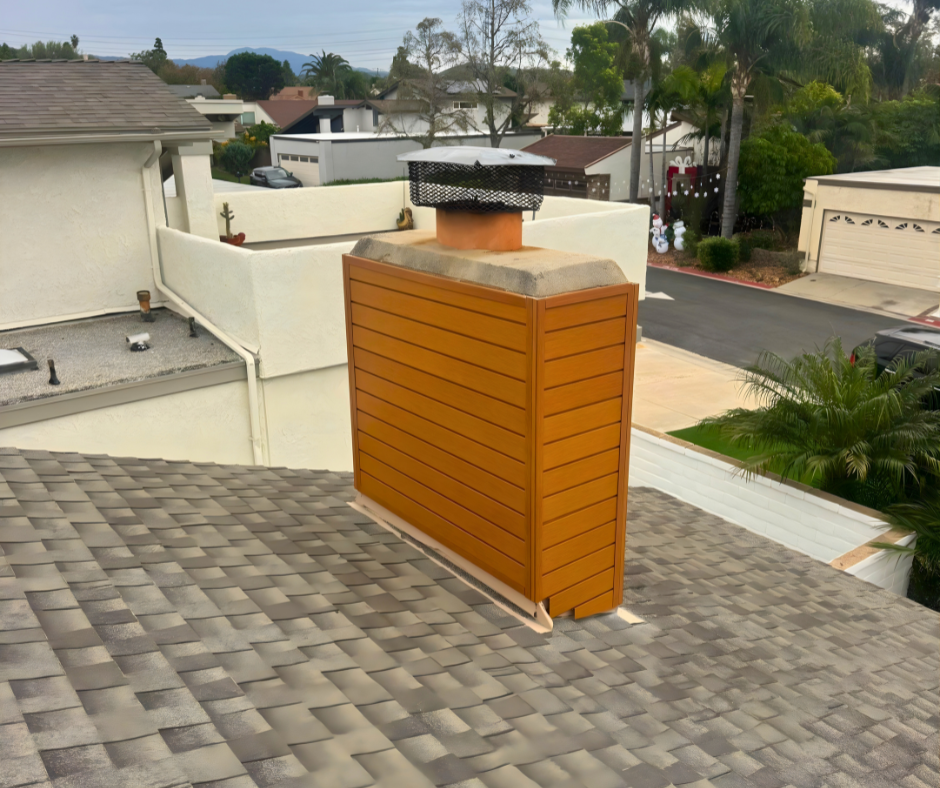
Cladding Around Windows, Doors, Lights and Other Penetrations
Windows and doors interrupt every layer of the wall, so their cladding details should be drawn before panels are installed. The backup flashing has to direct water outward, while the visible return has to create a clean relationship between the aluminum face and the frame. If the new cladding moves the finished wall plane outward, existing sills, jamb extensions and drip edges may no longer project far enough to manage water properly.
The same principle applies to vents, exterior lights, outlets, hose bibs, cameras, speakers and address numbers. These items should mount to approved structural backing or purpose-built boxes that remain flush with the new panel plane. Tightening a fixture directly against a hollow decorative profile can crush the face, distort the shadow line and make future service difficult. The installation should also preserve drainage around penetrations rather than surrounding every device with uncontrolled sealant.
Coordination is particularly important on modern Santa Monica facades because cladding is often used precisely to create a clean uninterrupted field. A randomly located conduit or oversized exterior box can become the most noticeable feature on the wall. Electrical and low-voltage trades should therefore review panel orientation and final fixture locations before the cladding crew closes the support system.
Bottom Edges, Roof Lines, Parapets and Top Terminations
The bottom of an exterior cladding system should never be treated as a decorative baseboard. Water that reaches the drainage cavity needs a place to exit, and the lower edge should remain separated from soil, paving or other surfaces as required by the approved wall detail. Setting aluminum tightly into landscaping can trap debris and moisture, while burying the bottom trim in new concrete can block drainage and make future replacement difficult.
At the top of the wall, parapets, roof edges and soffits are equally important because they control water before it reaches the cladding field. A parapet cap needs enough projection and drip behavior to keep water from running behind the panels. Roof-to-wall conditions should integrate with roofing flashings, and soffit transitions should be dimensioned so the final panel does not end with an arbitrary strip. The cladding should meet the roof system, not attempt to replace it.
These details also affect the visual proportions of the facade. A thick bottom trim, oversized cap or inconsistent gap at the soffit can make otherwise precise panels feel unfinished. On high-visibility entry walls, the best details often make the termination visually quiet while allowing the concealed drainage and movement functions to remain intact.
Thermal Expansion and Long Aluminum Panel Runs
Aluminum changes length as temperature changes, and a Santa Monica facade can experience meaningful surface-temperature swings even in a relatively mild coastal climate. Dark powder-coated profiles in direct afternoon sun can become much warmer than the surrounding air, then cool rapidly in evening marine conditions. Long uninterrupted panel runs need fastening and termination details that allow this movement without forcing the profiles to buckle, bow or push hard against corners.
Manufactured systems commonly manage movement through slotted holes, clips, controlled fastener torque, expansion gaps or other details specific to the profile. Installers should follow the intended method instead of converting every connection into a fixed point. Over-tightened screws can prevent a panel from moving, while excessive gaps can make the facade look loose. The challenge is to hold the panel securely while allowing the small amount of movement the system expects.
Movement planning also affects transitions between materials. Aluminum, stucco, glass, concrete and wood do not expand at the same rate, so a rigid joint between dissimilar materials can crack or distort over time. Proper reveals, sealant joints and trim conditions allow those materials to move independently while maintaining a clean architectural relationship.
Fasteners, Stainless Hardware and Dissimilar Metals
Coastal cladding should be reviewed as a material system, not simply as “aluminum panels.” The visible profiles may resist red rust, but the anchors, clips, furring, screws and adjacent metals can have different corrosion behavior. Stainless fasteners are commonly used in exterior aluminum assemblies, yet stainless itself comes in different grades and can still stain or corrode in aggressive marine conditions if the wrong product or detailing is used.
Dissimilar-metal contact deserves equal attention. When aluminum remains wet while touching a more noble metal, galvanic action can accelerate corrosion at the interface. Manufacturer-approved fasteners, isolating washers, coatings and compatible support systems help control that risk. The same care is needed where cladding meets steel railings, flashing, structural frames or older metal components that were not originally designed to touch aluminum.
Fastener placement also affects appearance. Hidden fastening is one of the reasons architectural cladding looks cleaner than conventional siding, so exposed screws should not become the default solution for every field problem. If the project repeatedly needs face screws to hold panels flat, the cause may be a poor support plane, incorrect panel engagement or an attachment strategy that was not matched to the system.
Installing Aluminum Wall Cladding Near the Santa Monica Coast
Salt air changes the maintenance and detailing priorities of an exterior facade even when aluminum is the primary visible material. Wind can carry salt several blocks inland, where it settles on panel faces, joints, trims and hardware. The material advantage of aluminum is that it does not develop the red iron-oxide rust associated with carbon steel, but salt deposits can still stain finishes, attack incompatible hardware and concentrate in areas that remain wet.
Finish quality therefore matters. Properly prepared and exterior-rated architectural coatings provide better UV and weather resistance than a generic decorative finish, while wood-look surfaces need the same underlying corrosion and adhesion discipline as solid colors. In exposed locations, installers should minimize unnecessary field damage and protect cut edges or scratches according to the coating system so small installation marks do not become early maintenance points.
Design should also respond to wind. Large flat panel fields, parapet conditions and tall feature walls can experience pressure and suction that are very different from an interior accent wall. Support spacing, anchors and panel attachment should be selected for the actual building and location rather than copied from a sheltered backyard project. Coastal cladding is successful when corrosion resistance and structural exposure are considered together.
Powder-Coated Aluminum Cladding and Finish Protection
Powder coating is often chosen because it creates a durable, consistent architectural surface, but the quality of the final facade depends on both the factory process and jobsite handling. Pretreatment helps the coating bond to aluminum, and exterior-grade architectural powders are formulated for stronger UV and weather exposure than basic decorative finishes. Buyers should therefore ask about the intended coating performance rather than treating all powder-coated aluminum as identical.
Once the material reaches the site, installers become responsible for preserving that factory finish. Panels should be stored on clean padded supports, not directly on concrete or gravel. Metal chips from cutting and drilling should be removed before they are trapped between profiles. Concrete splash, stucco residue and sealant smears should be cleaned before they cure. Protective films can remain useful during assembly but should not be left in the sun beyond the manufacturer’s guidance.
Touch-up products are appropriate for small scratches or exposed cuts, but they do not recreate a factory-cured surface. A project with extensive visible touch-up usually indicates a handling or fabrication problem that should have been prevented. The best installation looks as though the finished profiles arrived in place without being dragged, clamped or repeatedly reworked in the field.
Wood-Look Aluminum Wall Cladding
Wood-look aluminum is particularly useful in Santa Monica because it can bring visual warmth to modern stucco, glass and concrete without making natural wood the exposed exterior surface. The finish can be used on entry volumes, patio walls, soffits, garage surrounds and courtyard features where the design wants grain and color but the owner wants to avoid a recurring stain-and-sealer schedule in coastal sun and salt air.
The installation should respect the direction and repetition of the printed grain. Adjacent panels can look more natural when the installer understands how the pattern repeats and avoids creating obvious visual bands. Corners and cut edges also deserve more attention than they do on matte black because the aluminum base can become visible if a trim or return is not designed to conceal the cut. Fixtures should be laid out carefully so they do not interrupt the grain with unnecessary boxes or oversized mounting plates.
Wood-look aluminum should still be treated as an aluminum finish, not as “maintenance-free wood.” It benefits from routine washing and careful handling, and exact color can vary between batches. If the cladding is intended to coordinate with gates, fences or patio components, samples should be reviewed together and, where possible, the project should be ordered in coordinated finish production.
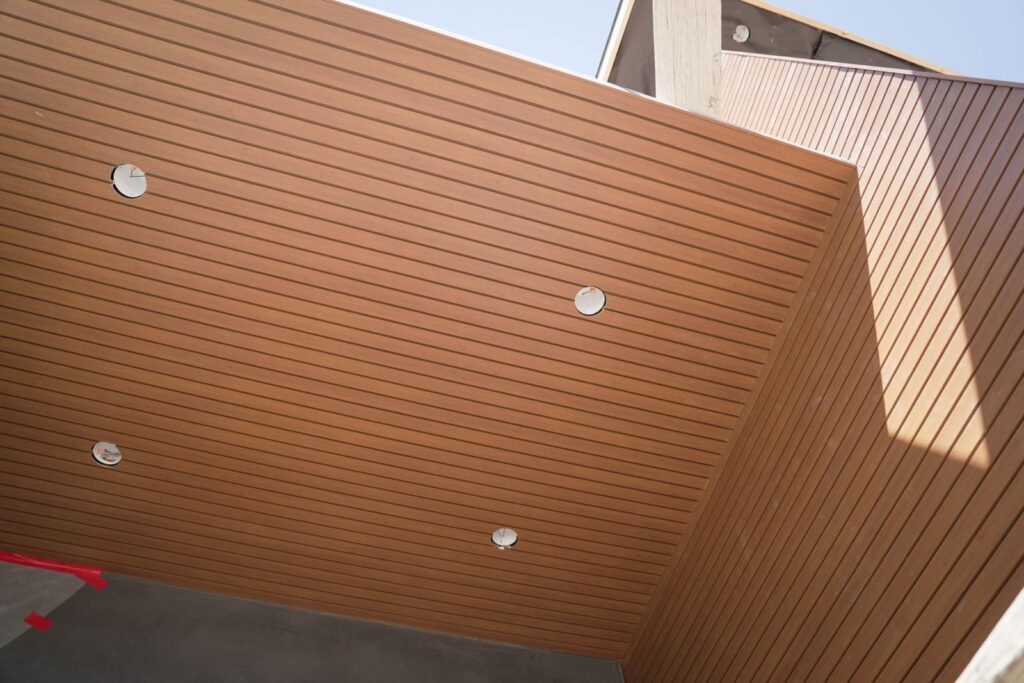
Noncombustible Aluminum and Wildfire-Conscious Material Selection
Aluminum is a noncombustible base metal, which makes it useful in California projects that are trying to reduce combustible exterior materials. That can be especially relevant where cladding is close to decks, gates, fencing, eaves or other exterior features that are being reconsidered as part of broader home-hardening work. The material itself does not ignite and continue burning like wood siding, but the performance of the complete wall still depends on the layers behind and around it.
That distinction is important because a cladding system can include membranes, insulation, furring, sealants and accessories with different fire characteristics. A powder-coated aluminum face should not be marketed as proof that the entire wall assembly is automatically compliant with every wildfire, exterior-wall or Zone 0 requirement. Project-specific code, building type, wall construction and current local or state rules determine what the complete assembly must achieve.
For a Santa Monica project, the practical benefit is design flexibility. Homeowners can use wood-look aluminum where they want a warmer facade language without choosing exposed wood as the primary cladding material. Contractors and designers should still document the entire approved wall build-up rather than reducing the specification to “aluminum panels.”
Insulation, Thermal Breaks and Exterior Wall Continuity
Cladding can be coordinated with exterior insulation, but the aluminum panels themselves should not be described as insulation unless the actual system includes a documented thermal component. In many high-performance wall assemblies, insulation is installed behind the cladding and subframe so the building receives a more continuous thermal layer outside the structural framing. That strategy can reduce thermal bridging and improve comfort when it is designed as part of the complete envelope.
Attachment through exterior insulation requires proper engineering and detailing. Fasteners need to reach structure, furring needs to remain stable and the system has to control compression without creating a wavy facade. Window and door returns also become deeper, which affects flashings and trim. If an existing Santa Monica home is being reclad as part of a larger energy upgrade, the cladding package should therefore be coordinated with the architect or energy consultant before fabrication.
Thermal-break claims also need precision. Some clip and rail systems reduce direct heat transfer more effectively than others, but the benefit depends on materials, geometry and tested assembly performance. Buyers should ask for documented system data rather than assuming any air gap behind aluminum automatically creates a high-performance insulated wall.
Installing Aluminum Cladding Over Existing Stucco
Stucco is one of the most common Santa Monica retrofit substrates, and it can be a suitable base condition when the wall behind it is sound. The first step is determining whether the stucco is stable and whether the planned fasteners can reach structural framing, sheathing systems or approved masonry anchors behind the finish. The visible stucco layer alone should not be assumed to provide the structural capacity for a long exterior cladding run.
Existing cracks should be evaluated rather than hidden. Hairline cosmetic cracking and major movement cracking are not the same condition, and water staining near windows or roof edges may indicate a flashing issue that needs repair first. If the wall is substantially out of plane, furring can create a straight surface without grinding the entire stucco facade, but the added wall thickness will change every sill, jamb and termination around it.
Overlaying stucco can reduce demolition and keep a functioning backup wall in place, but it also makes future access more difficult. The installation team should document concealed conditions, anchor locations and repaired areas before the panels close the wall. Those records are useful for future fixtures, service penetrations and any later cladding modification.
Cladding on Concrete and CMU Walls
Concrete and CMU can provide durable cladding substrates, but they require different anchor planning from wood framing. Solid concrete allows anchors to develop capacity when edge distance, embedment and concrete condition are appropriate. CMU is more variable because hollow cells, grouted cells and reinforcement are not equivalent attachment conditions. Installers need to know where the structural material is located instead of drilling uniformly and assuming every anchor has the same capacity.
Masonry walls also manage moisture differently from framed walls. Efflorescence, damp areas and cracks can indicate water movement that should be understood before the surface is covered. Furring can create a drainage space and a straight panel plane, but it should not trap water against the wall or bridge uncontrolled movement joints. Existing masonry expansion and control joints may need to be carried through or respected by the new facade design.
On boundary walls and exterior feature walls, cap conditions are especially important. Water entering from the top can migrate behind a beautifully installed panel field and create staining or corrosion at hidden fasteners. A properly detailed cap, flashing or coping should protect the assembly before the cladding is treated as finished.
Commercial and Multifamily Wall Cladding in Santa Monica
Commercial and multifamily cladding projects add another layer of coordination because the facade is part of a larger occupied building rather than a single private residence. The installer may need to work around storefronts, tenant entrances, fire-life-safety systems, signage, utility equipment and public sidewalks while keeping the building operational. Panel layout can also cross multiple structural bays or floor levels, making survey control and expansion detailing more important than on a small residential feature wall.
Santa Monica’s design-review and permitting context can also be more involved for commercial and multifamily work. Exterior materials, colors, visible mechanical equipment and changes to street-facing elevations may be reviewed as part of the broader project. Access equipment, staging and work in the public right of way can require separate coordination. The cladding contractor should understand what is included in the building permit and what remains the responsibility of the general contractor, architect or owner.
From a performance standpoint, larger facades need documented support spacing, wind design and fire characteristics for the complete assembly. Decorative language alone is not enough. Architects and contractors should have profile information, finish samples, attachment details and transition details early so structural, envelope and aesthetic decisions are coordinated before field installation begins.
Matching Wall Cladding With Gates, Fences and Other Aluminum Systems
One of the strongest design opportunities with architectural aluminum is the ability to coordinate the facade with other exterior systems without making everything identical. A Santa Monica home can use wood-look cladding at the entry, a darker aluminum gate at the driveway and a related fence finish along the property line while keeping the same general material language. The result feels cohesive because colors, profile direction and shadow lines are related, not because one profile is repeated everywhere.
Coordination should happen at the sample and drawing stage. A gate and cladding panel may use different base profiles, coating processes or production batches even when both are called “black” or “walnut.” Physical samples help determine whether the finishes are intended to match exactly or simply complement one another. Designers can also align visible lines, such as running a horizontal fence rhythm into a garage surround or continuing vertical cladding lines near a pedestrian gate.
Installation sequencing matters as well. If the cladding terminates at a gate post, railing or patio column, each trade needs a clear structural and waterproofing boundary. The facade crew should not cut panels around hardware that was installed without considering the final wall plane, and the gate installer should not anchor through a completed cladding face without access to the structure behind it.
Professional Wall Cladding Installation Workflow
A professional wall-cladding project becomes predictable when the work is sequenced around inspection and concealed conditions instead of around how quickly panels can be installed. The first phase is verification: final dimensions are checked, permit and design conditions are confirmed, the substrate is inspected and any required demolition or repairs are completed. The second phase establishes the wall envelope and support plane, including flashing, approved membranes, furring, rails and backing for fixtures.
Measure, verify permits, confirm finishes and document existing conditions.
Correct substrate, moisture, flashing and structural issues before concealment.
Install furring, rails, backing and drainage details to the approved assembly.
Set control lines, panels, trims, corners and penetrations with movement allowance.
Verify alignment, drainage, fasteners, finish condition and final permit items.
Panel installation should begin only after the crew has a clear control line and knows how the run will terminate. T&G profiles are engaged consistently, click panels are fully seated and cuts are placed where trims or returns conceal them. Openings and fixtures are installed from planned backing rather than improvised after the wall is closed. On larger projects, completed areas should be protected from other trades because ladders, stucco work and masonry cutting can damage a finished powder-coated surface quickly.
The final phase is not cosmetic cleanup alone. Installers should confirm that drainage openings remain clear, trims are secure, sealant is limited to approved locations, panels can move as intended and fixtures are mounted without deforming the face. Where inspections are required, concealed layers should have been approved before closure. The project is ready for handover when the wall looks consistent and the envelope details behind it have been documented.
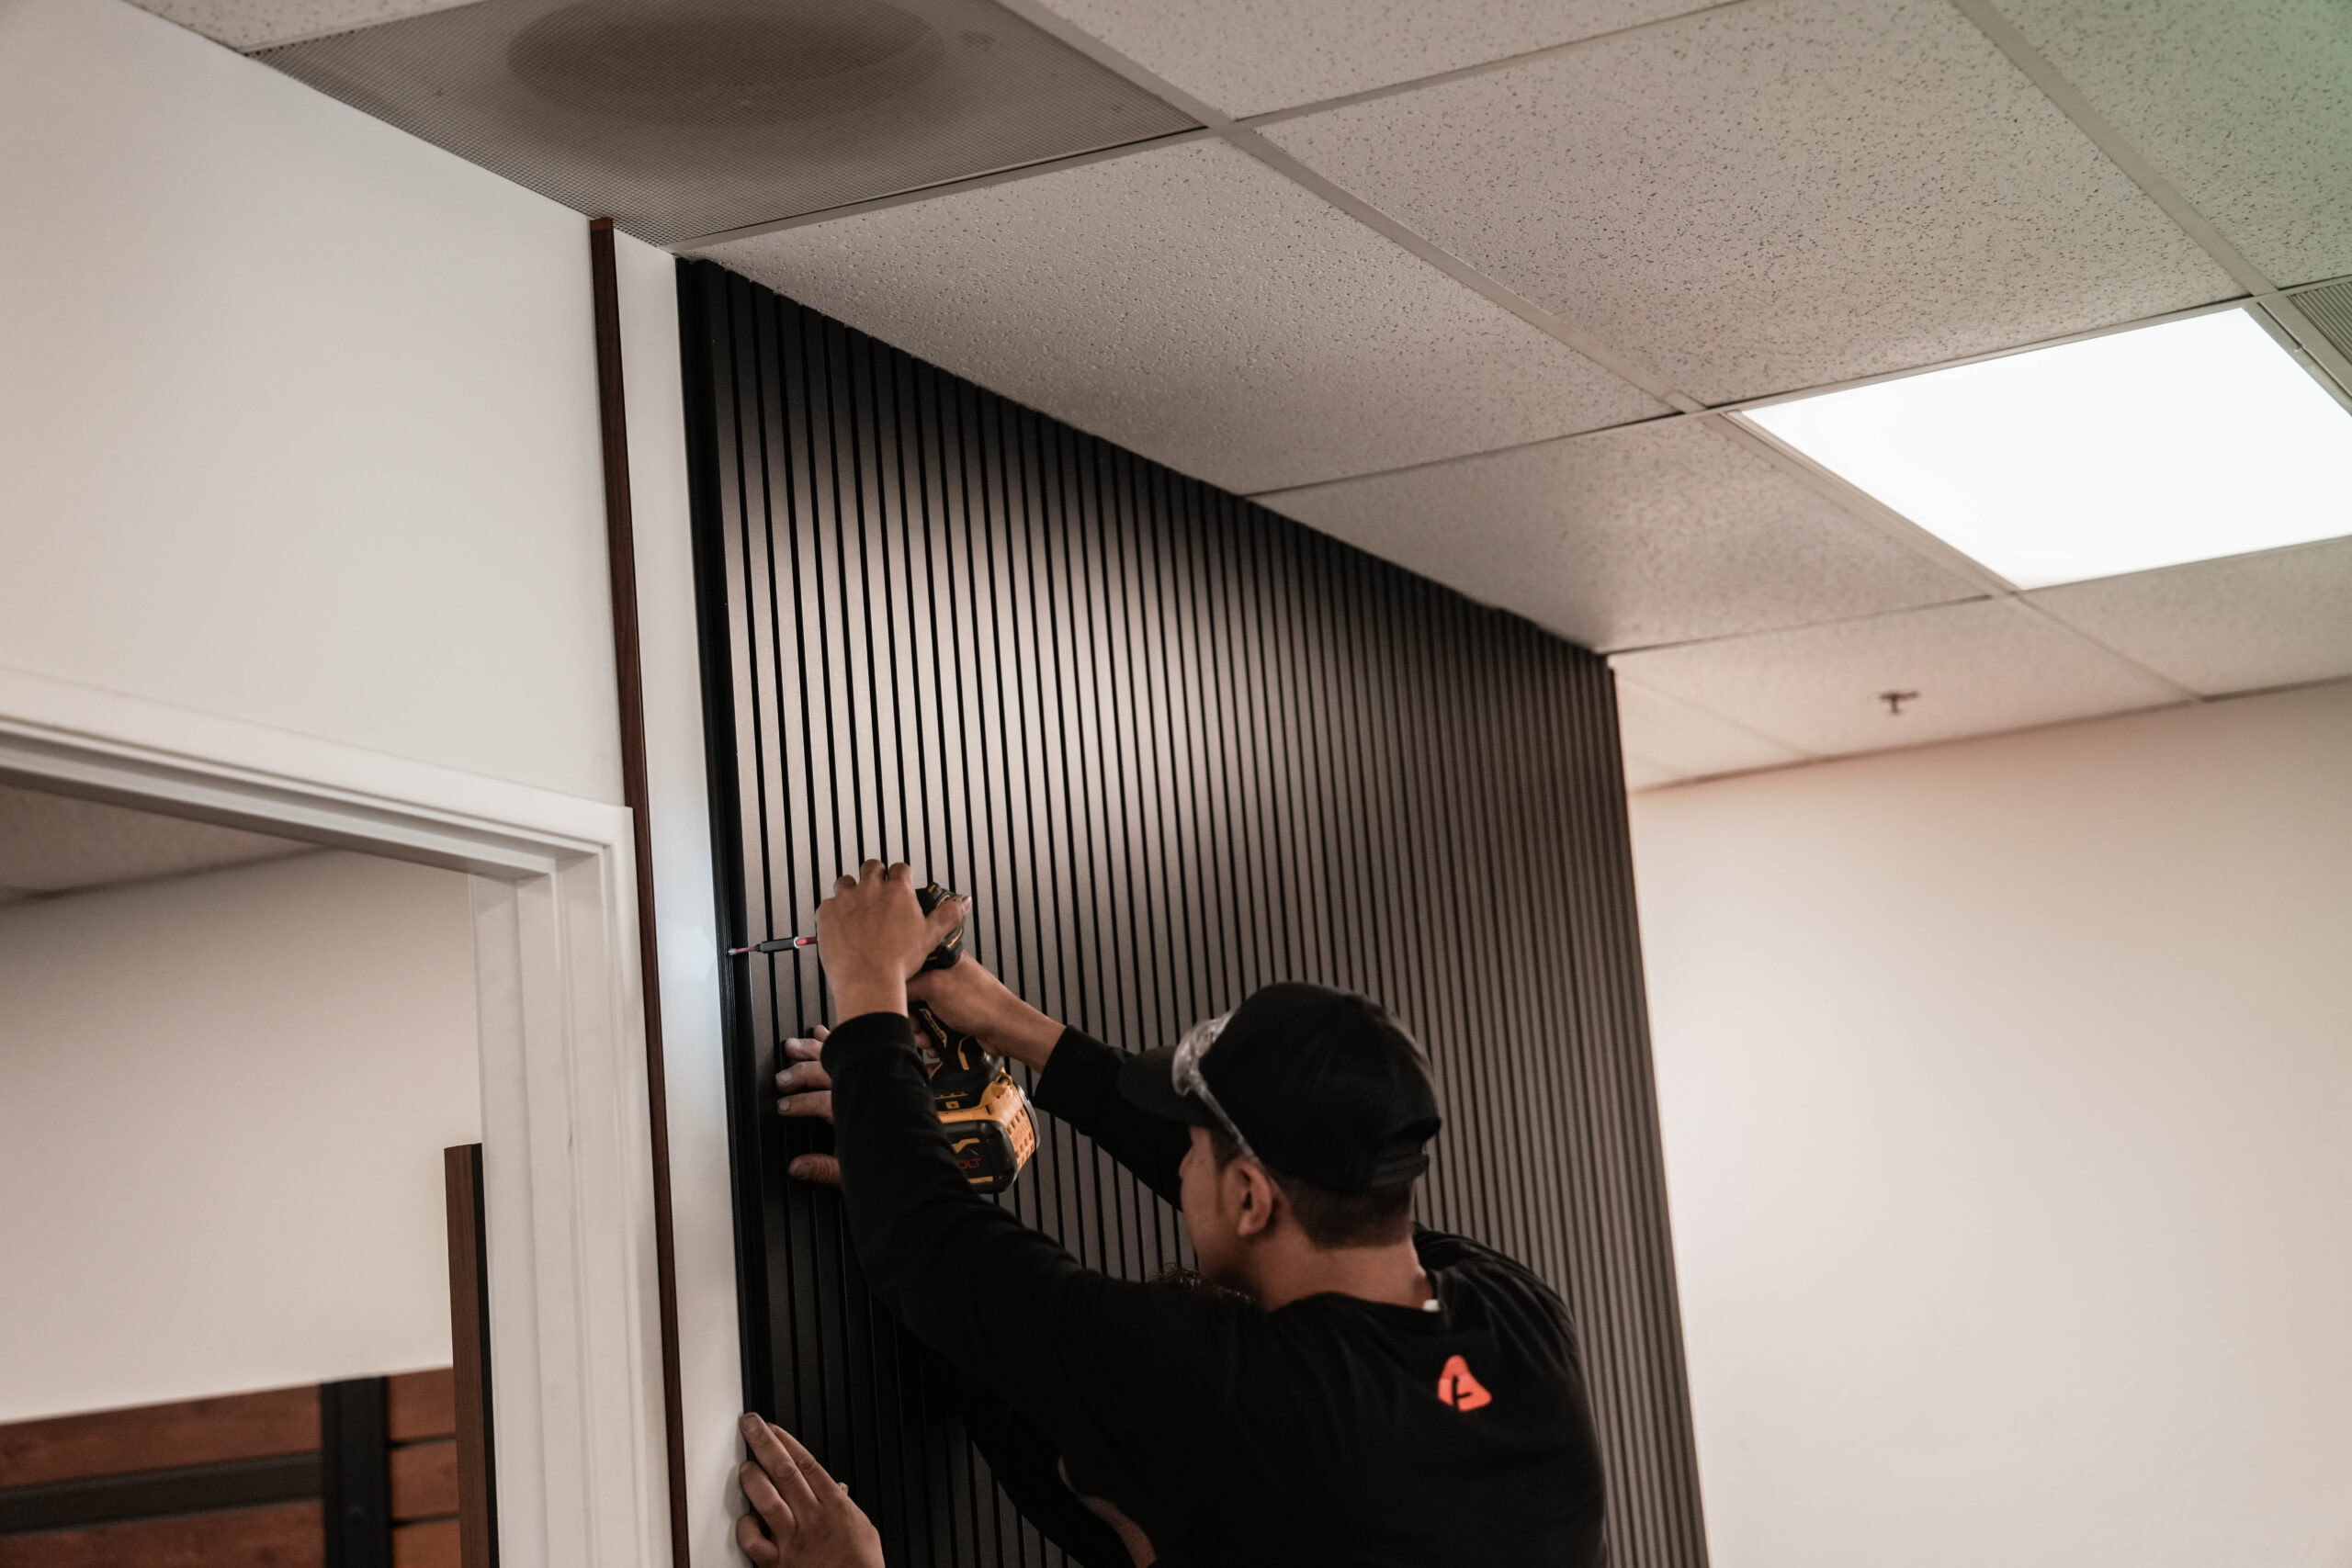
Final Inspection for an Aluminum Cladding Installation
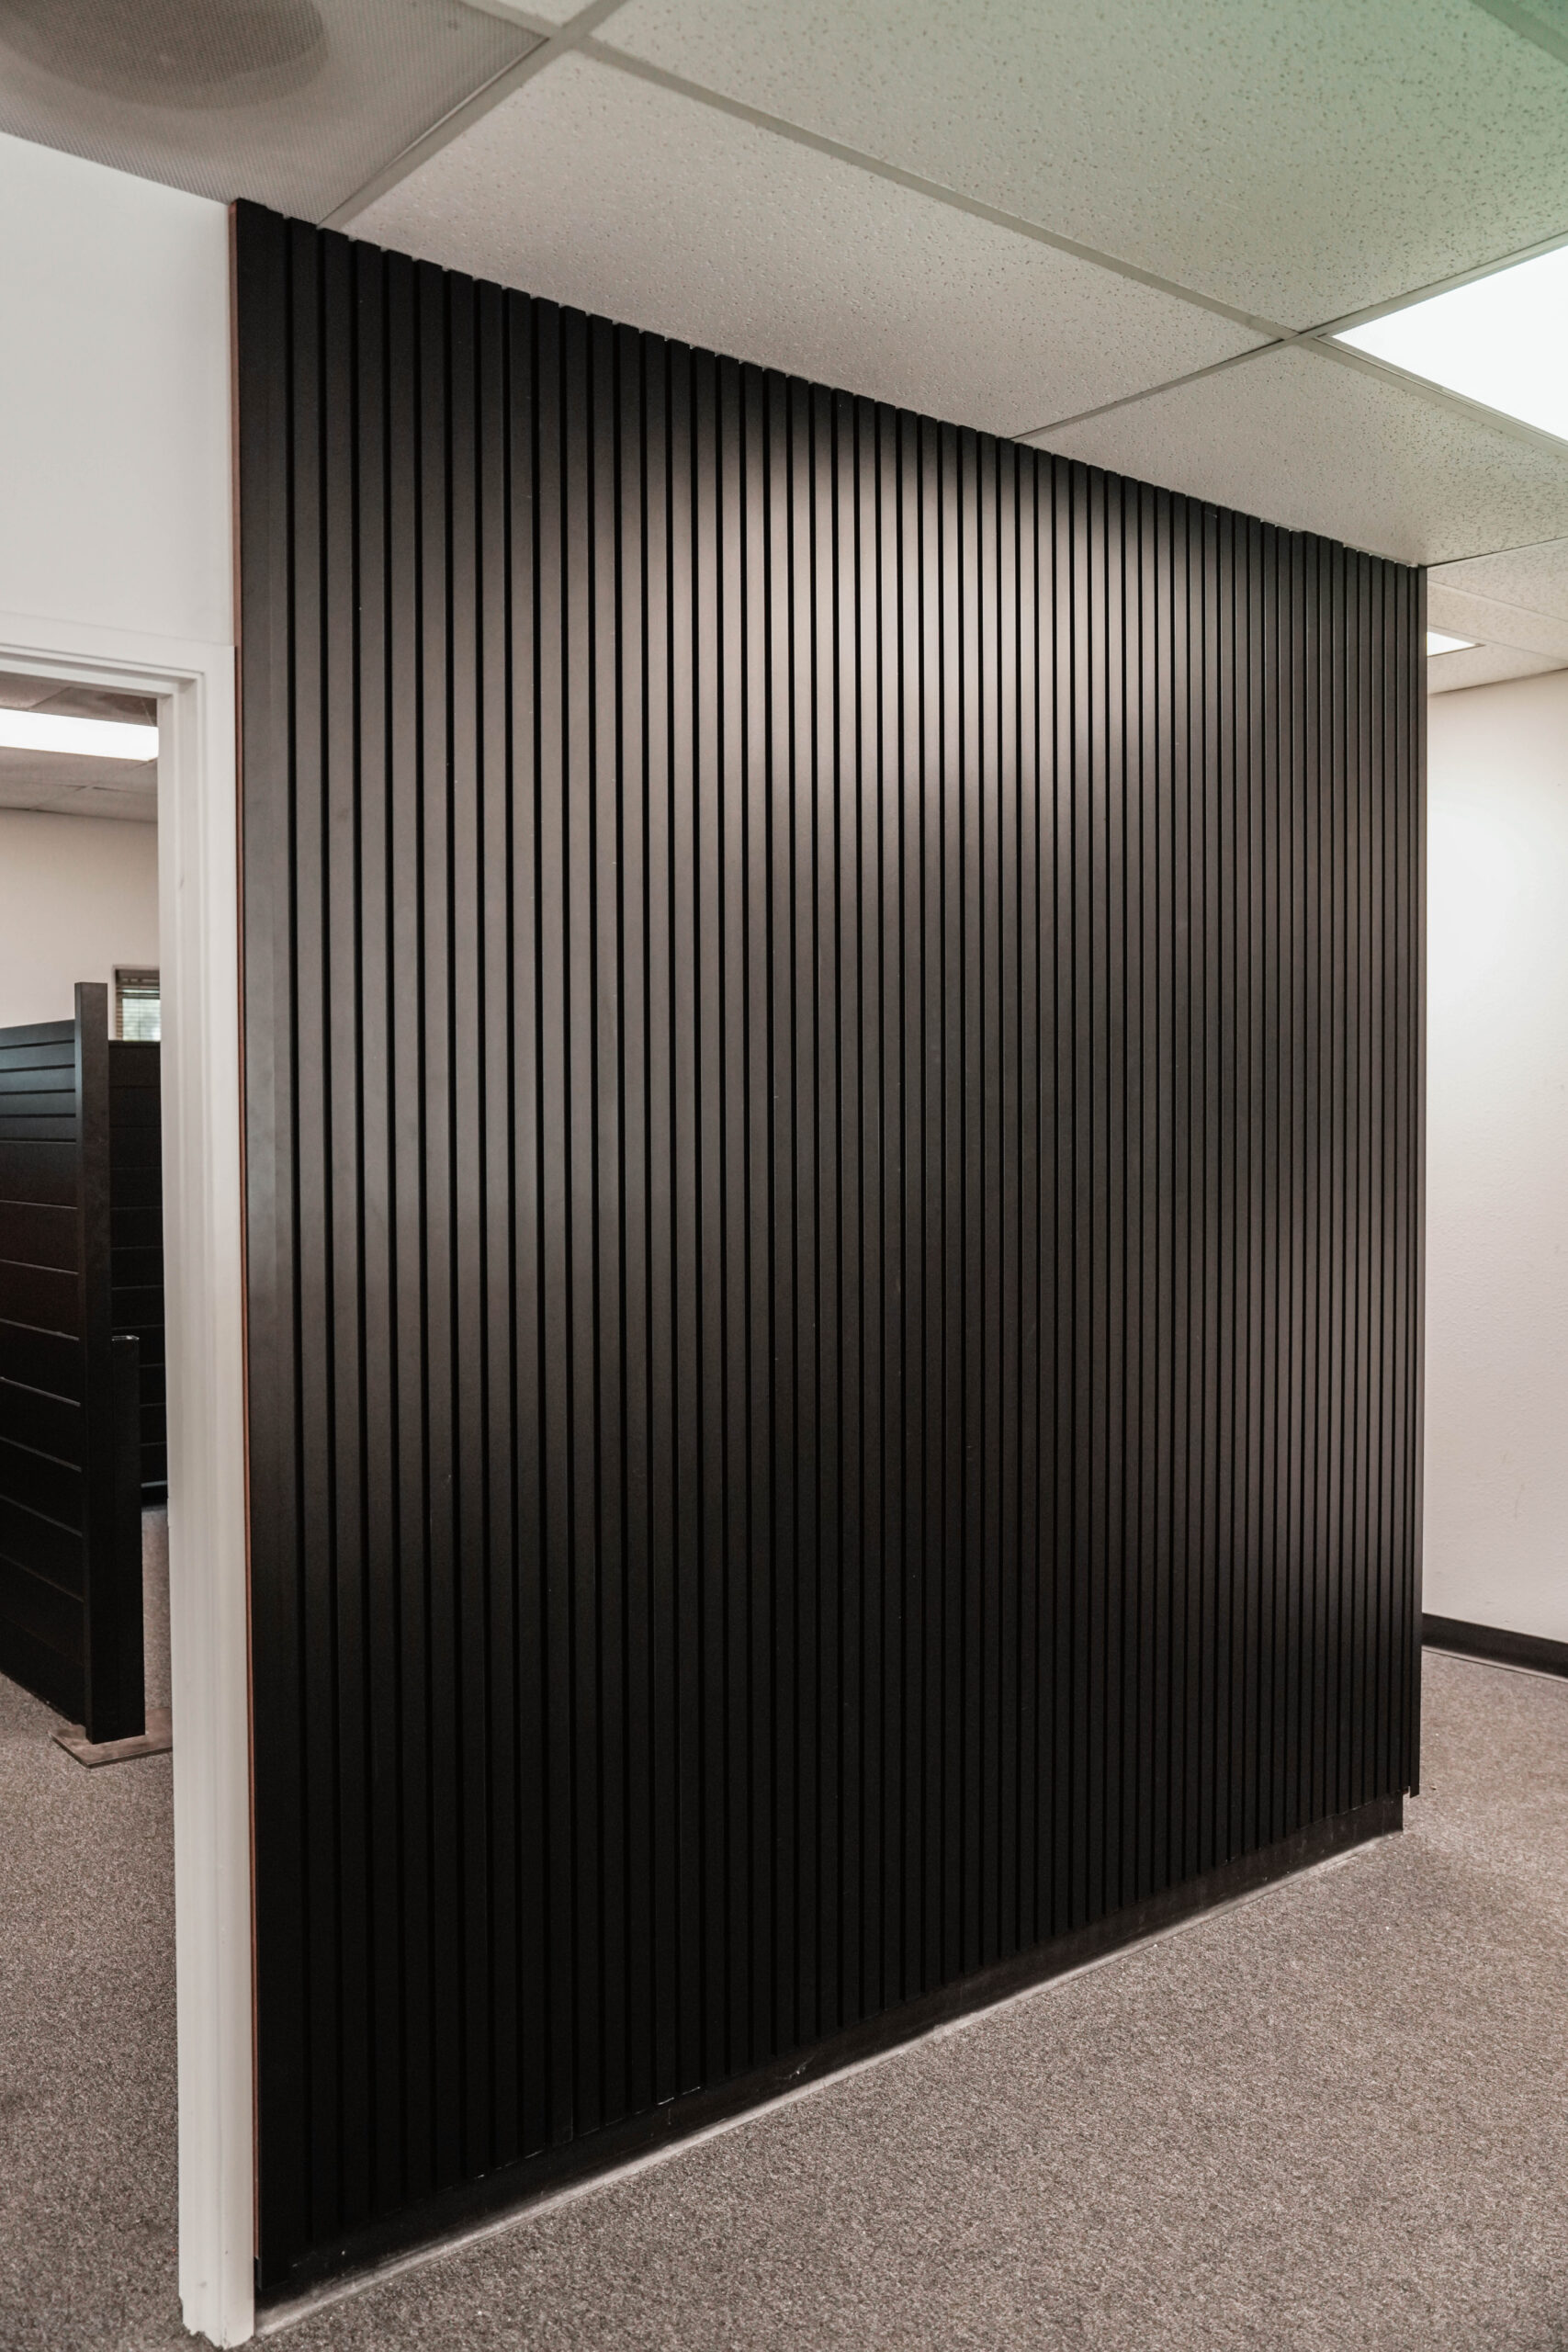
Final inspection should evaluate the project at two levels: the wall-envelope details that protect the building and the visual consistency that defines architectural cladding. From a distance, installers should look for waves, panel drift, irregular shadow lines and noticeable color variation. Up close, they should verify that corners are straight, profiles are fully engaged, exposed cuts are protected, trims are secure and fasteners have not distorted the aluminum.
Drainage and penetrations deserve a separate review. Bottom exits should remain open, window and door flashings should not be blocked by decorative sealant, and fixtures should be mounted to stable backing. Roof edges and parapet caps should direct water outward, while downspouts and other drainage elements should remain functional after the wall plane has moved outward. If the project includes removable click-system panels, at least one service condition should be checked so future access is realistic.
The finish should also be reviewed before the crew leaves. Small scratches can be documented and repaired with compatible touch-up where appropriate, but bent profiles, deep damage or obvious field rework should not be accepted as routine. A professional cladding project should feel precise at both ten feet and ten inches because the same control of line, attachment and finish is visible at every scale.
Maintenance After Wall Cladding Installation
Powder-coated aluminum is low maintenance, but a Santa Monica exterior still benefits from regular cleaning because airborne salt, dust, irrigation minerals and pollution can accumulate on the facade. Fresh water and mild detergent are usually appropriate for routine cleaning when used in accordance with the finish guidance. Abrasive pads, harsh alkaline cleaners and aggressive pressure washing can damage coatings or force water into joints that were not designed for direct high-pressure spray.
Coastal properties should pay particular attention to sheltered areas that do not receive natural rain washing, such as soffits, deep entries and the underside of overhangs. Salt can concentrate there even when the main wall appears clean. Fasteners, exposed hardware and sealant joints around windows or fixtures should be inspected periodically, while drainage openings at the base should remain free of leaves, soil and landscaping debris.
Maintenance also includes watching the building around the cladding. A new roof leak, failed window seal, moved downspout or cracked parapet cap can introduce water behind an otherwise sound aluminum system. Staining or unusual moisture should be investigated rather than simply cleaned repeatedly. Keeping project drawings, finish information and installation photos makes future service much easier because contractors can understand what is behind the panels before drilling or removing anything.
How Long Does Wall Cladding Installation Take in Santa Monica?
There is no reliable one-size-fits-all installation duration because the visible panel work may be the shortest part of the project. A small interior feature wall on a flat substrate can move quickly, while an exterior facade with scaffolding, stucco repair, window flashing, electrical relocation, permits and custom trims can require several separate phases before the first finished profile is installed. The schedule should therefore be built from the wall condition and project scope rather than from square footage alone.
Permit and planning review can also influence timing in Santa Monica. A minor facade repair that qualifies for Same-Day Review follows a different path from a broader exterior remodel, a coastal-zone project or work on a historic resource. Fabricating custom lengths before those approvals are stable can create expensive rework if the City or project team changes a flashing detail, panel direction or visible color. Production should be tied to an approved and field-verified design.
Weather and access matter as well. Coastal moisture, high winds, limited staging, active sidewalks and coordination with other trades can affect daily productivity. A good schedule includes substrate repair, concealed-layer inspection, material delivery, panel installation and final cleanup as separate milestones. The objective is not to advertise the fewest installation days; it is to complete the wall without reopening finished areas because earlier steps were rushed.
How to Choose a Wall Cladding Installer in Santa Monica
A cladding contractor should be able to discuss the wall behind the panels as comfortably as the color of the panels themselves. Ask how the installer evaluates stucco, concrete or framed substrates, what the proposed support system attaches to, how water drains behind the facade and how windows and doors are flashed. If the entire technical explanation is “we screw the aluminum to the wall and seal the edges,” the project may not be addressing the building envelope with enough depth.
Real project photographs are useful, but look closely at corners, window returns, base conditions and fixtures rather than only wide finished elevations. Ask to see active installation photos where the support plane and fastening approach are visible. Those images reveal whether the crew plans concealed work or simply focuses on the final face. Contractors should also be able to explain how they protect powder-coated material during cutting and how they handle coastal fasteners and dissimilar metals.
The proposal should define scope clearly. Substrate repair, waterproofing, permits, scaffolding, electrical relocation, fixture remounting, trim, demolition and painting of adjacent surfaces may or may not be included. Comparing one total number without normalizing those responsibilities can make a cheaper proposal look better even though substantial work has been excluded. For Santa Monica, the contractor should also understand when the owner needs City Planning, Building and Safety or Coastal Commission guidance before installation proceeds.
How Santa Monica Neighborhood Conditions Change Cladding Installation
Santa Monica is compact, but installation conditions vary significantly from one part of the city to another. Near the beach and Ocean Avenue, salt exposure and public-facing facades make coating, cleaning and design review especially important. North of Montana and in other residential areas with older homes, the challenge may be integrating new aluminum with existing stucco, wood, brick or mid-century materials without erasing the architectural character of the original building.
Salt, wind and visibility
Prioritize exterior-grade finish, compatible hardware, routine fresh-water cleaning and a support system appropriate to the site exposure.
High-end residential renovation
Entry volumes, courtyard walls and garage surrounds can use aluminum as a modern contrast while preserving the main house character.
Public-facing facade work
Coordinate storefronts, signs, utilities, sidewalk staging, design review and tenant access before panels are fabricated.
Occupied-building logistics
Panel installation may need to work around residents, balconies, utilities and multiple floor levels with more complex staging.
Neighborhood identity should influence the visual strategy even when the installation system remains similar. A dramatic black vertical wall can be appropriate on a contemporary commercial facade, while a warmer wood-look accent may integrate better with a residential courtyard. Local installation expertise is partly technical and partly contextual: understanding where the cladding should be visually dominant and where it should quietly support the building around it.
Common Wall Cladding Installation Mistakes
Covering a damaged wall
Cladding hides defects from view but does not stop structural movement, leaks, rot or failed flashing behind the new surface.
Skipping a flat support plane
Long profiles magnify substrate waves, producing a facade that looks uneven even when every panel is new.
Using sealant as the water strategy
A reliable exterior wall needs drainage and flashing behind the cladding instead of depending on one exposed bead of caulk.
Fabricating before approvals
Permit, planning or coastal comments can change visible details after custom-length material has already been finished.
Ignoring thermal movement
Pinning long aluminum runs too tightly can create buckling or stress when surface temperatures change.
Anchoring only into stucco
The finish layer is not automatically the structural support for an exterior cladding assembly.
Using incompatible coastal hardware
Fasteners and support metals need to be selected with salt exposure and galvanic corrosion in mind.
Planning fixtures after panels
Lights, outlets and cameras need structural backing and clean penetrations before the finished wall is closed.
Closing drainage at the base
Soil, paving and sealant should not trap water where the wall assembly is intended to drain.
Accepting excessive field touch-up
A premium factory finish should be protected during handling rather than repaired repeatedly after installation damage.
Most cladding failures are not caused by the center of a panel. They develop at transitions, penetrations, supports and hidden moisture conditions. That is why a professional installation invests disproportionate attention in the first and last few inches of every wall, around every opening and at every change in material.
Santa Monica Wall Cladding Installation Checklist
- Confirm the property jurisdiction and project scope
- Determine whether the property is in the Coastal Zone
- Check historic-resource or landmark status
- Confirm Same-Day Review or formal plan-review path
- Measure the finished wall and every opening
- Document corners, roof edges and grade changes
- Photograph existing cracks, stains and moisture evidence
- Decide whether existing stucco remains or is removed
- Verify structural attachment locations
- Define the water-resistive and flashing strategy
- Plan furring, rails or clips to create a straight plane
- Confirm drainage and ventilation cavity requirements
- Choose T&G or click-system cladding
- Select vertical or horizontal orientation
- Lay out starts, ends and visible narrow cuts
- Detail outside and inside corners
- Detail window heads, jambs and sills
- Plan lights, cameras, vents, outlets and hose bibs
- Coordinate bottom drainage and ground clearance
- Coordinate roof, parapet and soffit terminations
- Allow for aluminum thermal movement
- Specify coastal-compatible fasteners and isolation
- Approve physical finish samples
- Coordinate wood-look grain direction if used
- Confirm insulation or thermal-break requirements
- Coordinate scaffolding and sidewalk access
- Schedule concealed-layer inspections where required
- Protect powder-coated material during staging
- Photograph concealed conditions before closure
- Complete final alignment, drainage and finish inspection
A project that can answer every item on this checklist before the installation crew begins is far less likely to rely on field improvisation. The purpose of preconstruction planning is not paperwork for its own sake. It is to make sure the material that arrives on site has a clear place to start, a clear place to stop and a wall behind it that is ready to support decades of exposure.
Wall Cladding and Santa Monica Planning Resources
A cladding project becomes easier to manage when the design team, installer and property owner are working from the same current information. These resources provide the most useful starting points for system selection, local permit review and coastal or historic planning questions.
Frequently Asked Questions About Wall Cladding Installation in Santa Monica
These questions address the practical issues that matter most before a Santa Monica cladding project moves into fabrication: existing stucco, permits, coastal exposure, rainscreen logic, windows, thermal movement, fire planning, insulation, contractor selection and long-term maintenance.
Can aluminum wall cladding be installed over stucco in Santa Monica?
Yes, aluminum wall cladding can often be installed over existing stucco when the wall is sound and the attachment system reaches suitable structure or approved anchors behind the finish. The stucco should be inspected for significant cracking, moisture damage, loose areas and failed flashing first. Furring or rails can then create a straight support plane, but the added wall thickness must be coordinated around windows, doors, roof edges and other transitions.
Does wall cladding installation in Santa Monica require a building permit?
It depends on the scope. Santa Monica currently reviews permit applications under the 2025 California Standards Code, effective January 1, 2026, and the City lists certain minor facade remodels and repairs as possible Same-Day Review projects. Larger alterations, structural work, electrical changes or projects that exceed Same-Day criteria can require formal plan review. The permit path should be confirmed before custom cladding is fabricated.
What is the best wall cladding material for a coastal Santa Monica property?
Aluminum is a strong coastal option because it does not develop red iron-oxide rust like carbon steel and can be finished with durable architectural coatings. The complete system still matters. Fasteners, clips, support rails and adjacent metals should be selected for salt exposure, dissimilar-metal contact and the building’s wind conditions. Routine fresh-water cleaning also helps remove salt deposits from sheltered areas of the facade.
What is the difference between T&G and click-system aluminum cladding?
Tongue-and-groove cladding uses interlocking profile edges and concealed fastening to create a continuous permanent facade. Click-system cladding uses clips, rails or snap-in engagement to create a similarly clean face with faster placement and, in some systems, easier panel removal. The better choice depends on wall height, exposure, access needs, approved system limitations and the architectural design rather than installation speed alone.
Does aluminum wall cladding need a rainscreen behind it?
Many exterior cladding assemblies use rainscreen principles, but the exact wall build-up depends on the approved project and cladding system. The important concept is that the visible panels should not be expected to provide the building’s only moisture protection. A reliable backup wall, integrated flashing and a controlled drainage path should manage water that reaches the space behind the cladding and allow the assembly to dry.
Can aluminum cladding be installed directly onto concrete or block?
It can be attached to concrete or CMU when the anchor design is appropriate for the actual substrate, but direct attachment is not always the best way to create a flat facade or drainage space. Solid concrete, hollow block and grouted CMU cells provide different anchor conditions. Furring or rails are often useful for establishing a straight support plane and coordinating drainage, insulation or irregular existing walls.
Is wood-look aluminum cladding suitable near the ocean?
Yes. Wood-look aluminum can provide a warm timber appearance while keeping aluminum as the primary exposed cladding material. It still needs a durable exterior finish, careful handling and coastal maintenance. The installation should also conceal cut edges, coordinate grain direction and use compatible fasteners and support components. Regular fresh-water washing is useful where salt collects on sheltered walls and soffits.
How is aluminum cladding installed around windows and doors?
The wall-envelope flashing is resolved first so water from above and around the opening drains outward. The cladding support plane is then coordinated with the new wall thickness, and dedicated trims or returns finish the panel edges at the frame. Sills, jambs and heads should not rely on decorative sealant alone. The detail needs to connect the visible aluminum to the backup water-management system behind it.
Can wall cladding hide damaged stucco or an old facade?
It can visually cover an older surface, but damaged walls should not simply be concealed. Significant cracking, moisture staining, loose stucco, rot, failed flashing or structural movement should be investigated and repaired first. Cladding works best as a new protective and architectural layer over a sound wall. Using it as a cover-up can make future leaks or deterioration harder to locate and more expensive to repair.
How does aluminum cladding handle thermal expansion?
Aluminum expands and contracts as temperature changes. Proper systems account for that movement through clips, slotted holes, fastener torque, expansion gaps or other manufacturer-specific details. Long dark panels in direct sun can experience larger surface-temperature changes than shaded panels. Installers should avoid rigidly pinning every profile or eliminating required termination gaps, because restrained movement can lead to buckling, bowing or stress at corners.
Is aluminum wall cladding noncombustible?
Aluminum is noncombustible as a base metal, which can make it useful in California projects seeking to reduce combustible exterior materials. The complete wall assembly can still include membranes, insulation, furring, sealants and accessories with different fire characteristics. Compliance therefore depends on the approved wall system, building type and current code requirements rather than on the aluminum face alone.
Can aluminum wall cladding help insulate a building?
The aluminum panel itself should not be treated as insulation unless the documented system includes a specific thermal component. Cladding can be coordinated with exterior insulation, thermal-break clips or a ventilated cavity as part of a broader wall assembly. The actual energy performance depends on insulation thickness, attachment geometry, framing, glazing and continuity around openings, so buyers should rely on documented assembly data.
How long does wall cladding installation take in Santa Monica?
The schedule depends on much more than wall area. A small feature wall on a flat, prepared substrate can be installed relatively quickly, while a permitted exterior renovation may include demolition, substrate repair, waterproofing, subframing, inspections, custom fabrication, electrical relocation and scaffolding. Coastal or historic planning review can add time before construction begins. The best schedule is built from the actual wall condition and permit path.
How do I choose a wall cladding contractor in Santa Monica?
Look for an installer who can explain substrate assessment, water management, flashing, support rails, thermal movement, coastal hardware and finish protection in addition to panel styles. Review real installation photos, especially corners, openings and work-in-progress conditions. The proposal should clearly define responsibility for demolition, substrate repair, permits, scaffolding, electrical relocation, waterproofing and adjacent finish work so competing bids can be compared fairly.
Does Santa Monica Coastal Zone status affect a cladding project?
It can. The City advises that properties in the California Coastal Zone may need California Coastal Commission approval in addition to City permits. Exterior material changes can therefore require more planning review depending on the property and project scope. Santa Monica and the Coastal Commission are currently working toward a comprehensive Local Coastal Program, so applicants should verify the current approval path before beginning a visible coastal facade alteration.
How should aluminum cladding be maintained in Santa Monica?
Routine maintenance is generally straightforward. Wash the panels with fresh water and mild detergent according to the finish guidance, with more attention to sheltered areas where salt and pollution accumulate. Keep drainage openings clear and inspect sealant, parapet caps, window transitions and exposed hardware periodically. If staining or moisture appears repeatedly, investigate the water source instead of treating the issue as a surface-cleaning problem.
Final Thoughts: The Best Cladding Installation Starts Behind the Finished Panels
A finished aluminum facade can look effortless, but that simplicity is the result of decisions made before the first visible panel is installed. The existing wall has to be sound. The permit and planning path has to be understood. Flashing has to move water outward. The support plane has to be straight. Corners, windows, doors, roof edges and penetrations have to be dimensioned. Fasteners have to work with the substrate and the coastal environment. Long profiles need room to move as temperature changes.
Once those conditions are resolved, the cladding itself becomes much easier to execute well. T&G systems can build a continuous permanent surface with hidden fastening. Click systems can create a clean removable or faster-installing panel field where the system is appropriate. Vertical profiles can emphasize height, horizontal profiles can extend the building visually, and wood-look aluminum can bring warmth to a coastal facade without making exposed wood the primary exterior material.
Santa Monica adds reasons to take that planning seriously. Salt air makes finish and hardware selection more important. Older stucco and mid-century buildings make substrate assessment more important. Highly visible street and ocean-facing facades make color and proportion more important. Current City permitting, historic-resource review and Coastal Zone requirements can also affect when a project is ready to fabricate. Treating those issues as part of the cladding design is more efficient than discovering them after material arrives.
The installer’s work should therefore be judged in more places than the center of the wall. Look at the sill under a window, the return beside a door, the bottom drainage edge, the parapet cap, the corner extrusion, the fixture mounting and the hidden support system shown in construction photos. Those are the places where weather performance and visual precision meet.
When the wall behind the aluminum is prepared correctly and the visible profiles are installed with the same level of control, cladding becomes more than a facade upgrade. It becomes a durable exterior system that can modernize a property, reduce finish maintenance and connect gates, fences, patios and other architectural elements into one coherent material language.