Step 1: Plan Your Fence Gate Layout
Before cutting or drilling, the first step in how to build a fence gate is creating a solid and accurate plan. Begin by measuring your gate opening carefully, leaving a small clearance (½–1 inch) for hinges and latch movement. Make sure your fence posts are level, stable, and properly set in concrete — strong posts are essential for a gate that doesn’t sag.
Choose your material wisely. Wood is warm and traditional but needs frequent upkeep. Aluminum and composite are modern, low-maintenance, and ideal for humid or coastal climates. Decide early on whether you want a privacy-style gate with solid panels or an open design with horizontal or vertical slats.
Finally, gather your tools and hardware before starting. You’ll need a tape measure, saw, drill, level, screws, hinges, and a latch kit. Once everything is ready, you can move to the fun part — building.

Step 2: Build the Gate Frame
The frame is the backbone of your gate and a critical part of how to build a fence gate correctly. Cut two horizontal rails and two vertical stiles to match your measurements. Lay them out flat and ensure all corners form perfect 90-degree angles using a carpenter’s square.
To prevent sagging — the most common DIY gate issue when learning how to build a fence gate — install a diagonal brace that runs from the bottom hinge side up to the opposite corner. This transfers the gate’s weight back to the hinges and keeps it square over time. Use screws instead of nails for stronger joints and longer life.
If you’re using an aluminum or steel frame, many hardware stores and online suppliers sell preassembled DIY kits that simplify this step and ensure precise alignment.
Step 3: Add Panels or Slats
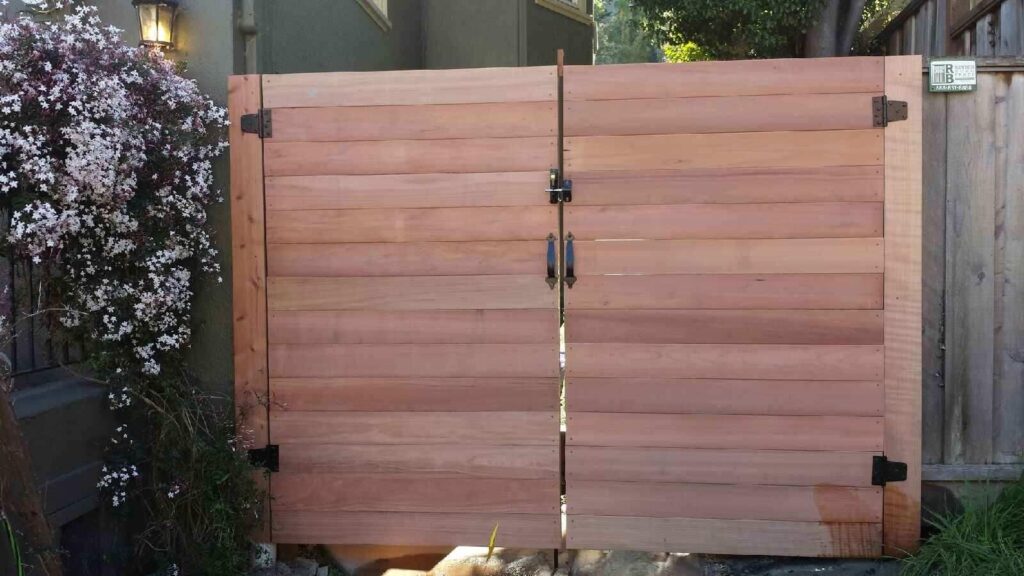
Now it’s time to attach your boards, slats, or pickets. Whether you’re using wood, aluminum, or composite material, space them evenly and fasten securely. Horizontal slats give a sleek modern look, while vertical boards provide a more traditional style.
If privacy is your goal, overlap boards slightly or use tongue-and-groove panels to eliminate gaps. Double-check alignment as you go — uneven spacing can throw off your gate’s overall appearance. For a longer-lasting finish, choose weather-resistant materials and fasteners.
Step 4: Install the Gate
This is where precision matters most when learning how to build a fence gate. Attach your hinges to the gate first, usually one near the top and one near the bottom. Have a helper hold the gate in place, ensuring it’s level, and mark hinge locations on the post. Pre-drill and secure the hinges with heavy-duty, rust-resistant screws.
Next, install your latch hardware so it aligns smoothly when the gate closes. Test the swing several times. The gate should move freely without dragging or hitting the post. If necessary, make small adjustments to hinge positioning. Once the swing feels right, tighten everything firmly.
Step 5: Finishing and Maintenance
With your gate installed, it’s time to protect your work and keep it looking sharp. If you built a wooden gate, apply an exterior-grade sealant, paint, or stain to protect it from moisture, UV rays, and insects. For aluminum or composite, simply wipe it clean with mild soap and water a few times a year — no sealing or painting required.
Here’s a quick reminder of the five DIY steps you just completed:
-
Plan and prepare your measurements and materials.
-
Build a square, sturdy gate frame.
-
Add slats or panels for design and privacy.
-
Install hinges and latch with precision.
-
Finish and maintain for long-term durability.
Regularly inspect your hinges, latch, and fasteners every few months to catch any wear early. A few minutes of upkeep each year can add decades to your gate’s lifespan.
Fence Gate Framing: The Foundation of a Strong Gate
Before installing any panels or hinges, proper fence gate framing ensures your structure stays square and solid over time. A gate frame acts like the skeleton—if it’s weak or uneven, the entire gate will eventually sag.
When building a gate in a fence, use treated lumber, welded aluminum, or powder-coated steel for best results. Always include a diagonal brace that runs from the bottom hinge side up to the opposite corner. This distributes weight evenly and prevents movement, especially in high-traffic or wide entry gates.
Building a Gate for a Fence: Planning Like a Pro
If you’re building a gate for a fence for the first time, start by planning your layout carefully. Measure the opening width between the posts and decide how much clearance your hinges and latch will need. Accuracy here ensures your gate opens smoothly without sagging or scraping against the ground.
Use a level and string line to make sure your posts are perfectly plumb before securing them in concrete. A slight tilt can throw off your entire swing line and cause uneven tension on the hinges. When planning, consider your material choice—aluminum fence gates are the easiest to install since they’re lightweight, rust-free, and require minimal maintenance compared to steel or wood.
For DIY builders, pre-marking hinge positions before attaching the frame can prevent costly mistakes. Always pre-drill pilot holes and use corrosion-resistant screws or bolts for a long-lasting connection. Before tightening everything, swing the gate a few times to confirm smooth movement and alignment.
Pro installers recommend adding a diagonal brace or tension cable for wider gates—this keeps the frame from sagging over time. A well-built aluminum gate will stay square and aligned even with frequent use and exposure to the elements.
Fence Gate Framing: The Foundation of a Strong Gate
Learning how to build a gate in a fence is easier than it sounds. Start by marking your post spacing, then cut your rails and stiles to match the opening. Assemble your frame flat on a level surface, secure joints with screws, and install hinges before lifting the gate into place.
For a seamless finish, align your gate boards or slats with the rest of the fence so it appears integrated rather than attached as an afterthought.
Make a Gate for Fence: Quick DIY Tip
If you want to make a gate for fence projects quickly and cleanly, go with a pre-fabricated aluminum or steel gate kit. These kits are engineered for durability and ease, giving you all the essentials—cut-to-size slats, brackets, hinges, and latch hardware—without the measuring headache.
Simply anchor your posts, follow the layout template, and assemble the frame step-by-step using a power drill and a level. For extra stability, pour concrete footings at least 24 inches deep to support the weight and prevent future movement. You can finish the area with matching aluminum fencing for a seamless, professional look.
One major advantage of using an aluminum gate kit is that it eliminates rust and warping—common problems in wood or iron gates. Aluminum’s AAMA-2604 powder-coated finish withstands sun, rain, and coastal moisture, making it ideal for California climates like Los Angeles, Orange County, and San Diego.
If you’re short on time or experience, these DIY gate kits make it possible to complete your project in a single day without welding or cutting. Just measure, anchor, and assemble—it’s the fastest route to achieving a factory-quality gate right in your backyard.
Install Fence Gate Like a Professional
Knowing how to install a fence gate is the final step to completing your outdoor upgrade. Always check alignment twice before tightening hinge bolts. The gate should swing freely, without rubbing or dragging.
If you’re installing a double gate, measure the center gap carefully—about 1 inch allows room for thermal expansion and latch movement. Once installed, your new gate will not only enhance security but also add a polished, architectural look to your fencing system.
FAQs
How wide should my fence gate be?
Most pedestrian gates are 3–4 feet wide. For vehicle access, double gates are typically 10–12 feet wide.
What’s the best wood for building a gate?
Cedar and redwood are naturally rot-resistant and great for outdoor use. Pressure-treated pine is a budget-friendly alternative.
How do I keep my gate from sagging?
Always install a diagonal brace from the bottom hinge corner to the opposite top corner and make sure posts are set in solid concrete.
Can I automate my DIY gate later?
Yes — as long as your frame is strong and aligned, you can easily add a gate motor later. Aluminum and steel gates are ideal for automation.
How deep should gate posts be?
Set posts about one-third of their total length underground (usually 24–36 inches) for maximum stability.
Do I need a permit to build a fence gate?
Small residential gates usually don’t require permits, but always check your local building codes before starting.
Should the gate swing inward or outward?
Most gates swing inward toward your property to avoid obstructing sidewalks or streets.

Ronnie is the CEO and Co-Founder of Globus Gates, bringing hands-on leadership and industry experience to the company’s aluminum gates, fences, patio covers, wall cladding, and exterior systems. His insights focus on helping homeowners, contractors, designers, and builders understand durable, modern, factory-direct, and non-combustible aluminum solutions built for long-term performance.