

Planning • Construction • Handover
Aluminum patio covers / Installation
Aluminum patio cover installation, planned around your Los Angeles property
Aluminum patio cover installation in Los Angeles starts with the house, the ground, and the way you want to use the space. A roof that looks excellent in a photograph can still place a post in the wrong walking path, shade the wrong part of the patio, or require a house connection that the existing wall cannot support. The best result comes from resolving those conditions before the system is fabricated and the first anchor hole is drilled.
For a homeowner in Encino, that might mean keeping an outdoor dining area comfortable without blocking light through a large sliding door. A Woodland Hills project might need careful coordination with a slope, a retaining wall, and a narrow side access. A courtyard in Sherman Oaks may need a compact footprint with a clean ceiling and discreet drainage. Each situation changes the installation conversation, even when the selected aluminum finish and roof dimensions appear similar.
This guide explains how a custom patio cover moves from early measurements to a finished installation. It covers adjustable louvers, solid insulated roofs, open slat systems, and cantilever layouts, with particular attention to foundations, structural connections, rainwater, utilities, and final checks. The aim is to help you understand a proposal, prepare your property, and make design decisions while they are still easy to change.
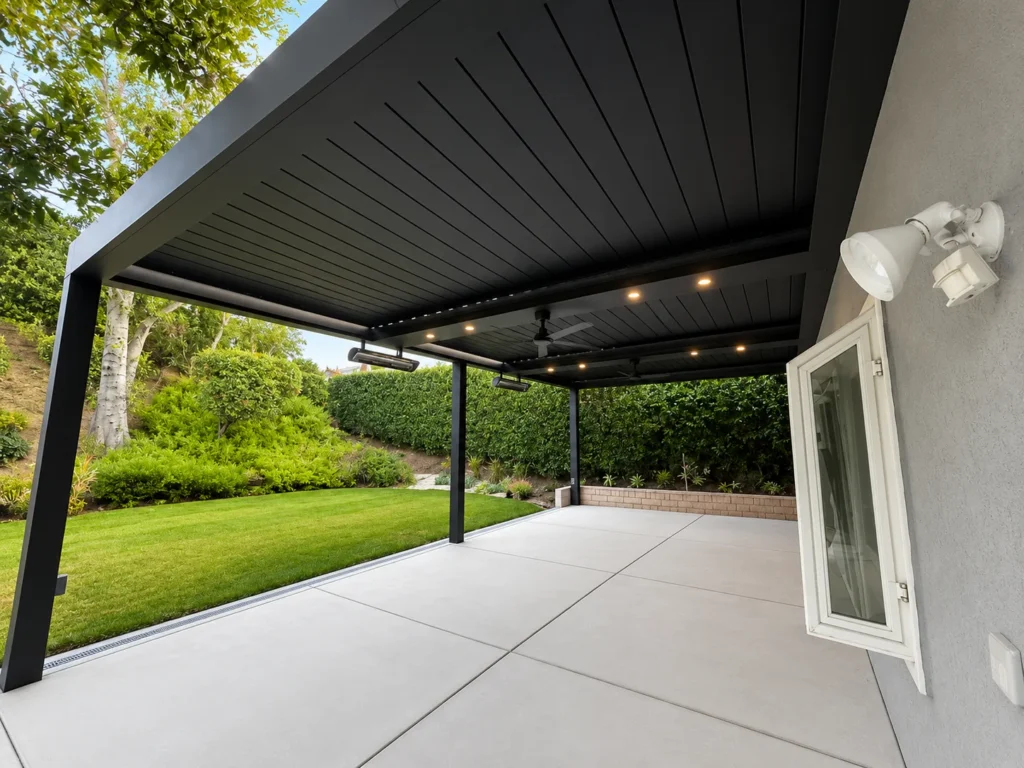
What a complete aluminum patio cover installation should include
A complete installation scope should describe more than the roof and the number of posts. It should identify the site survey, design decisions, supporting structure, required documentation, fabrication, delivery, assembly, utility work, and completion checks. Some projects include all these items under one contract; others involve separate specialists. Either arrangement can work when responsibilities are explicit. Problems begin when the homeowner assumes a task is included and every trade assumes someone else will handle it.
The distinction between material supply and professional installation matters here. A collection of aluminum components does not establish where the roof is allowed to sit, whether a slab can accept the anchors, or how the connection to an existing building will be waterproofed. The installation team must translate the selected system into a project that fits the property. That translation requires measurements, documented details, and coordination with the people responsible for the surrounding work.
Globus Gates offers custom aluminum patio cover systems in several roof styles. For installation in Los Angeles, the useful next level of discussion is how the chosen style will be supported and finished at your address. Ask for the proposed attachment method, post locations, water outlets, accessory locations, and restoration scope together. Those details make it possible to assess the finished space instead of comparing two roof descriptions that may represent very different amounts of work.
Los Angeles properties require an address-specific approach
Los Angeles is a collection of very different installation conditions. A flat yard with direct driveway access presents a different problem from a terraced backyard reached through a narrow passage. Even within the San Fernando Valley, an exposed hillside, a sheltered courtyard, and a garden shaded by mature trees can call for different layouts. A responsible site visit records those conditions instead of assigning a standard installation approach based only on the neighborhood name.
The permitting jurisdiction must also be identified correctly. City of Los Angeles requirements should not be applied automatically to every address in Los Angeles County. The county planning department explains that its zoning service covers unincorporated areas and directs properties inside incorporated cities to their own authorities. This matters when a project discussion expands from an LA neighborhood to nearby Burbank, Calabasas, or another separate city. See Los Angeles County's jurisdiction and zoning guidance.
Use local examples as design context, then verify the actual property. A Woodland Hills address does not by itself establish soil conditions, a wind design value, or permission to attach to a particular wall. A coastal location does not reveal the condition of concealed framing. The contractor needs to inspect, document, and, where necessary, obtain specialist input on the specific structure. That is what makes a custom installation meaningfully different from choosing a standard size online.
Start with the activity you want to cover
Before choosing a roof size, decide what needs shade and when you expect to use it. Dining, lounging, cooking, exercise, and circulation use space differently. A table needs room for people to pull out chairs; a sofa arrangement needs a comfortable route around its edges. An outdoor kitchen introduces appliance access and ventilation considerations. Drawing only the furniture footprints can make a patio look generous on paper while leaving too little room for the people using it.
Time of day changes the design as well. Overhead coverage may feel effective at midday and provide less protection from low afternoon sunlight entering an open side. Observe the patio during the hours that matter to your household, and photograph the sun pattern from the seating position. This gives the designer a more useful starting point than requesting the largest roof that fits between two walls. Shade should fall where you intend to sit, eat, or work.
Consider the adjacent room inside the house at the same time. A deeper solid cover may produce a more sheltered outdoor area while reducing daylight through nearby glazing. An open slat roof or adjustable louver arrangement offers different light control, with different weather protection. Treat that as a household decision rather than a product upgrade ladder. The right system is the one whose everyday behavior matches the way the indoor and outdoor spaces work together.
Measure the usable space, finished levels, and access route
An early homeowner sketch should show the approximate width along the house and the projection into the yard, together with doors, windows, existing drains, and nearby walls. Label the units clearly and distinguish the desired covered area from the clear space between posts. Overall roof dimensions and usable floor dimensions are not interchangeable. A beam overhang, a substantial post, or a gutter edge can affect the practical footprint without being obvious in a simplified drawing.
Final field measurements should include heights and changes in level. Record the relationship between the indoor threshold, patio surface, proposed underside of the roof, and existing eaves. If new paving will raise the patio, the design must use the future finished elevation. Otherwise, a comfortable clearance shown during the first visit can shrink after the hardscape contractor completes the floor. A shared reference elevation helps the different trades describe the same geometry consistently.
Access deserves its own measurement. Long beams and roof components need a workable route from the delivery vehicle to the installation area, with space to turn and stage them. Side gates, overhead branches, stairs, pool edges, and narrow corners can limit that route. The team should also establish where cutting, packaging, and equipment will be placed. Identifying a difficult delivery path early allows the installation plan to account for it before the finished components arrive.
| Measurement | What to record | Why it affects installation |
|---|---|---|
| Width and projection | Desired roof outline and clear space between supports | Establishes coverage and usable area |
| Heights | Threshold, finished floor, eaves, and desired ceiling level | Reveals clearance and attachment conflicts |
| Openings | Door swing, window operation, and service panels | Protects everyday access |
| Ground conditions | Concrete, pavers, soil, drains, and changes in level | Shapes foundation and restoration work |
| Delivery route | Gate width, turns, stairs, and overhead obstructions | Determines handling and staging needs |
Choose the roof by its behavior and installation needs
An adjustable louver roof changes the amount of overhead light and ventilation as its blades move. A solid insulated roof provides continuous coverage with a finished underside. An open slat or lattice system creates patterned shade while remaining open to weather. Those are functional differences, not just visual styles. The selected roof affects drainage, electrical planning, moving clearances, maintenance access, and the assumptions used to design the supporting structure.
Cantilever describes the support arrangement rather than a single roof material. It can open a view or remove a post from a circulation area, but that changes the forces that must be resisted by the remaining supports and foundations. A cantilever layout should therefore be considered while the structure is being designed. It is not a last-minute instruction to leave one support out of a conventional installation drawing.
Globus Gates' patio cover collection includes louvered, insulated, slat, beam, and other custom configurations. For a broader discussion of roof selection, the existing louvered pergola versus insulated patio cover guide compares the main options. Here, the important installation question is what must change beneath and around each roof type to deliver the intended result on your property.
| Roof or layout | Main use | Installation questions to resolve |
|---|---|---|
| Adjustable louvers | Variable light and overhead opening | Blade clearance, drive access, power, gutters, controls |
| Solid insulated roof | Continuous overhead cover and a finished ceiling | Panel support, joints, slope, drainage, accessory support |
| Open slats or lattice | Filtered shade and an open architectural effect | Slat direction, spacing, support, sun pattern |
| Cantilever support | Fewer posts within a selected view or walking area | Engineered connections, foundation demand, projection |
| Combined roof zones | Different functions within one outdoor space | Transitions, water paths, alignment, separate controls |
Attached or freestanding: decide before finalizing the plan
An attached patio cover can create a close relationship between the house and the outdoor room. It may reduce the number of posts near the wall and preserve a clear path through a sliding door. That benefit depends on having a suitable connection to the existing structure. The finished wall surface alone cannot answer the question. The designer needs to know what lies behind it and how forces will be carried into the building.
A freestanding system carries its structure through its own supports and foundations. This can be useful when a house connection is impractical or when the covered area should sit away from the building. It still needs careful detailing near the house. A small gap may admit rain, collect leaves, or complicate cleaning, while a tight fit can interfere with gutters or wall maintenance. Freestanding does not mean independent of every other condition on the site.
Compare the two arrangements with the furniture and circulation plan visible. The structurally convenient post location may not be the best place for a dining chair, and a visually attractive beam height may obstruct a window. The most successful layout resolves those conflicts together. Ask the contractor to explain the consequences of each option for foundations, wall repair, water management, and access before deciding which appearance you prefer.
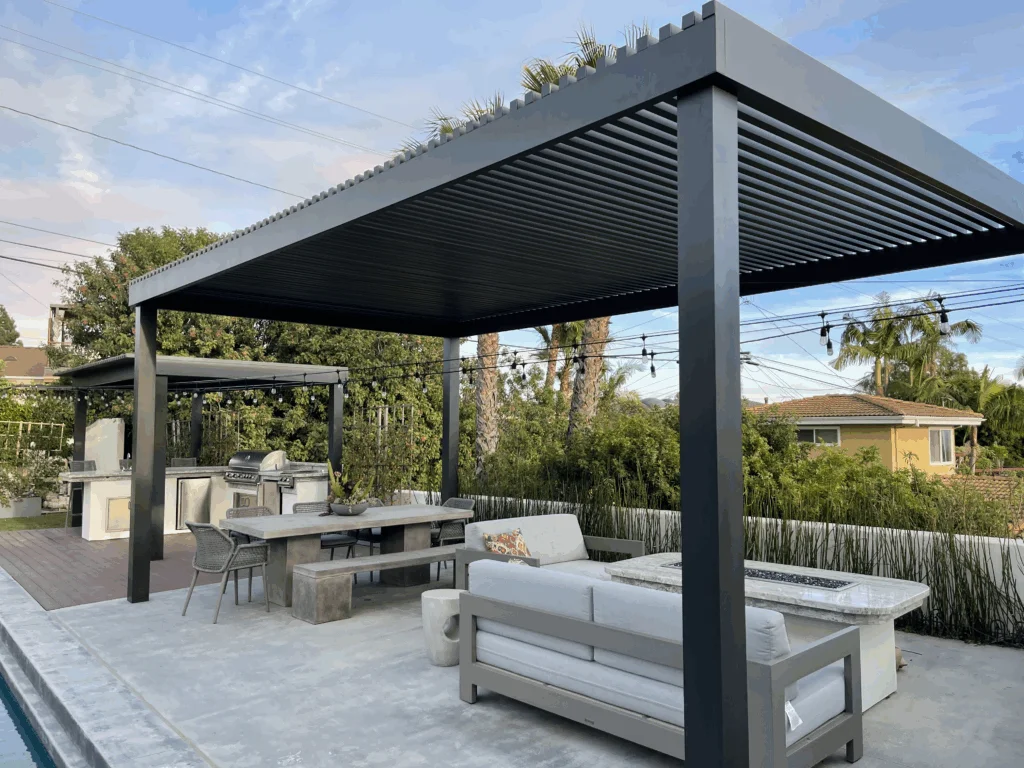
Understand the structural system beneath the clean appearance
A patio cover works as a connected structure. The roof transfers forces to beams, beams transfer forces to posts or building connections, and those supports transfer forces into foundations or the existing building. Engineers often call this the load path. For a homeowner, the practical question is whether every link in that path has been considered. A substantial-looking beam cannot compensate for an inadequate connection at the wall or an unsuitable anchor at the ground.
The structure must be considered for more than its own weight. Wind can push on the roof and pull upward on it, while accessories and later modifications can change the loading. A screen across an open side can introduce forces that were not part of the original configuration. A hanging fixture creates a different support question from a lightweight trim piece. Tell the designer about planned accessories before the structure is approved and fabricated.
Ask for project-specific design information rather than selecting a patio by the largest span shown in an advertisement. A span claim applies to a particular combination of members, connections, support conditions, and design assumptions. It should not be transferred automatically to a taller structure, a different roof, or a more exposed property. The useful comparison is whether the proposed assembly has appropriate documentation for the configuration you are actually buying.
Can an aluminum patio cover be installed on existing concrete?
Existing concrete may be usable, but its suitability has to be established. A patio slab that performs well as a walking surface was not necessarily designed to resist concentrated post forces or uplift through anchors. Surface appearance does not reveal thickness, reinforcement, concrete condition, or what lies beneath it. Treat the slab as an existing condition to investigate rather than as a foundation that has already been approved for a new roof.
The proposed post position also matters. A location near an edge, joint, crack, drain, or previous patch may affect the connection options. Tile or a decorative topping can hide the structural surface and make the available embedment less obvious. Ask how the contractor will confirm the supporting material and whether exploratory work is needed. The answer should be clear before the final price assumes that every post can simply be fastened to the existing patio.
When the existing slab is unsuitable, the solution may involve localized openings and new foundations designed for the structure. That work should be coordinated with the paving pattern and drainage before concrete is cut. Discuss the visible result of restoration, especially with older colored concrete or unusual pavers. A structurally sound foundation repair and an invisible cosmetic match are different deliverables, and the proposal should explain what level of finish restoration is included.
Foundations, pavers, soil, and retaining-wall conditions
Pavers and decorative stone should not be assumed to provide a structural foundation. The design needs to establish what supports the post beneath the finish, how the base is connected, and how the paving will terminate around it. Soil installations raise another set of questions about excavation, footing geometry, surrounding grades, and drainage. The appropriate detail depends on the site and structural design; there is no universal footing size that applies to every aluminum patio cover.
Raised planters and retaining walls require particular care because they can look like convenient support locations. A wall built to hold back soil may not have been designed for additional roof forces, and its visible height says little about its reinforcement or footing. Avoid treating a masonry cap as proof of capacity. A designer should evaluate the existing construction and determine whether a separate foundation or another support arrangement is necessary.
Plan the foundation work together with the landscape contractor. Irrigation lines, tree roots, drainage pipes, and future planting can conflict with the proposed excavations or keep the base area wet. A clean-looking finished patio should also permit inspection of the structural connections that need to remain accessible. Agree on the final ground level around each post and avoid allowing later landscaping to conceal hardware or block a designed water outlet.
Post bases and anchors need a defined installation detail
A base plate is part of a connection system, not proof that any concrete surface is adequate. Anchor type, spacing, embedment, concrete condition, and distance from edges all affect the installation. The approved structural detail and the selected anchor manufacturer's instructions should establish what is required. Simpson Strong-Tie's anchoring resources explain terms such as edge distance; they are useful background, but they do not select an anchor for a specific patio cover.
The crew should know how the bases will be set out, how drilling locations will be checked, and what inspection or documentation is required before concealment. If the field condition differs from the drawing, the solution should be reviewed rather than improvised. Moving an anchor to avoid an obstruction can alter the connection geometry. A change that looks minor on the surface may require a revised detail or a different post position.
Discuss the finished appearance of the base at the same time. A cover can improve the visual transition between the post and floor, but it should not create an inaccessible pocket for debris or interfere with drainage. The chosen finish detail should work with the structural arrangement, not hide an unresolved one. At handover, the owner should understand which covers can be removed for maintenance and which connections should only be serviced by a qualified professional.
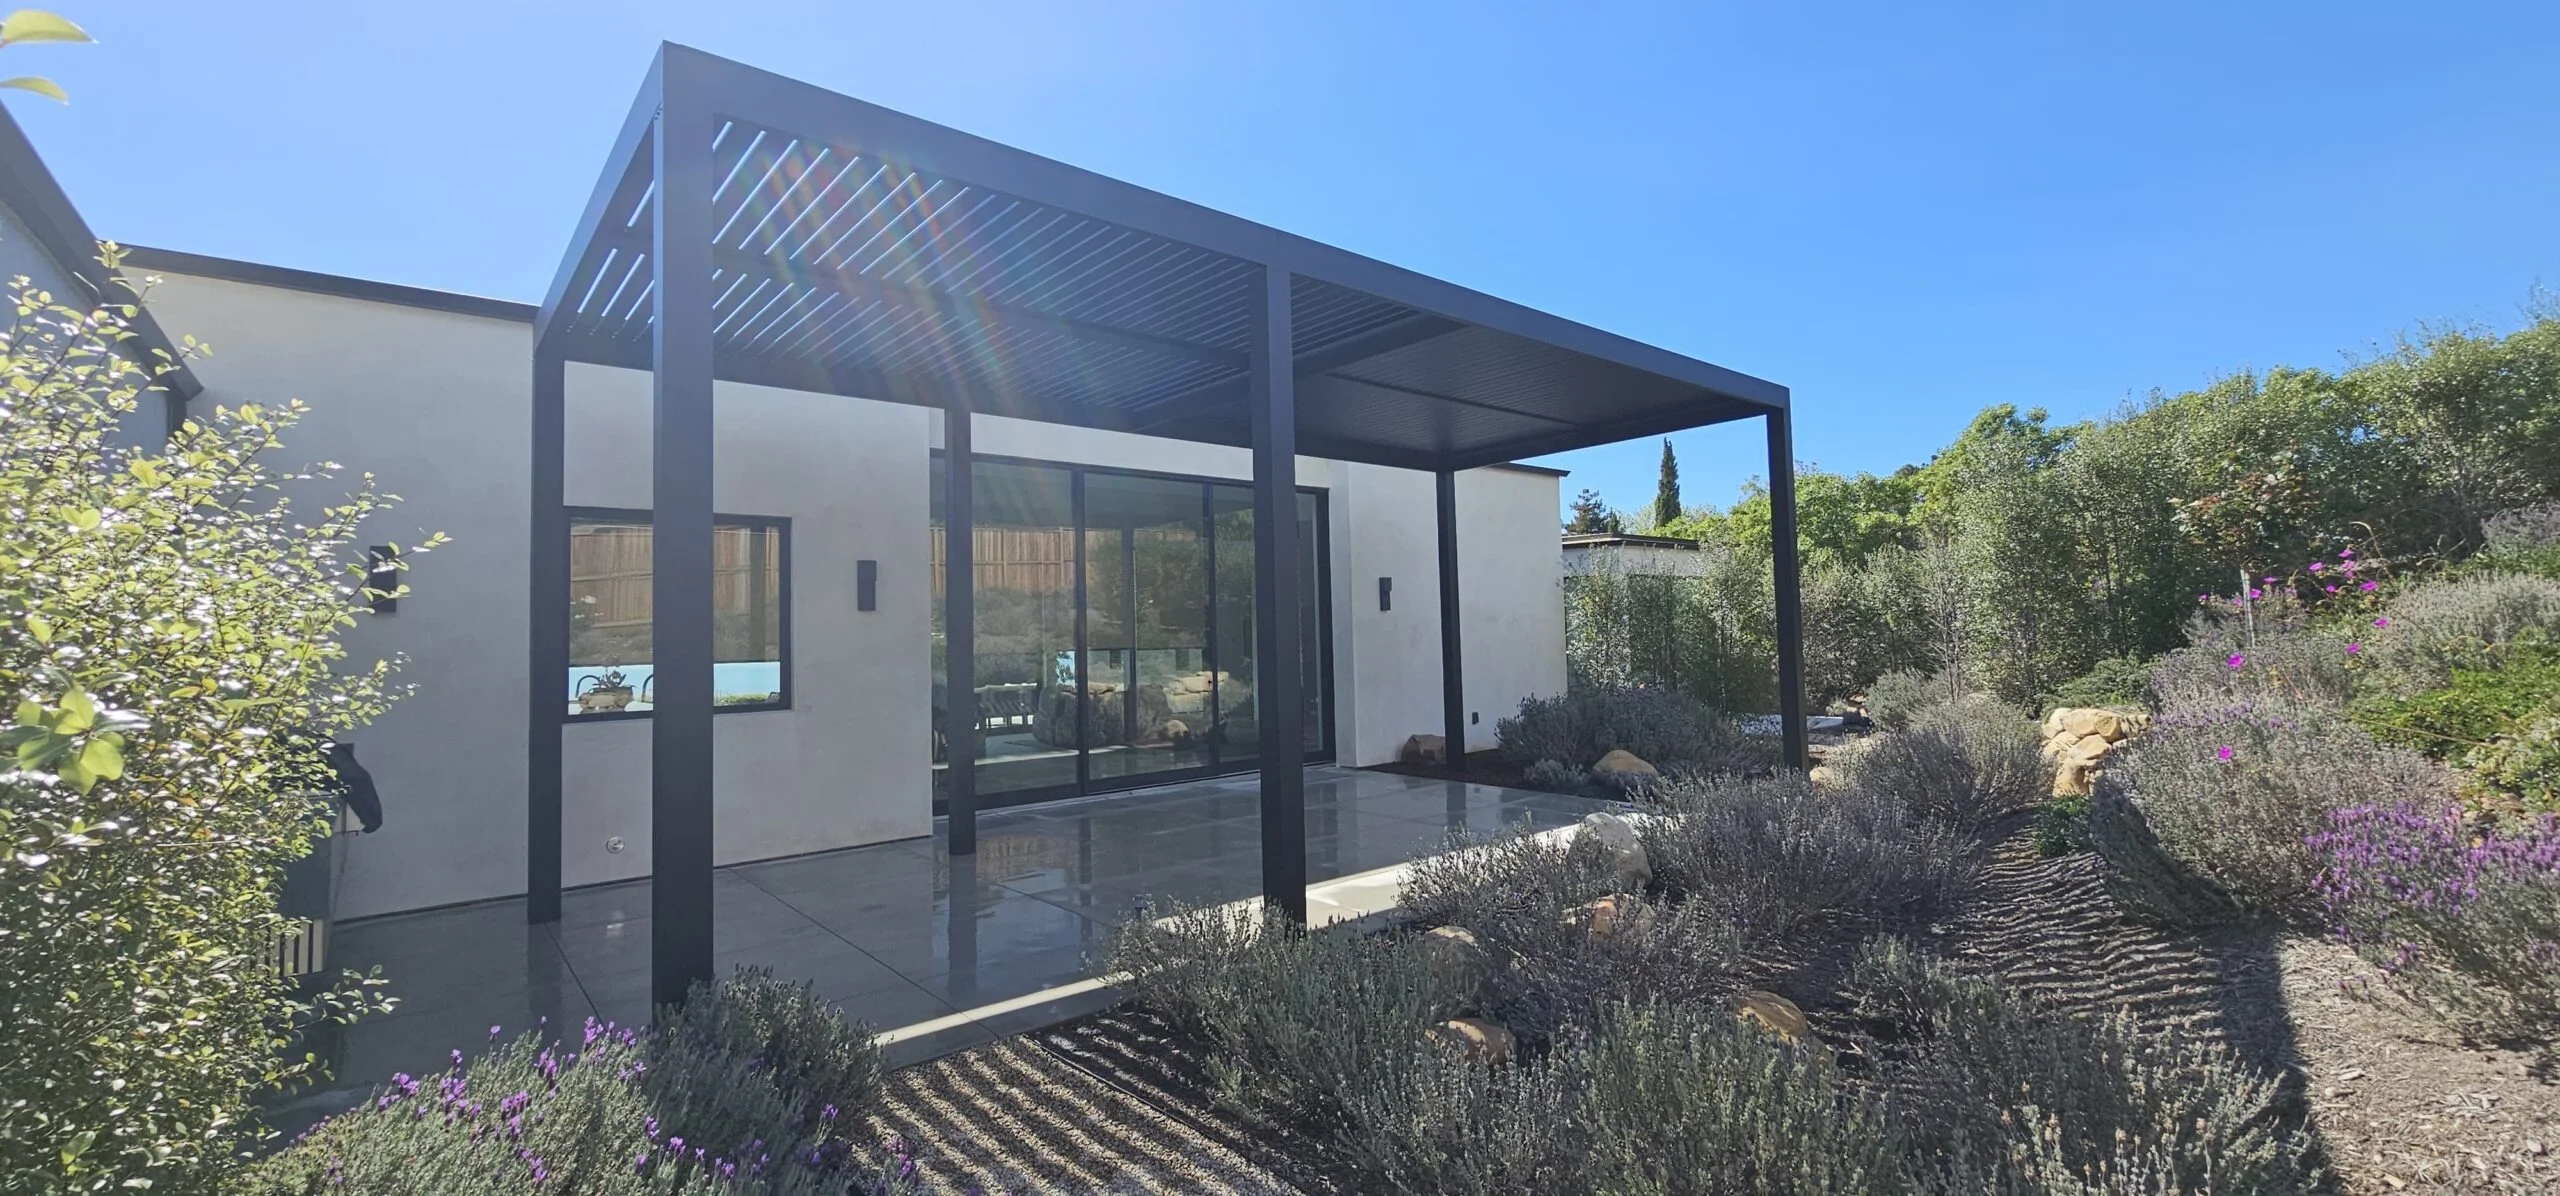
Attaching a patio cover to stucco, framing, or masonry
Stucco, siding, and decorative cladding are exterior finishes; their presence does not establish a suitable structural attachment. The installation design must identify the material behind the finish and the intended connection to it. An older wall may contain framing, masonry, repairs, or concealed conditions that differ from the original assumption. A site survey should identify how those conditions will be verified and who is responsible for repairing any opening required for inspection or installation.
Waterproofing is inseparable from the structural connection. Any penetration through the exterior needs an appropriate weather-management detail that works with the wall assembly and the selected patio system. A visible bead of sealant is not a complete explanation of how water will be kept out over time. Ask how flashing, drainage, movement, and future maintenance are addressed, and make sure the installer understands any existing wall or roofing warranty that could be affected.
Keep serviceable parts serviceable. The new roof should not make an exterior light impossible to replace, hide a cleanout, obstruct a utility panel, or prevent an existing window from opening. Where wall cladding is also planned, decide which components are installed first and how trim will finish around the attachment. Coordinating these details before fabrication helps the final connection look deliberate while preserving the building functions that were already there.
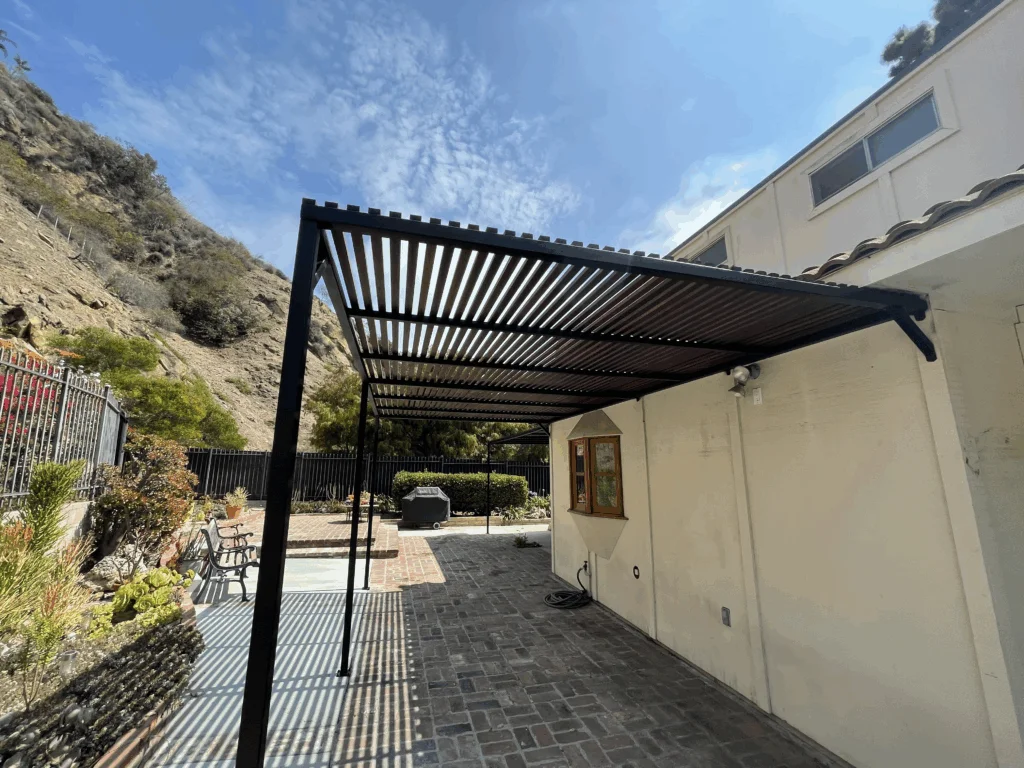
Fascia and roof connections require more than a mounting bracket
A fascia-mounted arrangement can appear simple because the attachment line is visible and often close to the desired roof height. The important question is what the fascia connects to and whether the proposed assembly can transfer the required forces. Decorative trim should not be treated as structural framing. The designer needs to evaluate the existing roof edge, the supporting members, the connection method, and the effect on gutters and roof drainage before approving that approach.
A connection above or through an existing roof introduces additional coordination. The support detail, penetrations, waterproofing, and maintenance access must work with the existing roofing system. This can require input from a roofer or another specialist. It also affects the order of work: a new roof covering should not be completed without understanding the patio attachment that will follow. The objective is a durable junction between two assemblies, not simply enough height to fit the new cover.
Ask for a drawing that shows the proposed roof-to-house relationship from the side. It should make the beam position, roof edge, drainage route, and important clearances understandable. An elevation or section often reveals conflicts that are hard to see in a plan view. If the installer cannot yet explain that junction, the design is still developing. Resolve it before approving finishes and fabrication so the appearance does not get revised around an unexpected structural constraint.
Permits and zoning belong before fabrication
For a Los Angeles patio cover, confirm the required approvals before ordering a custom assembly. LADBS states that even possession of a pre-approved standard plan does not remove the need for a building permit; the plan must be adapted to the specific site and reviewed for applicable requirements. A manufacturer's engineering package and permission to build at an address are therefore different things. The LADBS standard-plan guidance explains that distinction.
Property zoning can influence the permitted location, height, and area of the structure. LADBS identifies ZIMAS as a source of parcel zoning information, but an online map should not be treated as a boundary survey or complete project approval. The designer should check the relevant property conditions, including any applicable overlays or separate reviews. See LADBS zoning resources and the more detailed Globus Gates pergola permit guide for the permit-focused discussion.
California's 2025 Building Standards Code took effect on January 1, 2026, according to the California Building Standards Commission. The design team should confirm the applicable edition, local amendments, and project requirements with the permitting authority. Avoid assuming that a permit exception described for a small detached structure also covers an attached roof, electrical work, or a different use. Establish the approval path for the actual scope and record who will manage it.
Turn the concept into a coordinated fabrication package
Before fabrication, the owner, designer, and installer should be working from the same revision of the plan. That package should show the approved overall geometry, post positions, attachment arrangement, roof selection, finish, accessory locations, and relevant connection details. A rendering can help communicate appearance, but dimensions and details control the build. Confirm which document governs when a visual concept and a construction drawing appear to show different post locations or proportions.
Resolve the decisions that are expensive to change after parts are finished. These include the direction of louvers or slats, visible beam lines, fan positions, lighting zones, gutter exits, and the side from which equipment can be serviced. The layout should also identify tolerances and any field measurements that still need verification. Ordering a custom assembly while those decisions remain open can shift design work onto the installation crew at the least convenient stage.
Keep a simple record of approvals and changes. If a post moves to protect a walkway or avoid a utility conflict, update the affected drawing and confirm the consequences for structure, drainage, and finishes. A message approving a color does not automatically approve a changed roof dimension. Clear revision control is useful on a residential project precisely because many decisions happen through short calls and photographs that can otherwise become disconnected from the final construction documents.
Drainage should end at a planned destination
A patio roof changes where rainwater lands. With a solid roof or closed louver system, water may be collected and directed toward a limited number of outlets rather than falling across the original patio area. The design should identify the complete route from the roof surface to a suitable discharge point. A concealed gutter or internal post drain can provide a clean appearance, but the outlet still needs to work with the finished paving and surrounding landscape.
Ask where the water will go during use and how the drainage system will be cleaned. Discharging beside a doorway, across a main walking route, or into a planting pocket at a foundation can create avoidable problems. Existing yard drains should not be assumed to accept a new connection without review. The roof installer and drainage contractor should agree on their respective scopes, particularly when the outlet disappears below paving or connects to an existing system.
The existing house roof needs attention too. Its gutters and downspouts may conflict with the new patio roof, or an existing outlet may discharge onto the proposed assembly. Those relationships should be visible on the plan. Do not assume that the patio gutter has been designed to receive water from the house as well. Keep maintenance access to both systems, and make the expected behavior at roof edges, joints, and wall transitions part of the completion review.
Installing an adjustable louver roof
An adjustable louver system requires the structural frame and moving roof components to work together accurately. The installation plan should account for the full range of blade movement, the location of the drive mechanism, and access for future servicing. A ceiling fan, decorative screen, or light fixture must not intrude into that moving space. Coordinating those elements early is much easier than discovering a conflict after the roof and accessories have been installed.
Power and controls are part of the construction scope, not accessories to leave until the last day. Establish the power source, wiring route, controller location, and any optional sensor or smart-control requirements. Confirm the behavior of the selected equipment during a power interruption and which functions depend on another device or service. The owner should receive instructions for the exact installed system, including its operating limitations and maintenance requirements.
During commissioning, the installer should demonstrate the roof movement and each included control function in accordance with the manufacturer's instructions. A remote that moves the blades once does not complete the handover. The owner needs to understand normal operation, how to stop movement, and when to call for service. Avoid assuming that a rain sensor provides storm protection or that a closed roof makes the open-sided patio equivalent to an enclosed, weather-sealed room.
Installing a solid insulated patio roof
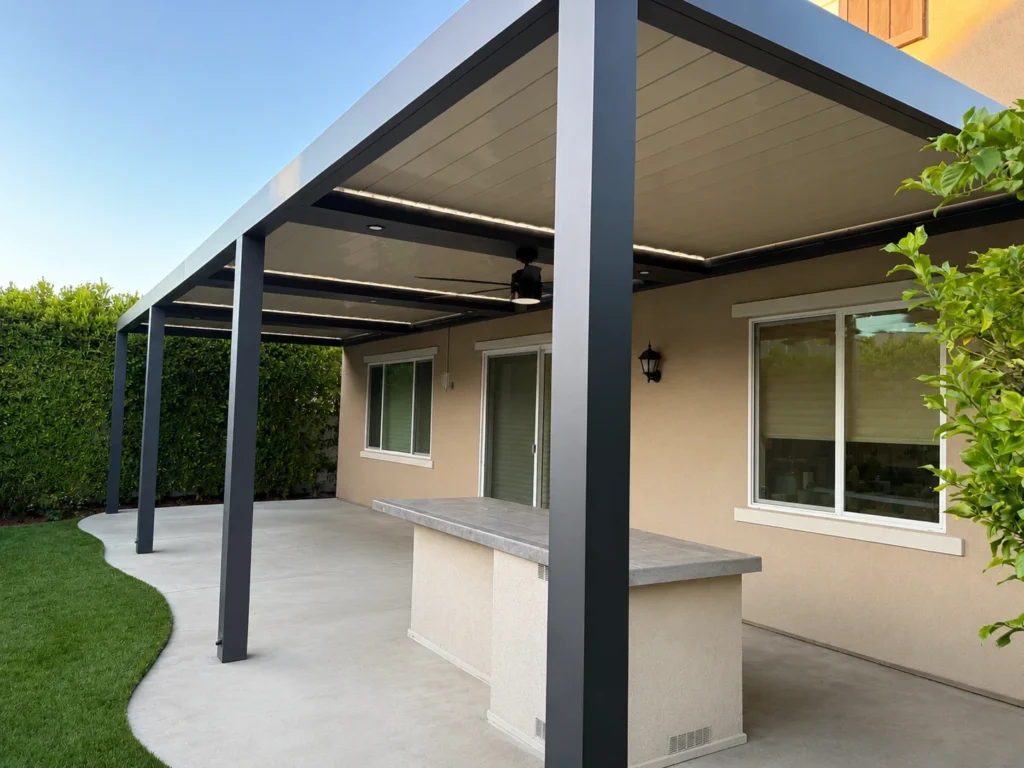
A solid insulated roof creates a continuous ceiling surface, making panel layout and finish detailing especially visible. Plan where panel joints, edge trims, beams, lights, and fans will appear when viewed from below. A small alignment change can be obvious across a large uninterrupted ceiling. The installation documents should identify the selected panel system and its support requirements so the visual layout and structural layout are developed together.
Accessory support deserves particular attention. A finished ceiling panel should not be assumed to support a fan, heater, or suspended item at any arbitrary position. The design should provide an approved support arrangement for each planned accessory, with wiring access coordinated before closure. This is also the time to decide where switches and dimmers belong. Thinking about how the patio will be used after dark helps avoid a ceiling crowded with last-minute surface-mounted equipment.
The roof panel's construction and the roof assembly's performance should be described accurately. Aluminum exterior skins do not establish the fire classification of an insulated core or the completed assembly. Likewise, thermal performance depends on the selected panel and the overall outdoor conditions; an open-sided patio is not a conditioned indoor room. Request the actual product documentation when insulation, fire performance, or another tested characteristic is important to the design decision.
Installing open slat and decorative shade systems
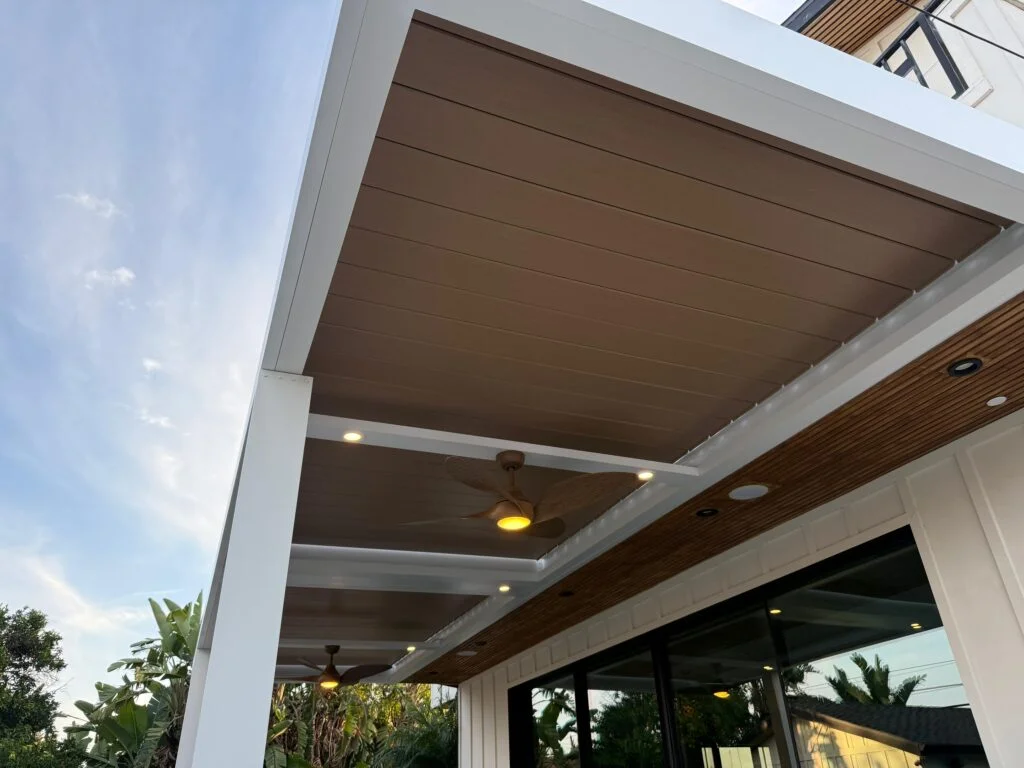
Open slats can give an outdoor room a strong architectural rhythm while preserving a view of the sky. The practical result depends on slat direction, spacing, depth, roof height, and the changing sun angle. Evaluate the pattern from the sitting position and from inside the house, not just from the driveway. A layout that looks balanced in an overhead drawing may cast shade across the wrong part of a dining table during the hours you use it.
An open slat roof is not a rain-shedding roof. That distinction should guide furniture choices, electrical equipment selection, and expectations for the patio below. Adding a sheet or another covering later is a change to the roof assembly and should be reviewed before installation. It can alter loading, drainage, appearance, and the behavior of the structure. Choose the desired weather protection at the design stage instead of treating future infill as an automatic upgrade.
Decorative panels and mixed roof zones require similar coordination. The supports, panel edges, visible joints, and attachment details should be laid out deliberately, especially where a patterned panel meets linear slats. Ask to see the relationship between the pattern and the structural grid before approving fabrication. A carefully coordinated combination can provide a distinctive ceiling, but the panel layout still has to allow safe installation, service access, and the movement required by the selected system.
Cantilever patio installation starts at the foundation
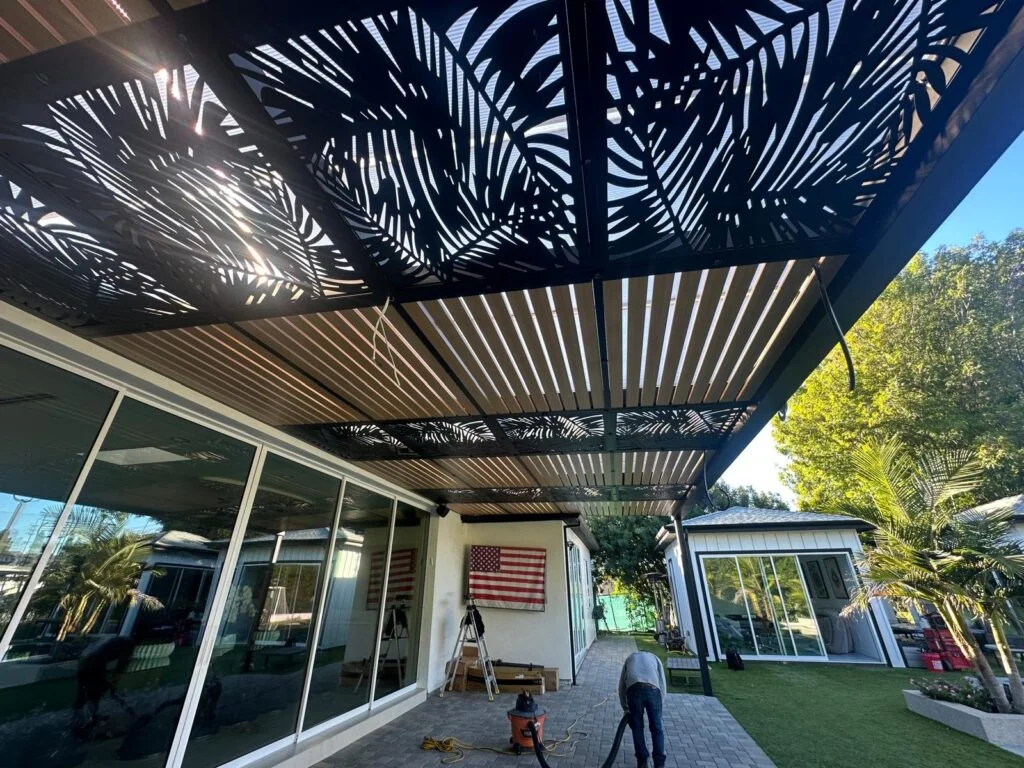
A cantilever roof can preserve a clear view, keep a corner open, or avoid a post near a poolside route. Those advantages come from transferring the roof's forces through a different structural arrangement. The remaining supports and their connections may have more demanding work to do. The design should therefore begin with the intended open area and a suitable engineered support concept, rather than adapting a conventional roof by removing a post.
The foundation implications should be understood before the homeowner approves the visual concept. A clean, apparently floating edge can require substantial concealed work, and the existing patio may need to be opened to accommodate it. Ask how the proposed structure will be supported, what excavation is anticipated, and how the surrounding finishes will be restored. That discussion makes the tradeoff between open space and construction scope concrete enough to compare with a more conventional layout.
Avoid selecting a cantilever system by a maximum projection alone. The applicable projection depends on the exact roof, members, connections, support geometry, and design conditions. Changes to height, accessories, or side screens may change the analysis. A good proposal identifies the configuration being designed for your property and the documents that support it. The finished appearance should follow a resolved structural design, with all visible and concealed elements included in the scope.
Plan electrical work before beams and ceilings are closed
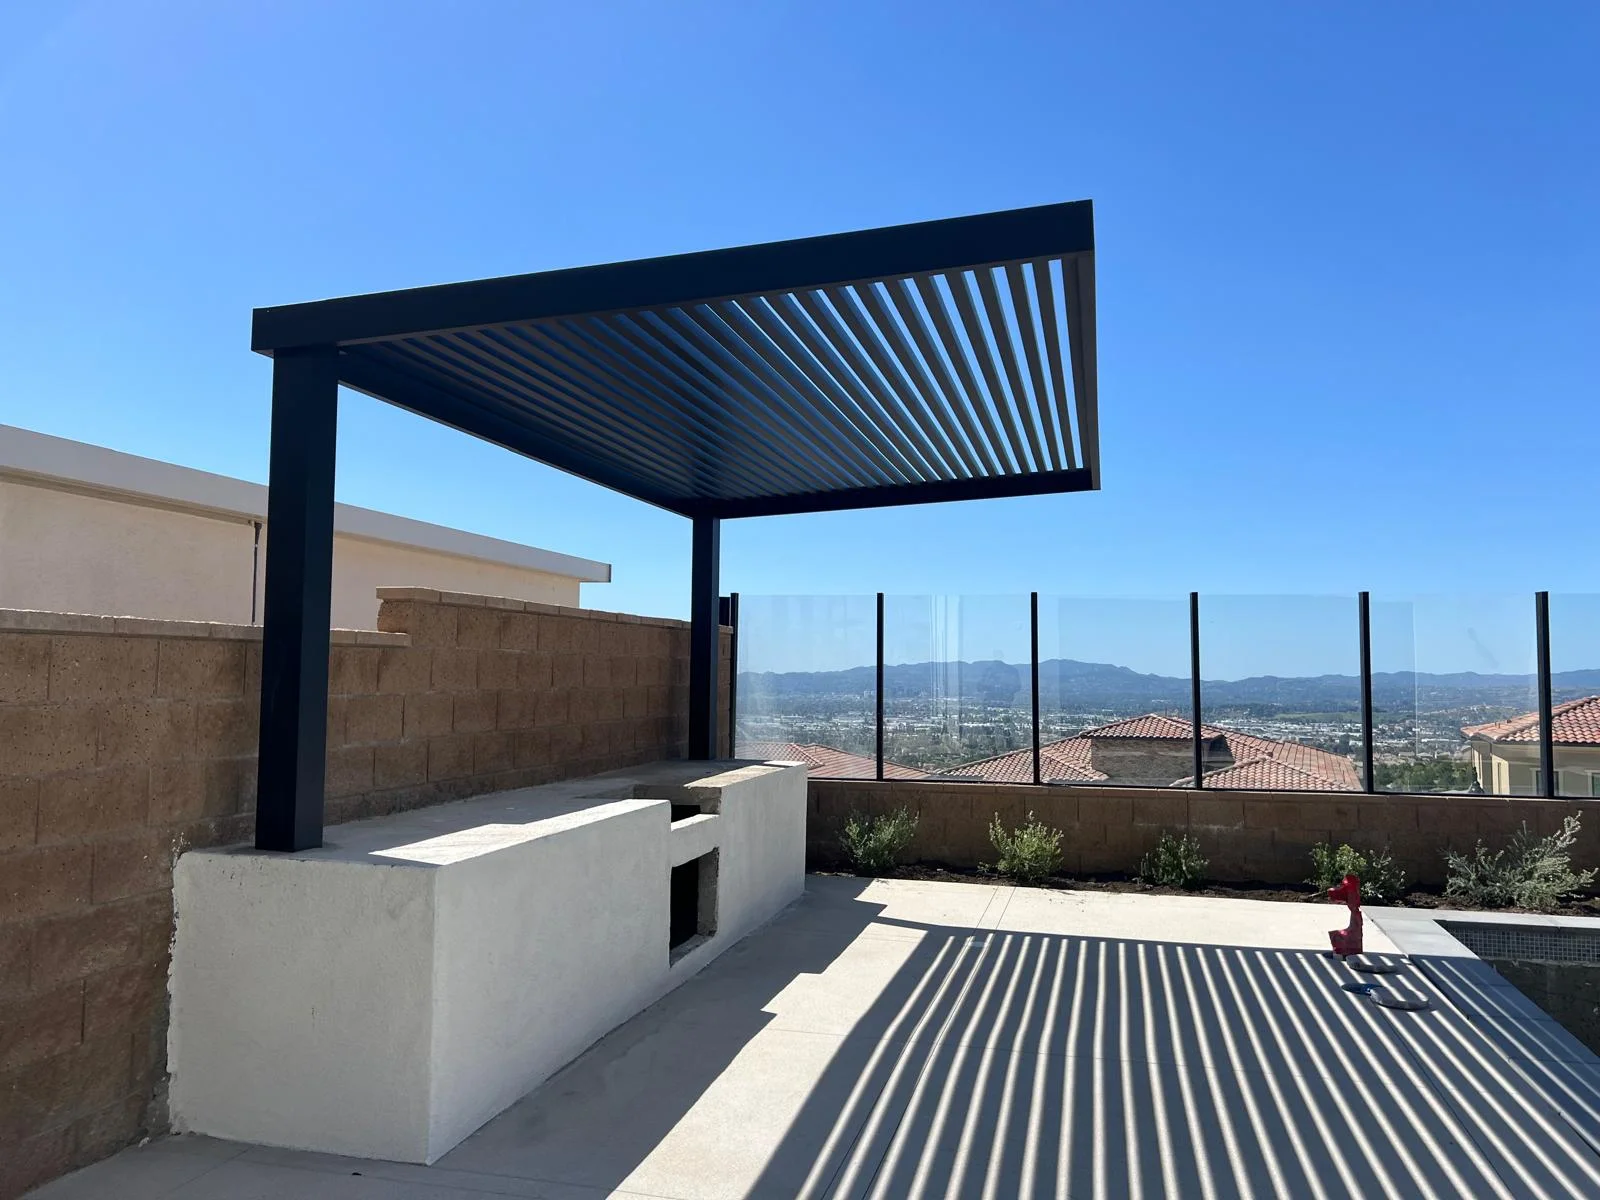
An electrical plan starts with the equipment you intend to operate. List the roof drive, lights, fans, heaters, convenience outlets, and any future accessories that are genuinely planned. The electrical contractor can then evaluate the supply and determine the appropriate circuits, protection, wiring methods, and installation requirements. Do not assume that an existing outdoor receptacle can serve every new load simply because it is close to the proposed patio.
Coordinate the routes and access points before fabrication and foundation work. A conduit path may need to cross a new footing or enter a post at a specific location, while a controller or power supply may need accessible housing. Decide where exposed conduit is acceptable and where a concealed route is available within the system's approved details. Clean electrical integration is usually the result of early planning, not a cosmetic adjustment after the structure is complete.
Keep responsibilities clear between the patio installer and electrical contractor. The proposal should state who supplies equipment, who installs structural accessory supports, who provides wiring, and who tests the completed functions. Equipment must be suitable for its actual outdoor exposure and installed according to its instructions and applicable requirements. At handover, the owner should know which circuit serves the patio and where the relevant controls and service access points are located.
Fans, heaters, and outdoor kitchens need coordinated clearance
A fan should be located around the seating arrangement and the available structural support, with its operating envelope checked against the roof, beams, and nearby equipment. On a louvered roof, the blade movement and fan movement must be considered together. On a solid roof, the finished ceiling should be planned around the support and electrical connection. Simply centering a fan in a roof bay may not put useful airflow over the people who need it.
Heaters require attention to mounting, electrical or fuel supply, and the clearances specified for the exact appliance. These should not be guessed from a photograph of another patio. A lower ceiling, an adjacent screen, or a later furniture change can alter the relationship between the heater and nearby materials. Choose the appliance early enough that the designer can provide a suitable position and the installer can follow its requirements without modifying the finished roof.
An outdoor kitchen introduces cooking heat, smoke, grease, and appliance service access. An aluminum frame does not automatically make any grill location acceptable beneath a roof. Coordinate the appliance instructions, ventilation needs, overhead conditions, and applicable approvals with the relevant professionals. Consider the experience of the people seated nearby as well: a beautifully aligned roof and island will be disappointing if smoke, heat, or maintenance access makes the central gathering area difficult to use.
Finishes, fasteners, and coastal exposure
Choose the finish with actual samples whenever possible. Black, white, and wood-look aluminum can read differently in direct sunlight, under a roof, and beside existing window frames. View the sample against the house and paving rather than judging it on a phone screen alone. When several aluminum systems are being coordinated, confirm whether the proposed components use the same finish specification and whether differences in texture or sheen will be visible together.
Globus Gates' current patio system information describes architectural aluminum and a seven-stage powder-coating process. For a particular order, confirm the specified finish, cleaning instructions, and warranty terms in the project documents. A finish specification should be tied to the actual supplied system. Avoid treating a general marketing description as proof that every accessory, fastener, or separately supplied item has identical coating performance or warranty coverage.
Exposure also affects maintenance planning. Dust, irrigation overspray, accumulated debris, and coastal salt can all influence how the installation should be cared for. Ask for the manufacturer's approved cleaning method and compatible fastener and contact details, particularly where different metals meet. The goal is to protect both the appearance and the connections over time. Low maintenance should mean a manageable care routine, not the assumption that an exterior structure never needs attention.
Fire-conscious planning and the limits of material claims
CAL FIRE recommends attention to the first five feet around structures, including removal of debris from roofs and gutters and replacement of combustible fences, gates, and arbors attached to the home with noncombustible alternatives. These recommendations make the relationship between a patio, nearby fencing, vegetation, and stored items worth reviewing together. The CAL FIRE defensible-space guidance is a useful starting point; property-specific requirements should be confirmed with the responsible local authority.
Aluminum as a base metal is noncombustible, but that fact does not establish a fire-resistance rating for an entire patio assembly. Insulated cores, coatings, seals, wiring, screens, and accessories must be considered according to their actual materials and documentation. Noncombustibility also does not mean that a structure will retain its strength indefinitely in a fire. Avoid describing a patio as fireproof, universally Zone 0 compliant, or certified without documentation supporting the exact claim and configuration.
Practical planning includes the surroundings as well as the selected frame. A gutter full of leaves, combustible storage under the roof, or vegetation against the building can remain relevant even when structural members are aluminum. Include access for cleaning and consider how the area will be furnished and used. A well-detailed aluminum installation can support a broader fire-conscious property plan, but it should never be represented as a substitute for the rest of that work.
Poolside patios and raised decks need separate coordination
Near a pool, the installation must preserve a workable relationship between the cover, pool edge, circulation, equipment, and any required barrier. A post that looks unobtrusive in a photograph may narrow a critical walking route. A footing excavation can also conflict with concealed pool plumbing or other services. The site review should bring the patio designer and the relevant pool or electrical professionals into the conversation before the layout becomes fixed.
A raised deck presents a different structural problem from a slab on the ground. Deck boards are a walking surface, and attaching a roof post to that surface alone does not establish a suitable support. The designer must consider how the roof forces reach the underlying structure and foundations, along with waterproofing and movement. Existing guardrails and stair handrails should remain functional, and the patio layout should not obstruct the clearances or routes needed for everyday use.
Record these relationships in the design documents instead of treating them as field adjustments. A change made to avoid a pool drain might place a post too close to a railing or require a different footing arrangement. The value of coordination is that the project can be revised as a whole before construction. Where there is uncertainty about existing concealed services or structural capacity, resolve it through appropriate investigation and professional review rather than assumptions.
Coordinate the patio with aluminum gates, fencing, and cladding
A coordinated exterior does not require every surface to use the same slat spacing or visual weight. The patio frame can relate to the driveway gate and fence through color, proportions, and consistent detailing while each system performs its own job. Start with a few deliberate visual decisions: the dominant finish, the main horizontal lines, and the balance between open and solid surfaces. This creates continuity without forcing a roof, gate, and wall to behave like identical products.
The practical connections are just as important. A patio post can reduce the opening of a side gate, a new drain can cross a fence footing, and wall cladding can affect how an attachment is flashed and finished. When several systems are being installed, place them on a shared site plan and agree on the order of work. The Globus Gates aluminum fence installation guide explains the separate boundary, post, and grade considerations for fencing.
Keep the structural roles distinct even when the appearance is coordinated. A fence post should not be assumed to support a patio roof, and an existing gate pier should not be treated as a foundation for a new overhead structure. The same principle applies to decorative cladding around a support. Share the drawings between trades so every connection has a defined purpose and the final installation remains serviceable after the surrounding finishes are completed.
Removing an existing patio cover and preparing the work area
Replacement projects should begin with an assessment of what is being removed and what is intended to remain. An existing wood cover may conceal wall damage, abandoned wiring, or attachment conditions that only become visible during demolition. Establish how unexpected findings will be documented and approved before the crew starts. A proposal that includes removal should also explain whether disposal, wall repair, paint matching, and removal of old footings are part of that scope.
Protect the parts of the property that will remain in use. Identify the route for workers and materials, the staging area, and the boundaries around pools, planting, and finished surfaces. Discuss temporary access arrangements when a side gate or patio door becomes part of the construction route. Homeowners should also understand when the area will be unavailable for children, pets, or normal household activities, especially during demolition, lifting, excavation, and concrete work.
Before excavation, the contractor should arrange the required utility notification and locating process. DigAlert's California guidance calls for at least two working days of notice, excluding the notification date. Existing private irrigation, lighting, and pool lines also need appropriate investigation rather than being assumed covered by a utility mark. Review the current DigAlert requirements and include the resulting information in the site plan before footing or conduit work begins.
The on-site sequence: layout, foundations, and preparation
The first physical layout should be checked against the approved drawing and the actual finished conditions. Confirm the post locations, overall dimensions, important clearances, and relationship to doors and paving before irreversible work begins. This is a useful homeowner review point because markings on the ground make the structure easier to visualize than a drawing alone. Any requested change should be reviewed for its effect on the approved design before the crew acts on it.
Foundation and anchoring preparation then follows the project details, including any required investigation of existing concrete. Where new concrete is needed, the installer must account for the specified concrete and anchor requirements, the planned inspection stages, and the time needed before the connection can be loaded. Avoid assuming that the structure can be fully assembled immediately after concrete placement. The schedule should reflect the actual construction and product requirements rather than an arbitrary promise of speed.
Utility routes and concealed details should be coordinated while access is available. This is the right stage to confirm a conduit entry or drainage crossing that will later be difficult to reach. Keep photographs and relevant records of work that will be concealed, alongside the approved documents. Good records do not replace inspection, but they give the owner and future service professionals a clearer understanding of how the completed patio was assembled.
Frame erection, roof assembly, and finish protection
As the frame is erected, the installer should verify the geometry needed by the selected system. Post alignment, beam relationships, and the roof's intended drainage arrangement need to work together. A visually level fascia does not necessarily describe every slope within the roof or gutter system. Follow the approved design and manufacturer details, and avoid adjusting a component solely to match an existing surface that may itself be out of level or out of square.
Finished aluminum needs protection during handling and assembly. Agree on a staging method that keeps components off damaging surfaces and minimizes contact with debris from other trades. Drilling and cutting residues should be managed so they do not remain on the finished roof or in drainage channels. If a component is damaged, the repair method should follow the finish supplier's guidance. The owner should not discover an improvised touch-up after the surrounding work has already been accepted.
Once the roof components and accessories are installed, the crew should check the interfaces before covers and trims make them difficult to inspect. That includes water routes, equipment access, visible alignment, and the fit of adjacent finishes. A clean architectural appearance depends on consistent details across the whole assembly. The goal is a roof that is both well finished and understandable to maintain, with no essential connection or service item made inaccessible for appearance alone.
Commissioning, inspection, and the final walk-through
The final walk-through should include a practical demonstration of the installed features. Operate included louvers, lights, fans, and controls according to the equipment instructions, and identify their normal service points. Confirm that doors, gates, and windows still function as intended. Where appropriate for the selected roof, review water movement using a method agreed with the installer. A demonstration should establish the expected behavior of the actual system without implying a performance rating that has not been documented.
Required inspections must be planned into construction rather than left to the final visit. LADBS explains that work needs inspection before it is covered or concealed and that permitted construction is not approved until it has been inspected and accepted. Keep the relevant plans and permit records available, and make sure any corrections are resolved. The LADBS inspection guidance describes the general sequence and the documents that should be ready.
Before closing out the job, collect the care instructions, equipment information, warranties, approved changes, and inspection records applicable to the project. Make a written list of any remaining work with clear responsibility for completion. This might include a finish repair, a landscaping adjustment, or a control setting that needs attention. The handover should leave the owner able to use the patio confidently and able to identify the correct contact when a service question arises.
| Handover item | What the owner should be able to verify |
|---|---|
| Dimensions and access | The installed layout matches the agreed design and preserves required routes |
| Roof operation | Included moving parts and controls are demonstrated |
| Drainage | Outlets and cleaning access are identified |
| Electrical features | Controls, circuits, and service access are explained by the responsible trade |
| Finish | Visible surfaces and agreed restoration are reviewed |
| Documents | Applicable instructions, warranties, approvals, and completion records are provided |
Understand the timeline as several separate stages
A patio installation has more than one clock. Design and approvals, fabrication, site preparation, assembly, utility work, and closeout can each have different dependencies. The time spent physically assembling the roof is only one part of the project. Ask the contractor to explain which dates are estimated, which depend on another trade or authority, and which decisions you must make to keep the next stage moving. This produces a more useful schedule than a single completion promise.
Custom finishes, revised dimensions, difficult access, concealed damage, and changes to electrical scope can affect the sequence. So can the need for foundation work or inspection before a detail is covered. These are not reasons to accept an undefined schedule; they are reasons to identify the dependencies clearly. A good project plan gives the owner notice of the conditions that might change timing and explains how revised dates will be communicated.
Coordinate the patio schedule with paving, painting, landscaping, and appliance delivery. New furniture should not arrive in the middle of a protected work area, and finished paving should not conceal a connection before it has been reviewed. The most efficient sequence usually comes from deciding what must remain accessible and which surfaces could be damaged by later work. That coordination reduces unnecessary rework while giving each trade a realistic opportunity to complete its responsibilities.
Compare installation proposals by scope, not roof area alone
Two proposals with the same roof dimensions can describe very different projects. One may include demolition, new foundations, electrical work, and finish restoration, while another covers only delivery and assembly on an assumed prepared site. Compare the stated roof system, support arrangement, attachment method, finish, accessories, approvals, and exclusions line by line. If an item is not described, ask whether it is included, excluded, or still awaiting investigation before comparing the totals.
The California Contractors State License Board provides tools for checking a contractor and guidance on hiring a licensed contractor and home improvement contracts. Use those resources when evaluating the company and written agreement. Also ask who will perform the structural, electrical, and other specialist portions of the project. The name on the proposal should lead to a clear chain of responsibility for the actual work.
Keep budget discussions tied to the site conditions that create cost. New footings, difficult delivery access, a complicated house connection, and additional utilities can matter as much as the visible roof. The existing Globus Gates louvered patio cost guide addresses pricing considerations separately. For installation planning, the more durable question is whether the proposal describes a complete, appropriate solution and makes the assumptions transparent enough to evaluate before signing.
Maintenance should influence the original design
Maintenance becomes easier when access is designed into the patio from the start. Gutters, outlets, controllers, moving parts, and removable covers should be reachable through the service approach intended by the manufacturer. Ask what can be checked from the ground and what requires a professional. A hidden component is not necessarily a low-maintenance component; sometimes it is simply harder to reach. The finished design should balance a clean appearance with practical long-term care.
Follow the care instructions for the exact finish and equipment supplied. Use approved cleaning methods, keep drainage routes clear, and address unusual movement, noise, leaks, or visible damage promptly. The appropriate service interval depends on the product and exposure rather than a universal annual rule. A patio beneath trees or near irrigation may need a different routine from one in an open courtyard. Keep the original instructions with the project records so future care remains consistent.
Treat later modifications as changes to an existing structure. New screens, a heavier fan, suspended furniture, photovoltaic equipment, or a solid covering over an open roof can alter the original design assumptions. Ask the appropriate professional to review the change before installing it. The fact that an attachment fits on a beam does not establish that the beam or its connections were designed for it. Preserving the original design intent protects both function and serviceability.
Three Los Angeles planning examples
Consider an illustrative Encino dining patio beside a large sliding door. The owner wants shade during afternoon meals but does not want a dark interior or posts crowding the doorway. The useful first step is to map the furniture, circulation, sun exposure, and indoor light relationship together. An adjustable roof and a solid roof should then be evaluated for those priorities, with the house connection and clear ceiling height checked before either option is finalized.
An illustrative Woodland Hills project might sit between the house and a landscaped slope. The roof outline could look straightforward while access, drainage, footing locations, and the retaining-wall relationship complicate construction. Here, a site survey and early structural review would be more useful than choosing a standard dimension immediately. The designer would need to establish what can be supported independently, where water will discharge, and how components can reach the yard without damaging finished areas.
For an illustrative Sherman Oaks courtyard, the challenge might be the number of functions competing for a compact area: dining, a side gate, an outdoor kitchen, and a route to the garden. A carefully placed post and coordinated overhead lighting can make a smaller roof more useful than a larger one with poor circulation. These examples are planning scenarios, not claims about completed jobs. They show why the same installation process can produce different designs at different addresses.
Prepare a useful brief before the site visit
A useful project brief combines your goals with the conditions already known. Include wide photographs, an approximate sketch, the roof styles you are considering, and the activities you want to cover. Show the house wall, the ground, nearby boundaries, and the route into the yard. Add any relevant drawings or permit records you already have. You do not need to solve the engineering yourself; you need to help the installer understand what requires investigation.
State which surrounding improvements are planned, even if they belong to another contract. New paving, a kitchen, a pool renovation, wall cladding, and replacement gates can each affect the patio. Identify the people coordinating those jobs and the expected order of work. This gives the designer a chance to resolve conflicts early rather than discovering them after a footing is poured or a finished beam arrives with an electrical entry in the wrong place.
Separate essential requirements from preferences. Keeping a doorway clear may be essential, while a particular beam alignment may be flexible. A continuous solid roof may be important for the intended use, while a specific color may still be under consideration. Clear priorities allow the designer to explain useful tradeoffs without repeatedly redrawing the project around assumptions. They also make the final proposal easier to assess because the owner can see how the agreed needs have been addressed.
- Wide photos of the house, patio, boundaries, and delivery route.
- Approximate width, projection, and desired clear height, with units labeled.
- Existing and planned floor finishes, drains, and changes in elevation.
- Furniture layout, door and gate access, and preferred hours of use.
- Desired roof type, finish, lighting, fans, controls, and other accessories.
- Known utility routes and available drawings or approval records.
- Related work by other trades and the person coordinating the overall project.
Frequently asked questions
What is included in aluminum patio cover installation in Los Angeles?
The agreed scope can include site measurement, design coordination, required approvals, fabrication, foundations, structural assembly, roof components, drainage, accessories, and final checks. Electrical work, demolition, and finish restoration may be separate. Ask for a written scope that identifies who performs each task and which assumptions still require investigation.
Can a patio cover be anchored to my existing concrete slab?
Possibly, but the slab and proposed connection need review. Thickness, reinforcement, condition, anchor locations, and structural demand all matter. A walking surface is not automatically a suitable foundation for a roof. The designer may require investigation, a different connection, or new foundations through localized openings in the patio.
Do pavers count as a foundation for an aluminum pergola?
Pavers should not be assumed to provide the required structural support. The installation needs a designed connection to suitable supporting construction beneath or separate from the paving. Coordinate the base, footing, and paving restoration before construction so the finished surface does not conceal an unresolved support condition.
Is an attached patio cover better than a freestanding one?
The better option depends on the house, available support, desired layout, and weather-management details. An attached system can preserve clear space near the house but requires a suitable building connection. A freestanding system uses its own supports and foundations, while still needing careful coordination with nearby walls, gutters, and doors.
Can an aluminum patio cover attach directly to stucco or fascia?
The exterior finish or fascia appearance does not establish structural capacity. The designer must identify suitable supporting construction and an appropriate connection, including waterproofing. Existing conditions may need investigation. Roof and fascia attachments should be detailed for the actual building rather than selected solely because a bracket fits the visible surface.
Does a pre-engineered patio system avoid the need for a permit?
No automatic permit exemption follows from a pre-engineered system. LADBS states that its standard-plan process still requires a building permit and site-specific adaptation. Confirm the requirements for the actual address and scope, including any electrical or other work, with the responsible permitting authority before fabrication and construction.
Which patio roof provides the most adjustable shade?
An operable louver roof allows the blade angle to change, providing adjustable overhead light and opening. The useful shade still depends on orientation, roof height, and sun angle. Compare the selected system's actual behavior with a solid or open slat roof using the times of day and seating positions that matter to your household.
Is an open slat aluminum pergola rainproof?
No. An open slat roof provides filtered shade and allows rain through its openings. Adding a covering later changes the assembly and should be reviewed for structural, drainage, and other implications. Select the intended weather protection during design rather than assuming an open roof can be converted without further evaluation.
Can lights, fans, and heaters be added to the patio cover?
They can be considered when compatible with the selected system and properly supported and supplied. Plan equipment locations, electrical requirements, service access, and appliance clearances before fabrication. A finished ceiling panel or decorative roof member should not be assumed to support an accessory at an arbitrary location.
Can a cantilever design eliminate a corner post?
An engineered cantilever arrangement may preserve a selected open area, but feasibility depends on the full structure and site. Removing a post changes how forces are transferred. The remaining members, connections, and foundations must be designed for that arrangement; a post should never be omitted from an approved conventional layout without review.
Is an aluminum patio cover fire-rated or automatically Zone 0 compliant?
Aluminum's base-metal noncombustibility does not establish a fire rating or universal approval for the complete patio assembly. Cores, finishes, seals, equipment, and other components need appropriate documentation. Confirm the actual product claims and applicable property requirements. A fire-conscious material choice remains one part of the broader property plan.
How long does installation take?
Timing depends on design decisions, approvals, fabrication, site preparation, access, foundation work, utilities, and inspections. Physical roof assembly is only one stage. Request a schedule that identifies dependencies and distinguishes estimated dates from confirmed milestones, rather than assuming a short assembly period represents the full project timeline.
Should the patio cover go in before or after new paving?
The sequence should be coordinated between the patio and hardscape contractors. Foundations, conduit, drainage, and inspections may need to happen before paving is completed, while finish work may follow structural assembly. Establish the final floor elevation and restoration detail early so the two scopes fit together without unnecessary cutting or rework.
Can the patio match my aluminum fence and gate?
Color, texture, proportions, and visible lines can be coordinated across the exterior systems. Their structural functions remain separate. A fence post or gate pier should not be assumed to support a roof. Use a shared site plan to resolve gate clearance, drainage, foundations, and the order of work between the different installations.
What should I check during the final walk-through?
Review the agreed layout, visible finish, restored surfaces, drainage outlets, and operation of included equipment. Confirm that doors and gates still work as planned and that maintenance access is understood. Collect applicable care instructions, warranties, approvals, and inspection records, and document any remaining work with a clear responsibility for completion.
What information makes an installation estimate more accurate?
Provide wide site photos, approximate dimensions, desired roof type, intended use, accessory plans, and details of existing concrete or paving. Include access constraints and other planned construction. These help establish the scope, but final measurements and investigation of structural conditions are still needed before a custom installation can be fully defined.
Final Thoughts
A successful aluminum patio cover installation in Los Angeles is the result of coordinated decisions made before the roof is assembled. The site survey, support arrangement, foundations, house connection, drainage, and utilities determine how well the finished structure fits the property. The visible aluminum system is the part everyone notices, but the less visible details are what allow that clean design to function as intended over time.
Start with the way you want to use the space, then develop a design that responds to the actual site. Compare complete scopes, keep changes documented, and make the final handover as deliberate as the initial design. Whether the roof uses adjustable louvers, insulated panels, open slats, or a cantilever arrangement, the best installation is one whose appearance, construction, operation, and maintenance have all been considered together.